
You open your Magento 2 store (or the admin panel) and instead of your homepage you get a white page that says 500 Internal Server Error, or Chrome shows “This page isn’t working. HTTP ERROR 500”. No stack trace, no hint, nothing. This usually happens right after an upgrade, a new extension, a server migration or a change of PHP version.
The good news: a 500 error is never “random”. It is the web server telling you that PHP crashed or that the server configuration is broken, and the real reason is always written in a log file. In this tutorial, we will learn how to find that reason and fix the Magento 2 500 internal server error step by step. The steps work on Magento 2.4.x (including 2.4.8), on Apache and Nginx.
Previously, I published a tutorial on fixing the Magento 2 404 error page not found. Today we deal with its more scary cousin.
Contents
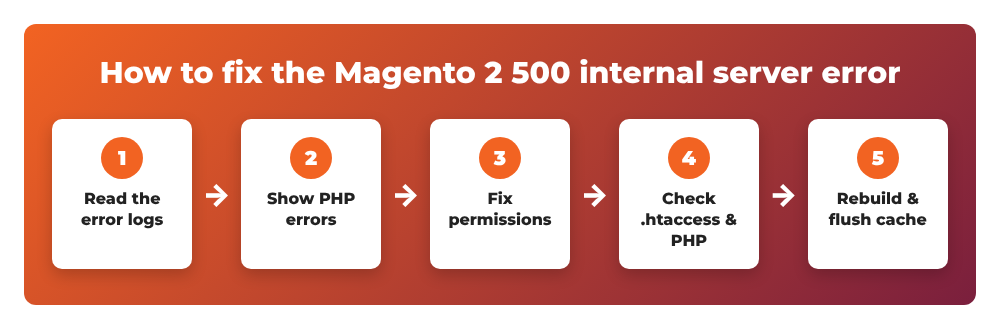
- What causes the Magento 2 500 internal server error?
- Step 1: Read the error logs to find the real cause
- Step 2: Show PHP errors on screen (temporarily)
- Step 3: Fix file ownership and permissions
- Step 4: Check .htaccess, Apache modules and PHP settings
- Step 5: Rebuild generated code and flush the cache
- Common errors related to the Magento 2 500 error
- Wrapping up
What causes the Magento 2 500 internal server error?
From my experience, almost every 500 error in Magento 2 comes from one of these causes:
- Wrong file ownership or permissions after uploading files or running commands as
root. - An invalid directive in
.htaccess, or an Apache module (such asmod_rewrite) that is not enabled. - A PHP fatal error: not enough
memory_limit, a missing PHP extension, or an unsupported PHP version. - Outdated generated code after installing or removing an extension (
generated/folder not rebuilt). - A broken third-party module or theme.
Let’s go through them in the right order: first read the logs, then fix.
Step 1: Read the error logs to find the real cause
Do not guess. Connect to your server via SSH, go to your Magento root folder and check these logs:
- Web server log:
/var/log/apache2/error.log(Ubuntu/Debian Apache),/var/log/httpd/error_log(CentOS/AlmaLinux) or/var/log/nginx/error.log. - PHP-FPM log: for example
/var/log/php8.3-fpm.log, depending on your PHP version. - Magento logs:
var/log/exception.logandvar/log/system.log. - Magento error reports: files in
var/report/. The file name is the report number Magento shows on the error page.
tail -n 50 /var/log/apache2/error.log
tail -n 50 var/log/exception.log
tail -n 50 var/log/system.log
ls -t var/report | head -n 3
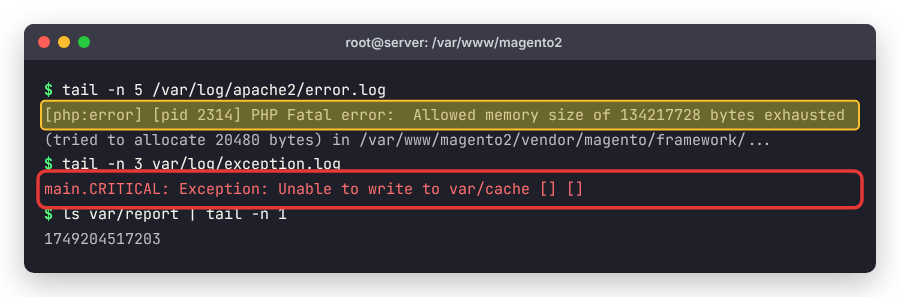
In the example above, the Apache log shows a PHP fatal error (Allowed memory size ... exhausted) and the Magento exception log says Magento can’t write to var/cache. Each message points to a different step below, so jump to the one that matches your log.
If you are on shared hosting without SSH, you can usually find the Apache error log in your hosting control panel (cPanel > Metrics > Errors).
Step 2: Show PHP errors on screen (temporarily)
If the logs are empty, make PHP print the error directly in the browser. Open app/bootstrap.php and find this line near the top:
#ini_set('display_errors', 1);
Remove the # so it becomes:
ini_set('display_errors', 1);
Reload the page and you should see the actual PHP error instead of the blank 500 page. You can also switch to developer mode, which shows exceptions in the browser; see my guide on how to enable or disable Magento 2 developer mode. If Magento shows “There has been an error processing your request” with a report number, read how to fix “Exception printing is disabled by default for security reasons” to see the full report.
Important: put the # back as soon as you are done. Never leave PHP errors visible on a live store.
Step 3: Fix file ownership and permissions
This is the number one cause of the 500 error on Magento 2, especially after you ran bin/magento or uploaded files as root. The web server user (usually www-data on Ubuntu, apache or nginx on CentOS) must be able to write to var, generated, pub/static, pub/media and app/etc.
Run these commands from your Magento root folder. They follow the approach in Adobe’s official guide to configuring file system ownership and permissions. Replace www-data with your web server group:
cd /var/www/magento2
find var generated vendor pub/static pub/media app/etc -type f -exec chmod g+w {} +
find var generated vendor pub/static pub/media app/etc -type d -exec chmod g+ws {} +
chown -R :www-data .
chmod u+x bin/magento
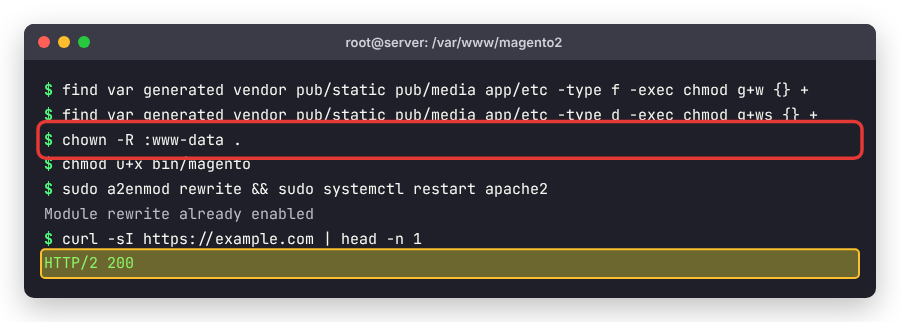
Never “fix” permissions with chmod -R 777. It may hide the 500 error, but it opens a big security hole, and Apache with suEXEC/suPHP will actually refuse to run PHP files that are world-writable, which causes… another 500 error.
Step 4: Check .htaccess, Apache modules and PHP settings
Apache: mod_rewrite and invalid .htaccess directives
If the Apache log says Invalid command 'RewriteEngine', the rewrite module is disabled. Enable it and restart Apache:
sudo a2enmod rewrite
sudo systemctl restart apache2
If the log says Invalid command 'php_value', your server runs PHP-FPM, which does not understand php_value / php_flag lines in .htaccess. The default Magento .htaccess wraps them in <IfModule> blocks, so look for custom lines you (or an extension) added outside those blocks and move those settings into php.ini or .user.ini. Also make sure your virtual host has AllowOverride All for the Magento folder.
Nginx: wrong document root
On Nginx there is no .htaccess. Make sure your server block includes Magento’s nginx.conf.sample and that $MAGE_ROOT points to the Magento root, with the public root set to pub/. Then test the config with nginx -t before reloading.
PHP memory limit, version and extensions
If you see Allowed memory size of ... bytes exhausted, increase memory_limit in your php.ini (Magento’s own .user.ini sets 756M; on bigger stores I use 2G), then restart PHP-FPM:
php -i | grep memory_limit
sudo nano /etc/php/8.3/fpm/php.ini      # memory_limit = 2G
sudo systemctl restart php8.3-fpm
Also check that the PHP version used by the web server is supported by your Magento version (Magento 2.4.8 supports PHP 8.3 and 8.4) and that all required extensions are installed. A very common trap after a server update: the CLI uses PHP 8.3 but Apache still uses an older PHP. Compare php -v with a phpinfo() page. If you get a missing extension error, install it with your package manager (for example sudo apt install php8.3-intl) and restart PHP-FPM.
Step 5: Rebuild generated code and flush the cache
If the 500 error appeared right after installing, updating or removing an extension, the generated classes are probably out of date. Clear them and rebuild (run as the file system owner, not as root):
rm -rf generated/code/* generated/metadata/* var/cache/* var/page_cache/* var/view_preprocessed/*
php bin/magento setup:upgrade
php bin/magento setup:di:compile
php bin/magento setup:static-content:deploy -f
php bin/magento cache:flush
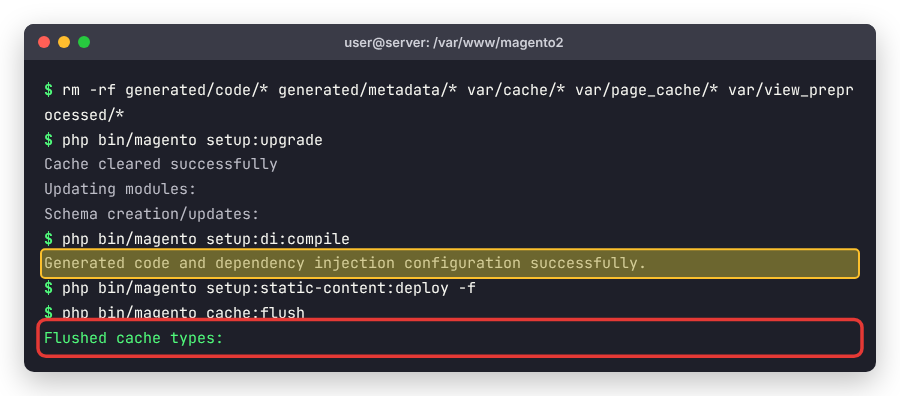
If setup:di:compile itself fails, the error message names the class or module that is broken. Disable that module to bring the store back online, then contact the vendor:
php bin/magento module:disable Vendor_ModuleName
php bin/magento setup:upgrade
php bin/magento cache:flush
- 500 error only in the admin panel: usually a broken admin module or outdated generated code. Follow Step 5 and check
var/log/exception.logright after you load the admin URL. - 500 error after an upgrade: check the PHP version requirements and run the full rebuild from Step 5. Also make sure the upgrade itself finished.
- Error 503 instead of 500: that is a different problem, usually maintenance mode or Varnish. See how to fix Magento 2 error 503 service temporarily unavailable.
- “Unable to write to var/cache” in the exception log: a permissions problem, go back to Step 3.
- Premature end of script headers in the Apache log: PHP crashed or ran out of time; increase
memory_limitandmax_execution_timeand check the PHP-FPM log.
Wrapping up
The Magento 2 500 internal server error looks scary, but the fix is always in the logs. Read the web server and Magento logs first, show PHP errors temporarily if needed, fix ownership and permissions, check .htaccess and PHP settings, and finally rebuild the generated code and flush the cache. In 90% of cases, Step 3 or Step 5 is enough.
If you are still stuck, leave a comment below with the exact line from your error log, and I will try to help you figure it out.