A sitemap is like a “map” of a website that helps search engine crawlers better understand and navigate a website. In a technical sense, it is a file that lists the pages and other files on your website and the relationship between them. Sitemap is one of the most essential factors that helps your Magento 2 website get better ranking in google search page.
In this tutorial, we will go through the process of generate a sitemap for Magento 2 website and learn how to optimize sitemap. We will also learn how to submit sitemap to search engines like Google and Bing to make your website appear on search engine.
Contents
Setting sitemap options in Magento 2
First, we will generate a new sitemap for Magento 2 website.
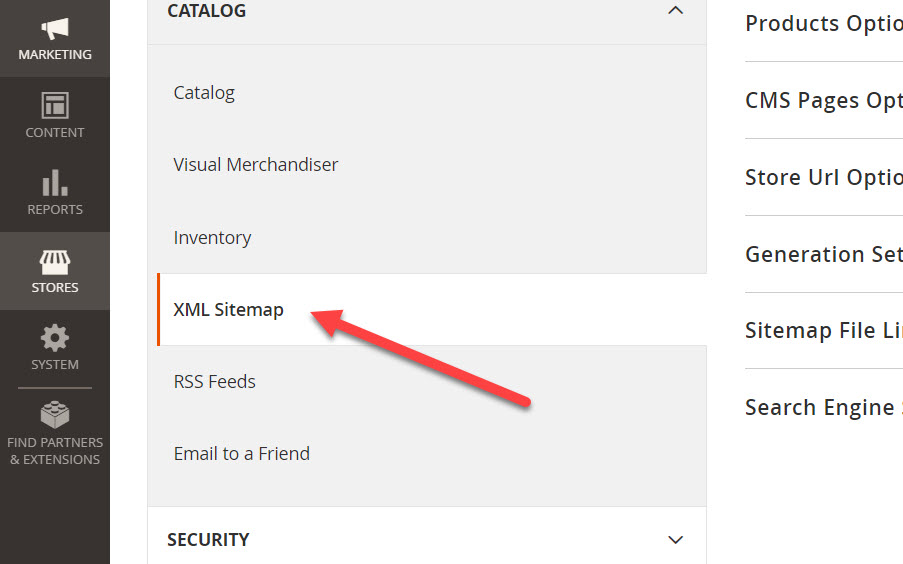
In admin panel, go to Store > Configuration > Catalog > Xml sitemap
In this section, we will setup how sitemap works for Magento 2. There are several options here, I will explain every option:
Category options
Category options allow admin to specify how frequently the site map is updated. The frequency options available are: Always, Hourly, Daily, Weekly, Monthly, Yearly, Never
Priority value is used to set which type of content should be prioritized to be generated in sitemap generation process.
Products options
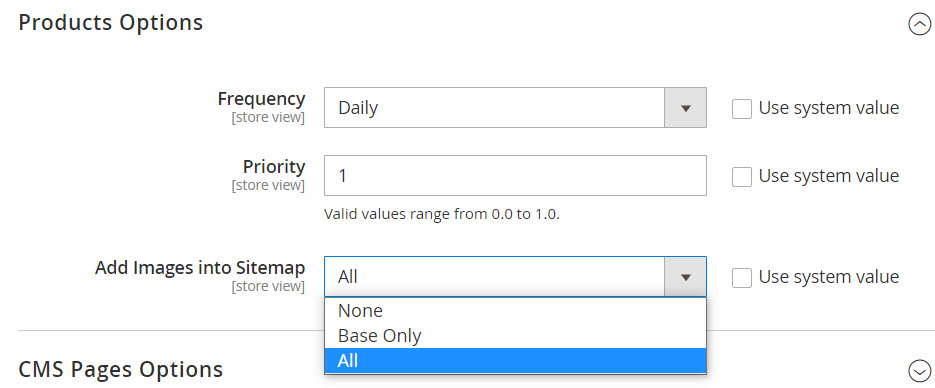
Products options specify the frequency and priority of Product options in sitemap.
You can also allow images to be added to sitemap or not here.
CMS Page options
Store URL options
Storeurl is your front store’s URL, if you never change the store URL you can disable this option.
Generation settings
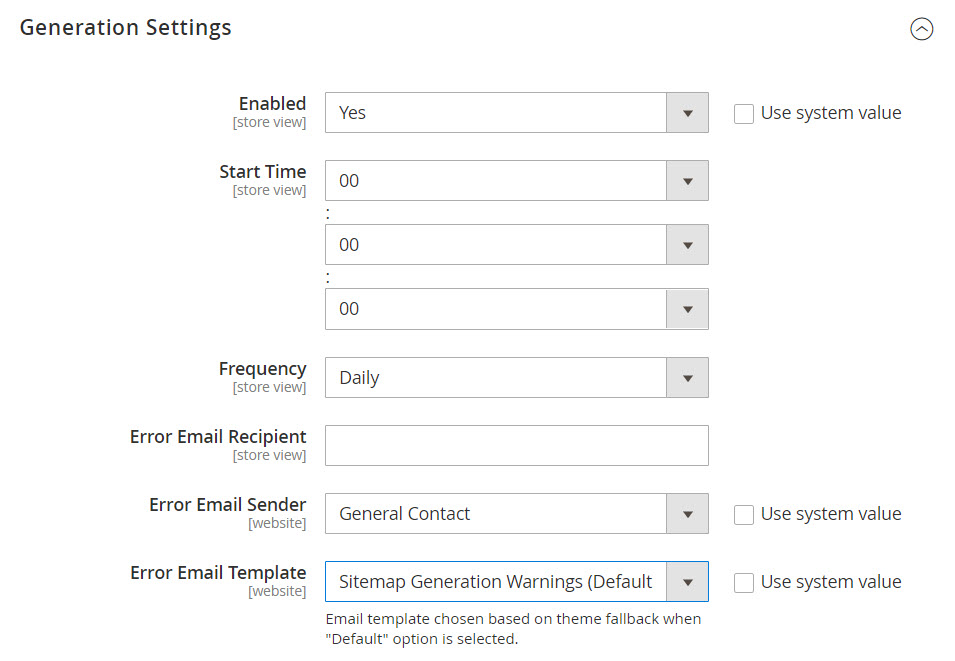
Generation settings allow us to set time and frequency of sitemap generating.
You can set Start time, frequency, error email when there’ a failure in the sitemap generation.
This is recommended to set the recipient email to your developer’s email so that he can keep track of the technical problems of the sitemap generation process.
Sitemap file limit
Here we can set max number of URL in the sitemap as well as max size of the sitemap.
If your store does not have too much URL, just leave it default.
Search Engine Submission Settings
Set yes if you want to add a line in robot.txt to notify search engine bots about your sitemap.
 Generate the sitemap for your Magento 2 store
After we finished setting options for sitemap, now we will start the sitemap generation process.
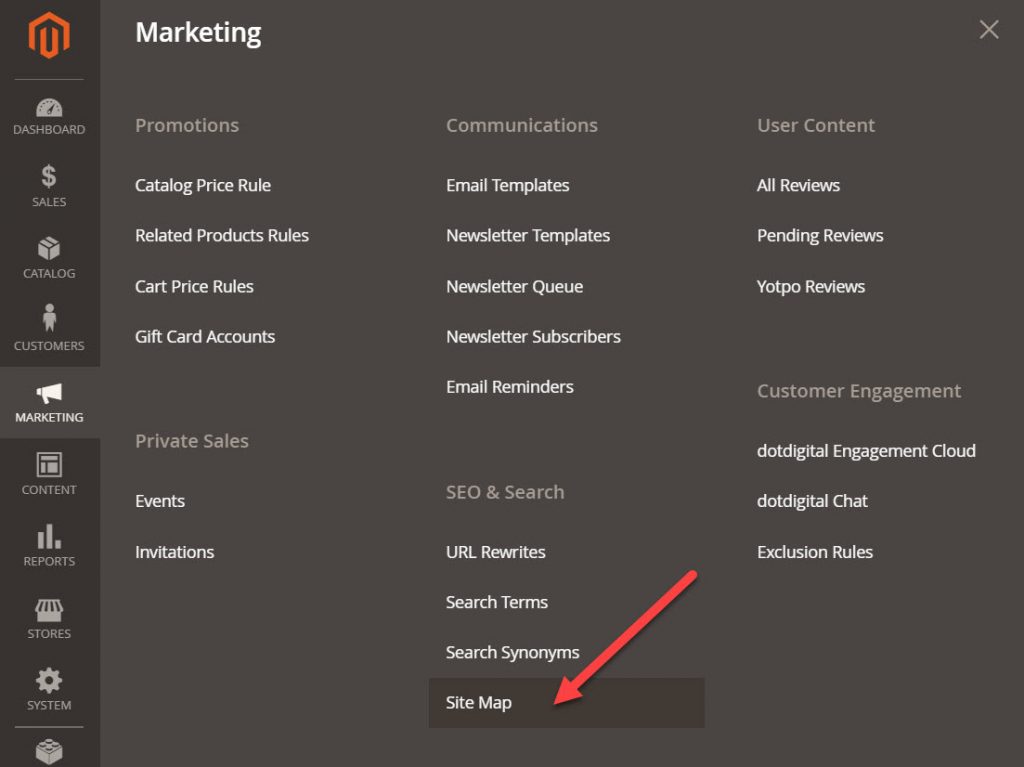
In admin section, go to Marketing > SEO & Search > Site Map
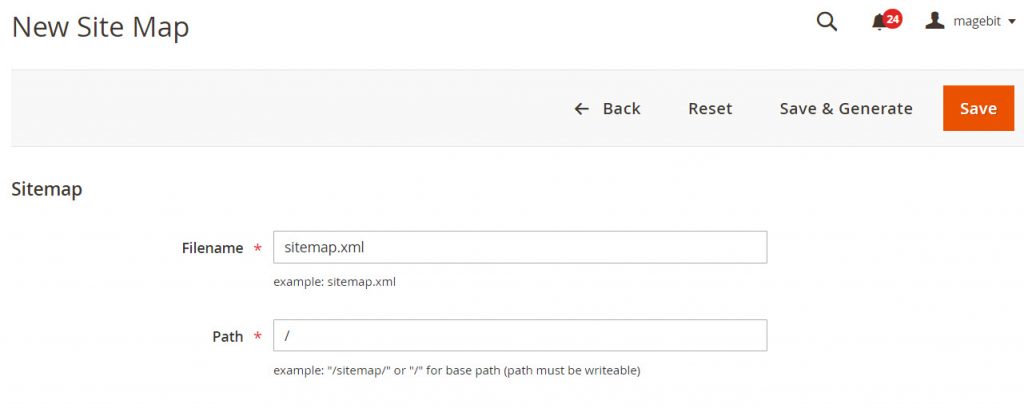
Next, click on add sitemap
There are 2 fields here:
- Filename: set the name of your Magento 2 store sitemap
- Path: Path to sitemap, if you want to put sitemap in root folder set it as: “/”
Finally, click on save and generate to start generating a new sitemap for your store.
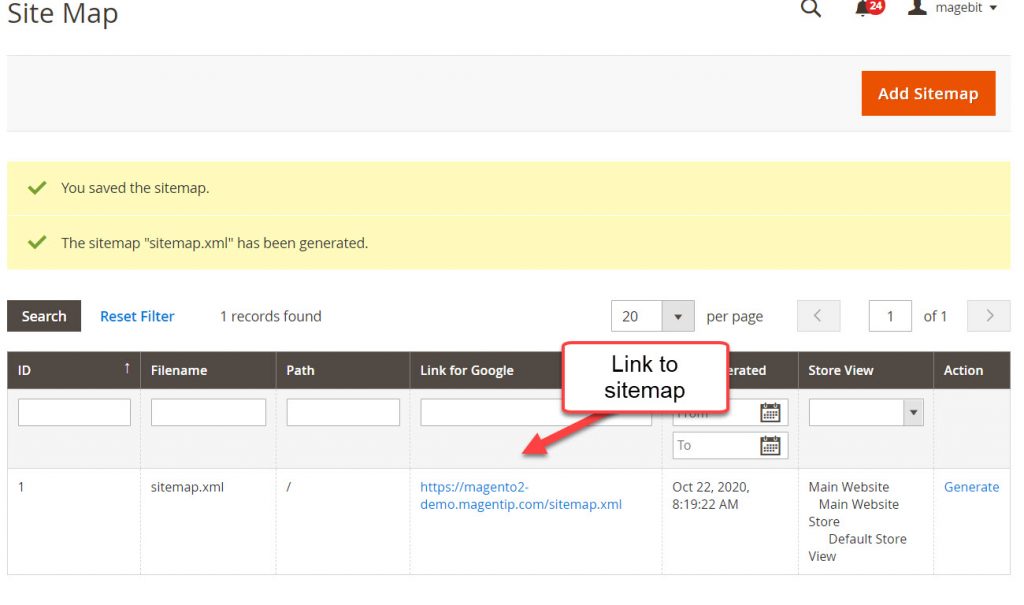
If you succeed, there will be a notification like this.
In this page you can see link to site map. If you want to rebuild the sitemap, click on generate.
Generate sitemaps for multiple stores
If you have multiple store and you want each store has its own sitemap, here’s how we do it.
Create a sitemap folder for each store. For example, you have store1, store2, store3
Go to file manager and create 3 folders accordingly:
- /yourwebsite.com/sitemap/store1
- /yourwebsite.com/sitemap/store2
- /yourwebsite.com/sitemap/store3
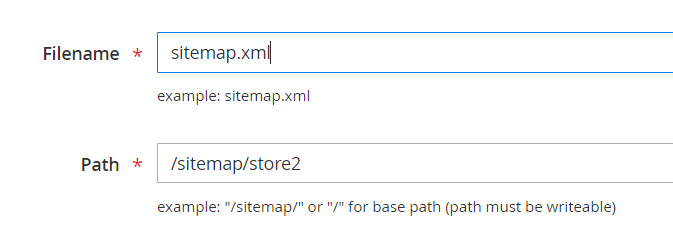
Next, create 3 sitemaps for 3 store in Marketing > SEO & Search > Site Map > Add sitemap
In path to sitemap field, set the correct path to sitemap for each store then create sitemap
Next, we will declare each sitemap in robot.txt. Open robot.txt file with a text editor and add the following lines
# Website Sitemap
Sitemap: http://www.store1.com/sitemaps/store1/sitemap.xml
Sitemap: http://www.store2.com/sitemaps/store2/sitemap.xml
Finally, we will make some config in virtualhost to allow access to sitemap of each store.
For apache, edit .htaccess file and add these rewrite rules at top
# Sitemap: http://www.store1.com/sitemaps/store1/sitemap.xml
RewriteCond %{HTTP_HOST} ^.*store1\.com$
RewriteRule ^sitemap.xml$ sitemaps/store1/sitemap.xml [NC,L,R=301]

# Sitemap: http://www.store2.com/sitemaps/store2/sitemap.xml
RewriteCond %{HTTP_HOST} ^.*store2\.com$
RewriteRule ^sitemap.xml$ sitemaps/store2/sitemap.xml [NC,L,R=301]
For Nginx:
location /sitemap.xml {
    alias /data/web/magento2/sitemaps/sitemap_store1.xml;
}
location /sitemap.xml {
    alias /data/web/magento2/sitemaps/sitemap_store2.xml;
}
Submit Magento 2 sitemap to Google search engine
After generating the sitemap, now we will submit our website’s sitemap to Google.
First you will need to register a Google Search Console account and verify your website.
After registering a Google Search console account, you will get a code to embed to your website, which allows google to verify the ownership of your website.
I recommend using Google analytics to verify Google Search console account, it’s the easiest method.
To install google analytics to your website, paste the tracking code Google prodives in admin > Store > Configuration > Sales > Google API > Google Analytics
If you don’t know how, just watch this video tutorial:
Next, we will submit sitemap to Google search engine.
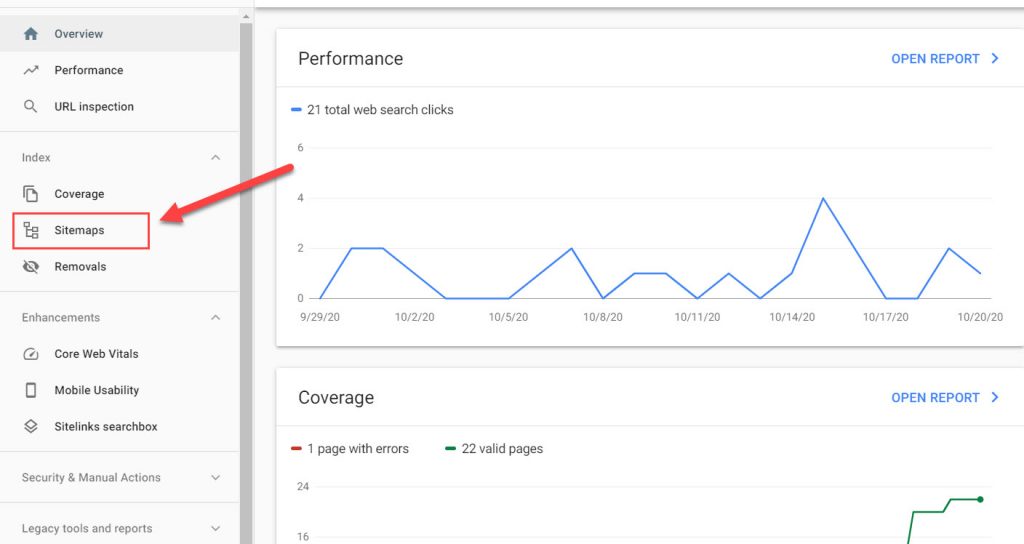
In Google search console, go to sitemap section
Next, enter path to sitemap and click submit
Now leave all the rest to Google, the search engine will crawl your sitemap and index your URLs in sitemap.
Wrapping up
Sitemap is always one of the factors, a powerful support tool for your SEO activities because it helps Google bot to index and rank the articles on the website very quickly, even when your website internal links were not optimized properly.
If you have any troubles when generating a sitemap for Magento 2, just drop a comment below describing your problem. I will try my best to help you out.





 Generate the sitemap for your Magento 2 store