
Extensions are one of the advantages of open source over other platforms. If you want to add extra features to your Magento 2 website, one of the best ways is to use a Magento 2 extension.
In this article, we will create a simple Helloworld module for Magento 2 in the most detailed and easy-to-understand way.
Contents
What is Magento 2 extension?
A module in Magento 2 (also known as an extension) is a directory that contains the PHP and XML files (blocks, controllers, helpers, models).
A Magento 2 module will add one (or a combination of related functions) needed for the Magento 2 website. For example, cms function, inventory management function, shipping, POS, Checkout…
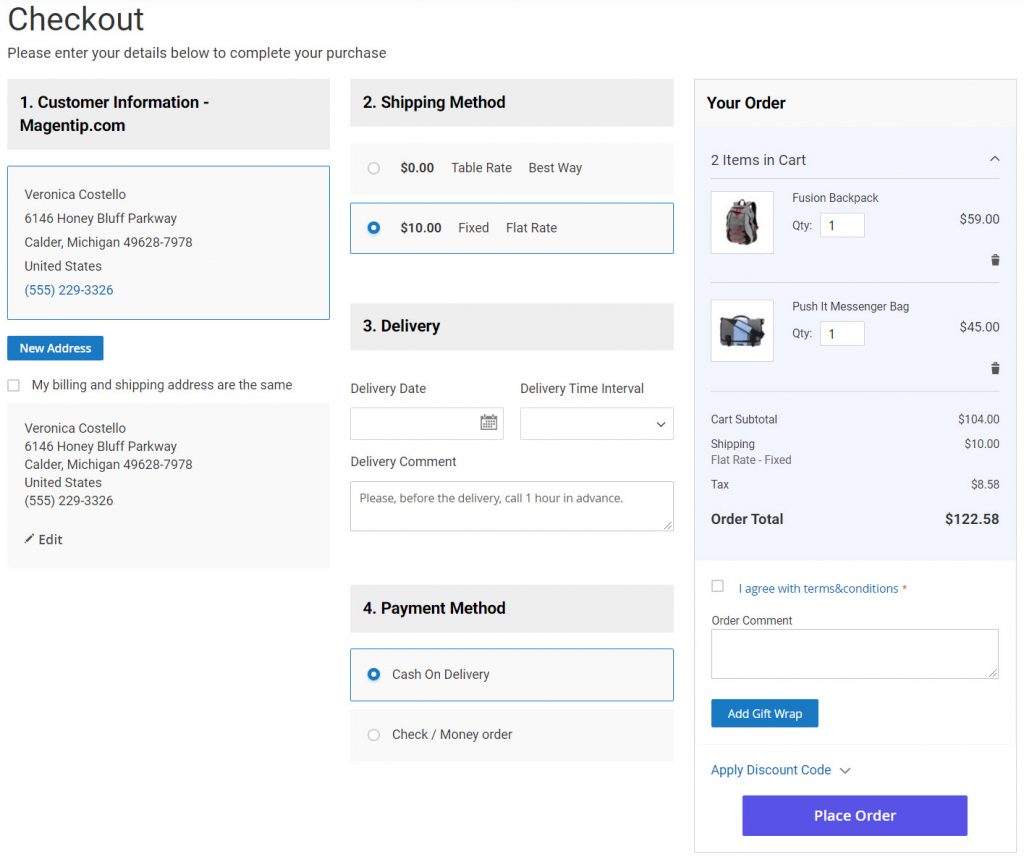
Below is an example of a Magento 2 module that turns Magento 2’s default checkout page into One Step Checkout Page
Basic structure of a Magento 2 extension
In this tutorial, we are going to build a very basic module for Magento 2, so I will list and explain only common module directories.
- Block: Contains classes responsible for preparing data to display through the template on the website. The content of almost every Magento 2 page is displayed through block classes.
- Controller: Contains PHP control classes (part of Model View Controller)
- etc: Contains the configuration files. This is the module’s core directory containing the module.xml file, which is required to register your module to Magento 2 system.
- Model: Contains model classes. These models are responsible for working with the database, exporting / importing information from the database, and processing it.
- Setup: Contains classes to help structure the database module and data setup. These actions are performed during installation or upgrade.
- view: Contains template files, CSS and JS files, layout files, email templates.
Step to create custom Magento 2 Helloworld module
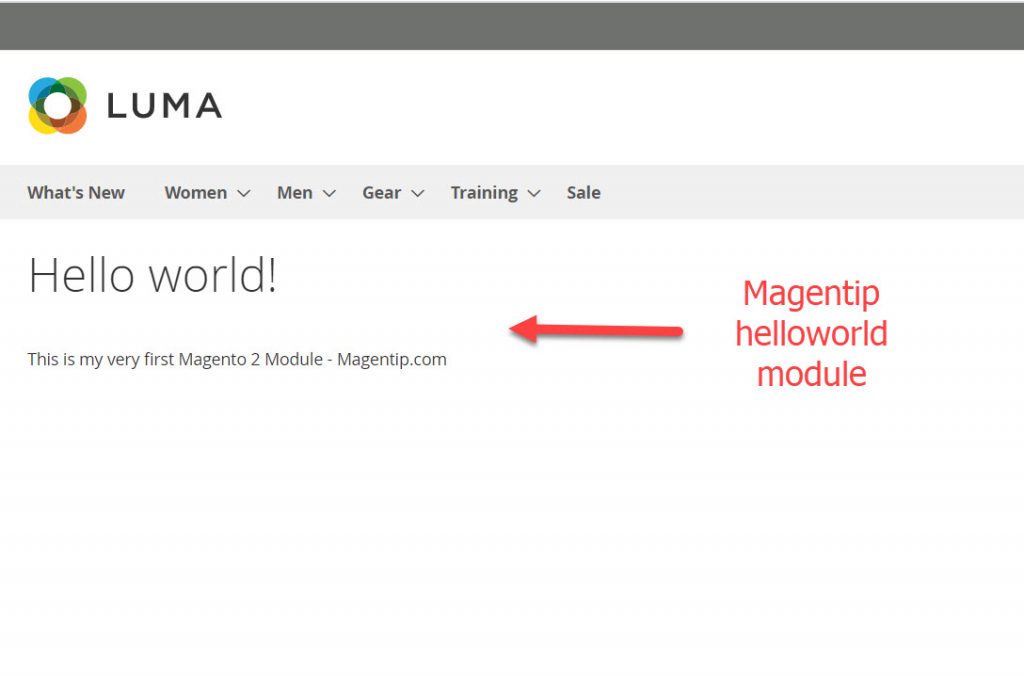
In this tutorial, we are going to build a very basic module for Magento 2 that will display Helloworld text on your Magento 2 website. The module will look like this:
In case you want to download my premade module, click on this link
Before we start
We will disable cache and turn Magento 2 to developer mode. By temporarily disabling caching, we won’t need to flush cache every time we make changes. With developer mode, all errors will be displayed in detail so that we can easily find out how to fix the issue.
Disable cache command
php bin/magento cache:disable
Change Magento 2 to developer mode command
php bin/magento deploy:mode:set developer
Step 1: Create Module folders
The module name in Magento 2 is divided into two parts, namely the vendor name and the module name.
In this tutorial, I create a module called Magentip_helloworld. Magentip is the vendor name and HelloWorld is the module name and connected by ‘_’.
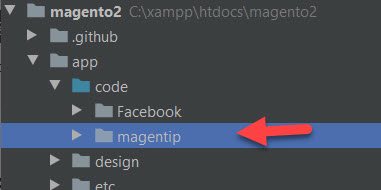
To create the module Magentip_helloworld, let’s start by creating the following folders:
- app / code / Magentip
- app / code / Magentip/ HelloWorld
If you don’t have these directories, just manually create them.
Step 2: Create Module.xml to declare your Magento 2 module
Next, we will register our module to Magento 2 system by creating module.xml file and put it to this path: app/code/Magentip/Helloworld/etc
<?xml version="1.0"?>
<config xmlns:xsi="http://www.w3.org/2001/XMLSchema-instance" xsi:noNamespaceSchemaLocation="urn:magento:framework:Module/etc/module.xsd">
<module name="Magentipo_Helloworld" setup_version="1.0.0">
<sequence>
<module name="Magento_Catalog"/>
</sequence>
</module>
</config>
- Module name: Defined by the folders that we created in the first step. Here is Magentip_helloworld because in Magento, the class name must follow the directory structure. Since we have created a module called Magentip_helloworld, for any class inside this module the namespace must start with ViMagento \ HelloWorld. Example: ViMagento \ HelloWorld \ Model \ Post.
- Module version: The current version of the module stored in the database and used in the module upgrade process. When the module upgrade process occurs Magento will compare the version stored in the database and the version in module.xml otherwise Magento will perform the upgrade for you. When you learn about the articles related to setup script, you will understand more about this part.
- Sequence: If your module depends on a module other than module.xml, there will be a special declaration that defines the list of modules that the current module depends on. This means that the current module uses another module’s class and model, so it cannot function properly without depending on these modules. The example above is that the current module is dependent on the Magento_Catalog module, so the current module will be loaded after the Magento_Catalog module is loaded.
Step 3: Create Registration.php to register your new module to the system
Each module is required to have this file in order to register the module to Magento know how to locate the module. Next, we will create Magentip/HelloWorld/registration.php with the following content:
<?php

\Magento\Framework\Component\ComponentRegistrar::register(
    \Magento\Framework\Component\ComponentRegistrar::MODULE,
    'Magentip_Helloworld',
    __DIR__
);
The file contents have been standardized for all modules, so you just need to change the module name Magentip_Helloworld to match your module.
Step 4: Activate the module you just created
Now let’s check if the module folder and registration files were created properly by running this command in your terminal.
php bin/magento module:status
If you see your module name in the output =>, That means the module was registered to the system. Sample output:

If you see the module in the List of the disabled module, then use this command to manually enable our module.
php bin/magento module:enable Magentip_HelloWorld
Use the below command to activate the module and notify Magento of your module’s presence.
php bin/magento setup: upgrade
This command will enable the module and add our new module to the database
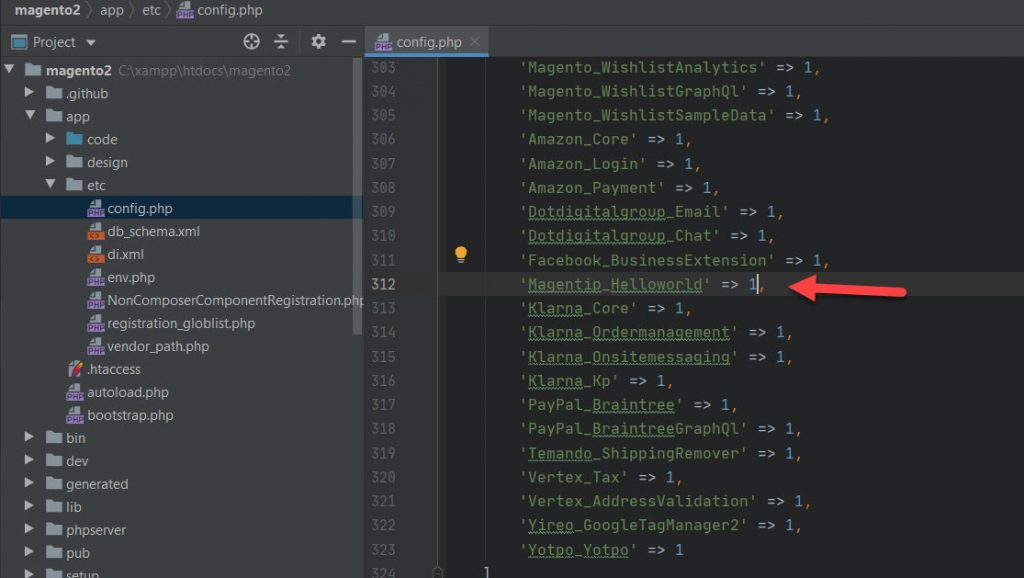
You can also check if the module is enabled in app/etc/config.php file. If you see the line:
'Magentip_Helloworld' => 1,
Then your module is properly enabled.
Step 5: Creating a controller
In this step, we will create controllers for our module. The Controller is an important part of a module in particular and the MVC model in general. The controller’s job is to receive requests, process, and render the page.
There may be one or more files in the controller directory of the module.
There are two types of controllers: the frontend controller and the backend controller. In essence, these two types are the same. Only the backend controller will have an extra method to check access.
Create Routes.xml
The first step before creating the controller, you must create a routes.xml file to define the routers.
Route for Frontend controller
We create a file Magentip/HelloWorld/etc/frontend/routes.xml and add the following content:
<?xml version="1.0"?>

<config xmlns:xsi="http://www.w3.org/2001/XMLSchema-instance" xsi:noNamespaceSchemaLocation="urn:magento:framework:App/etc/routes.xsd">
    <router id="standard">
        <route id="helloworld" frontName="helloworld">
            <module name="Magentip_Helloworld" />
        </route>
    </router>
</config>
In this example, we’re defining our frontend router an id “HelloWorld” and frontname:”HelloWorld”
The frontName attribute will be the first part of our module’s URL. In Magento 2, URL’s are generated with the following structure: <frontName>/<controler_folder_name>/<controller_class_name>
So with my Magentip_helloworld module, the URL to access my module on frontend will be:
mywebsite.com/helloworld/index/index
Route for Backend controller
We create the file Magentip/HelloWorld/etc/adminhtml/routes.xml and add the following content:
<?xml version="1.0"?>
<config xmlns:xsi="http://www.w3.org/2001/XMLSchema-instance" xsi:noNamespaceSchemaLocation="urn:magento:framework:App/etc/routes.xsd">
    <router id="admin">
        <route id="helloworld" frontName="helloworld">
            <module name="Magentip_HelloWorld"/>
        </route>
    </router>
</config>
Create Controller
Now we will create Frontend controller and Backend controller.
Frontend controller
We create the file Magentip/HelloWorld/Controller/Index/Index.php and add the following content:
<?php

namespace Magentip\Helloworld\Controller\Index;

use Magento\Framework\App\Action\Context;

class Index extends \Magento\Framework\App\Action\Action
{
    protected $_resultPageFactory;

    public function __construct(Context $context, \Magento\Framework\View\Result\PageFactory $resultPageFactory)
    {
        $this->_resultPageFactory = $resultPageFactory;
        parent::__construct($context);
    }

    public function execute()
    {
        $resultPage = $this->_resultPageFactory->create();
        return $resultPage;
    }
}
Backend controller
We create the file Magentip/HelloWorld/Controller/Adminhtml/Index/Index.php with the following content:
<?php

namespace Magentip\HelloWorld\Controller\Adminhtml\index;

use Magento\Framework\View\Result\PageFactory;
use Magento\Backend\App\Action;

class Index extends \Magento\Backend\App\Action
{
    protected $_pageFactory;

    public function __construct(Action\Context $context, PageFactory $pageFactory)
    {
        parent::__construct($context);
    }

    public function execute()
    {
        return $this->_pageFactory->create();
    }
}
As you can see, the frontend controller extends the Magento\Framework\App\Action\Action class and is located directly in the Controller folder.
The backend controller extends the Magento\Backend\App\Action class and must be in the Controller/Adminhtml directory.
Here, both classes use Magento\Framework\View\Result\PageFactory to render the base page that Magento has built. And all logic will be executed in the execute() method.
After completing these two steps, we will clear the cache so that Magento update your changes and deploy them.
php bin/magento cache:clean
Check if controller is working properly
To check frontend controller, go to this URL:
https://yourwebsite.com/helloworld/index/index
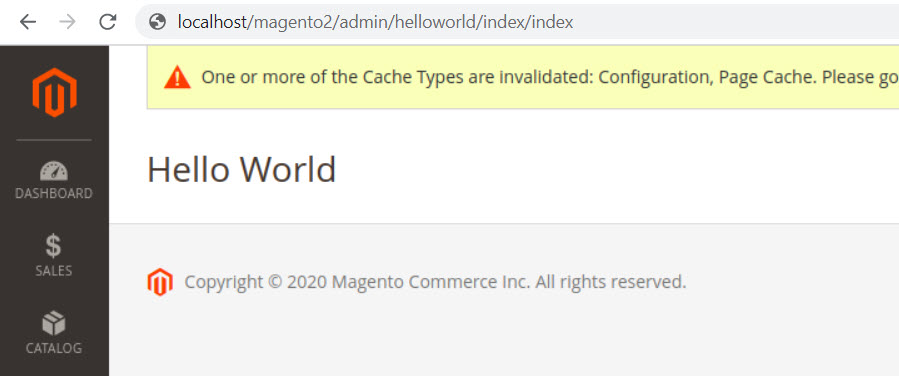
To check backend controller, go to this URL:
https://yourwebsite.com/admin/helloworld/index/index
Step 6: Create layout for the module
There are 2 types of a Layout of a Magento 2 module:
- default.xml : Use this file if you want your layout to be applied on all pages of your website.
- routeId_controllerName_actionName.xml : Use this file if you only want to apply your layout to a desired page. The example in this article is helloworld_index_index.xml
Now, let’s create the file Magentip/HelloWorld/view/frontend/layout/helloworld_index_index.xml with the following content:
<page xmlns:xsi="http://www.w3.org/2001/XMLSchema-instance" xsi:noNamespaceSchemaLocation="../../../../../../../lib/internal/Magento/Framework/View/Layout/etc/page_configuration.xsd" layout="1column">
    <body>
        <referenceContainer name="content">
            <block class="Magentip\Helloworld\Block\Helloworld" name="helloworld" template="helloworld.phtml" />
        </referenceContainer>
    </body>
</page>
The layout uses templates file to render html content to display in the frontend. Here is the file helloworld.phtml . In this file, we can use PHP and HTML code, even CSS and Javascript. And it connects to a block file used to provide data for templates, for example we can retrieve 10 latest products to show on the frontend … .
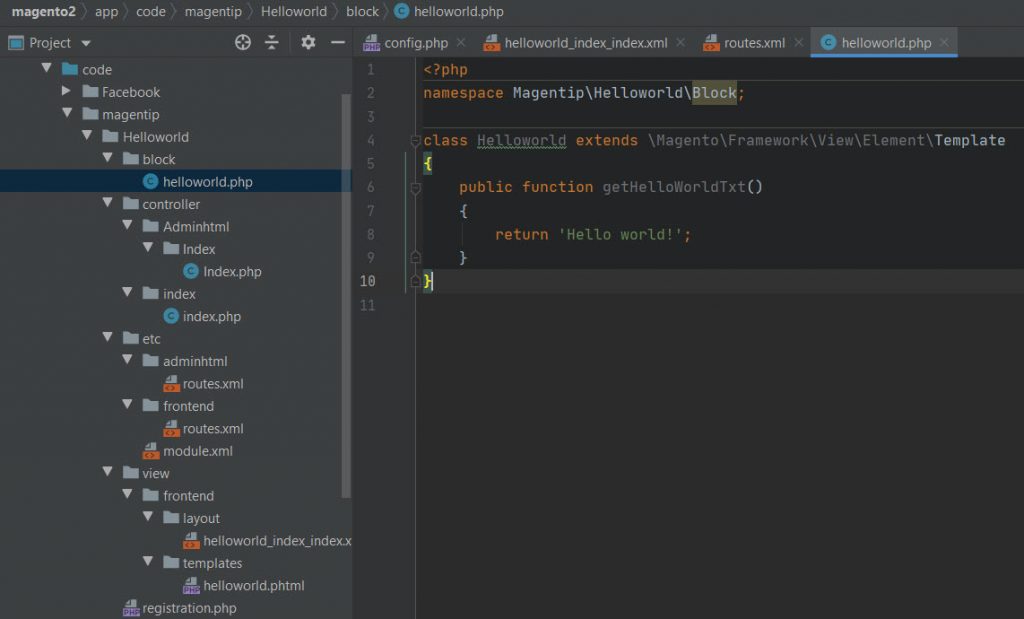
Step 7: Create Block
Create file Magentip/HelloWorld/Block/Index.php with the following code:
<?php
namespace Magentip\Helloworld\Block;

class Helloworld extends \Magento\Framework\View\Element\Template
{
    public function getHelloWorldTxt()
    {
        return 'Hello world!';
    }
}
This file uses the getHelloWorldTxt() function to return the words HelloWorld !, this is just an example. You can write whatever logic is to get the data provided for the templates file.
Step 8: Create template files
Create a helloworld.phtml file in the app/code/Magentip/Helloworld/view/frontend/templates folder with the following code:
<h1><?php echo $this->getHelloWorldTxt(); ?></h1>
This is my very first Magento 2 Module - Magentip.com
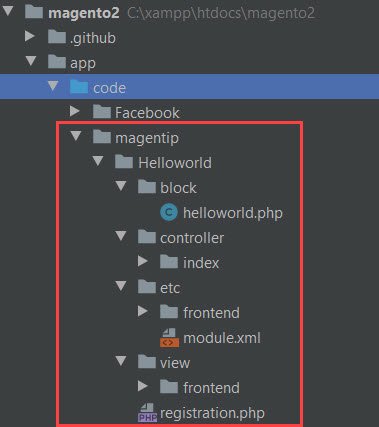
Now our module will contain these files and folders
Test our new Magento 2 module
Now the module is created and we will check if the module is working properly.
First, clear cache
php bin / magento cache: clean
Now go to this URL in your browser
https://yourwebsite.com/helloworld/index/indexIf the word HelloWorld! is displayed => Congratulation, you have successfully built your first custom Helloworld module in Magento 2.
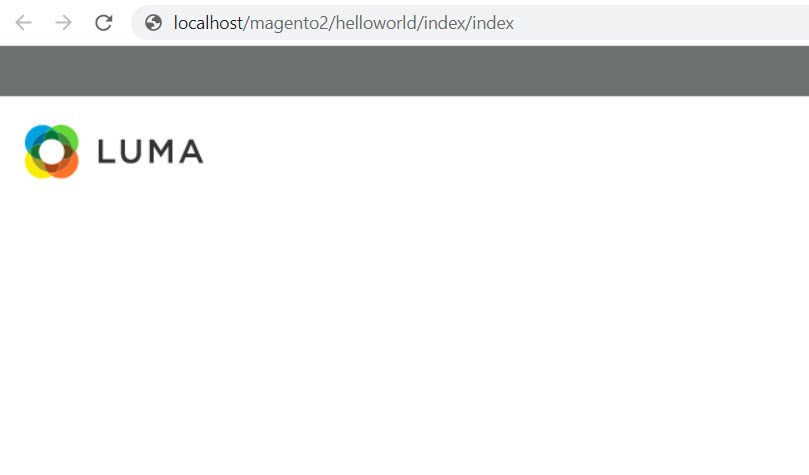
In case you see a broken style page like this when accessing module page:

That means you will need to deploy static view files, run this command
php bin/magento setup:static-content:deploy
After that flush cache and refresh your website.
Wrapping up
So we have finished creating our very first custom module in Magento 2. I hope this tutorial helps you understand the basic of Layout, Controller, Route, Block, and Template in a Magento 2 module
If you have any problem when creating helloworld module in Magento 2, feel free to drop a comment below describing your problem. I will be happy to help!
 with Elasticsearch")
")
