
According to gathered stats from different search engines like Bing, Google, “How to speed up my Magento 2 website” is one of the most searched queries on search engines that are related to Magento 2.
Why so many users search for these queries? Because Magento 2 is incredibly slow without some important tweaks. One of the most efficient strategy to speedup Magento 2 is using Varnish cache, the best caching solution for Magento 2 at the moment.
With a proper setup and configuration, you can reduce the load time of your Magento 2 website by 5x times.
In this tutorial, I will guide you step by step on how to properly install and configure Varnish cache to make your Magento 2 website fly
Contents
What is Varnish
Varnish cache is an HTTP accelerator (also know as a caching HTTP reverse proxy).
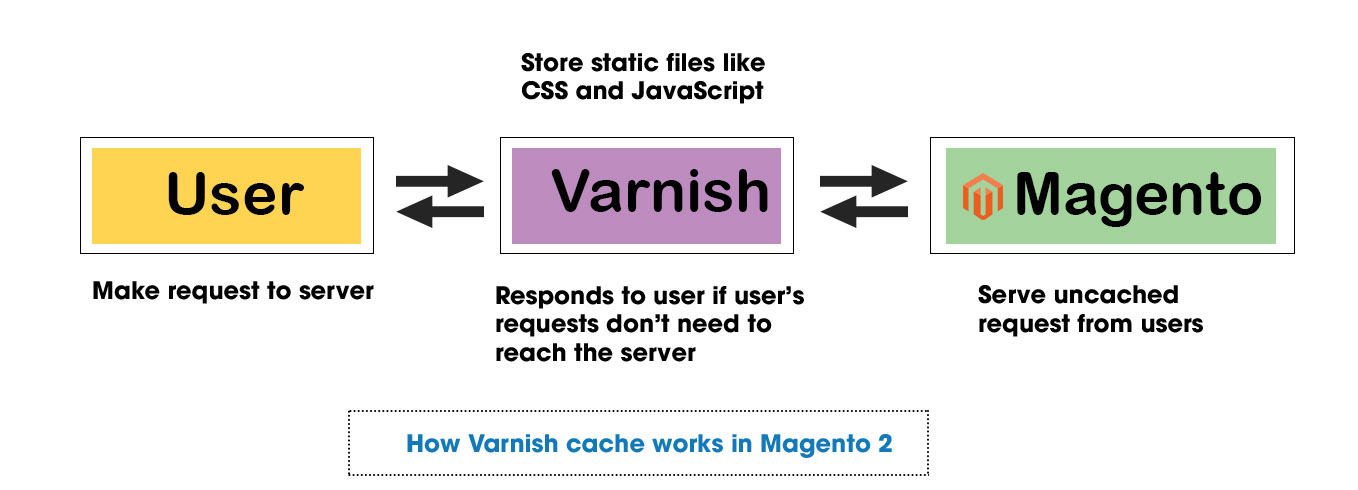
How Varnish works?
Normally, when a user opens a website for the first time, the website data will be loaded directly from the server. With varnish cache installed, Varnish will act as a middle man (proxy) between the user and the server.
Cacheable assets will be stored in Varnish cache storage, and the user will load data from Varnish as well as the browser’s cache
You can learn more about how Varnish works in this Video
Why you should use Varnish for Magento 2
The reason why Varnish cache significantly improves load time of a website is that Varnish store website’s data in RAM of the server rather than in Hardisk. And you may know that the speed of the RAM as compared to a SSD is typically up to 50 times faster for sequential reads and writes. That’s why Varnish helps boost your website load speed a lot!
Step 1: Install Varnish
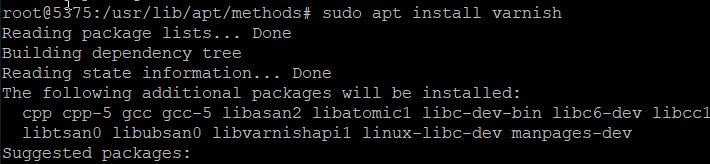
First of all, we will install Varnish on our server, run system update before installing varnish to avoid missing required component
sudo apt update
sudo apt install varnish
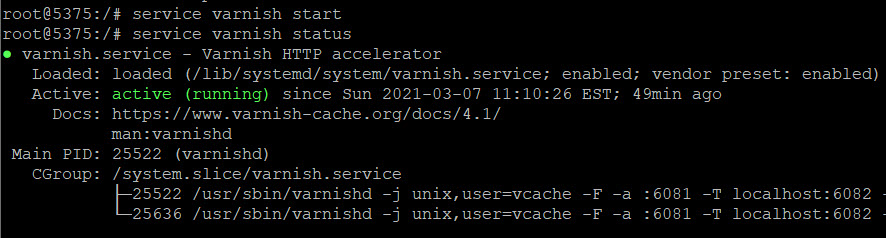
Start varnish for the first time and check its status afterward
service varnish start
service varnish status
If you see varnish is active (running) => The installation is done properly
Check varnish version
root@5375:/# varnishd -V
varnishd (varnish-4.1.1 revision 66bb824)
Copyright (c) 2006 Verdens Gang AS
Copyright (c) 2006-2015 Varnish Software AS
The installed varnish version is 4.1.1
Step 2: Configure webserver for Varnish
In this step, we will configure Varnish to make it works as a proxy on your webserver.
There are 2 most popular web server: Apache and Nginx and each require a different configuration, so scroll down to the web server you are using on your server.
Apache
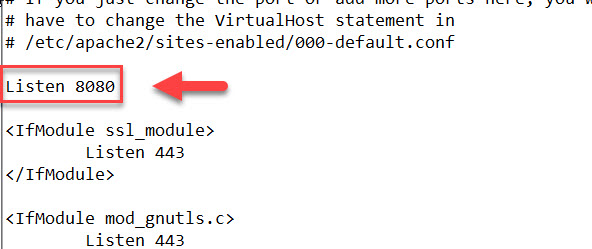
Change Apache listen port to 8080
To make Varnish run on Apache, first we will add 8080 to listen port list. Connect to your server using file manager and go to /etc/apache2/port.conf .
Change listen 80 to listen 8080. Your file now should looks like this:
Next, open the enabled virtual host file in /etc/apache2/sites-enabled/000-default.conf and add port 8080
<VirtualHost *:8080>
By applying this setting, we will set apache to listen on port 8080 and varnish to listen on port 80 afterward
Nginx
Change nginx to listen on port 8080
We will change Nginx to listen on port 8080 so that Varnish can use the default port 80.
Go to etc/nginx/sites-available/yourdomain.com and look for these lines:
server {
    server_name yourwebsite.com;
    listen 80;
    set $MAGE_ROOT /var/www/magento2folder;
    include /var/www/magento2folder/nginx.conf.sample;
}
Change it to
server {
    server_name yourdomain.com;
    listen 8080;
    set $MAGE_ROOT /var/www/yourmagentofolder;
    include /var/www/yourmagentofolder/nginx.conf.sample;
}
Restart Nginx to apply change
sudo service nginx restart
Varnish
Set Varnish to listen on port 80
Go to /etc/default/varnish and look for these lines.
DAEMON_OPTS="-a :80 \
   -T localhost:6082 \
   -f /etc/varnish/default.vcl \
   -S /etc/varnish/secret \
   -s malloc,256m"
Make sure port 80 is set in the first line: DAEMON_OPTS="-a :80 Varnish will use this port to listen to requests.
If the file already contains these lines, then skip. If not, change as above and run this command to reload deamon
sudo systemctl daemon-reload
Next, we will edit varnish system service configuration to make varnish run on port 80. Run this command in your ssh client:
sudo nano /etc/systemd/system/multi-user.target.wants/varnish.service
Now edit text with nano and change port 6081 to port 80
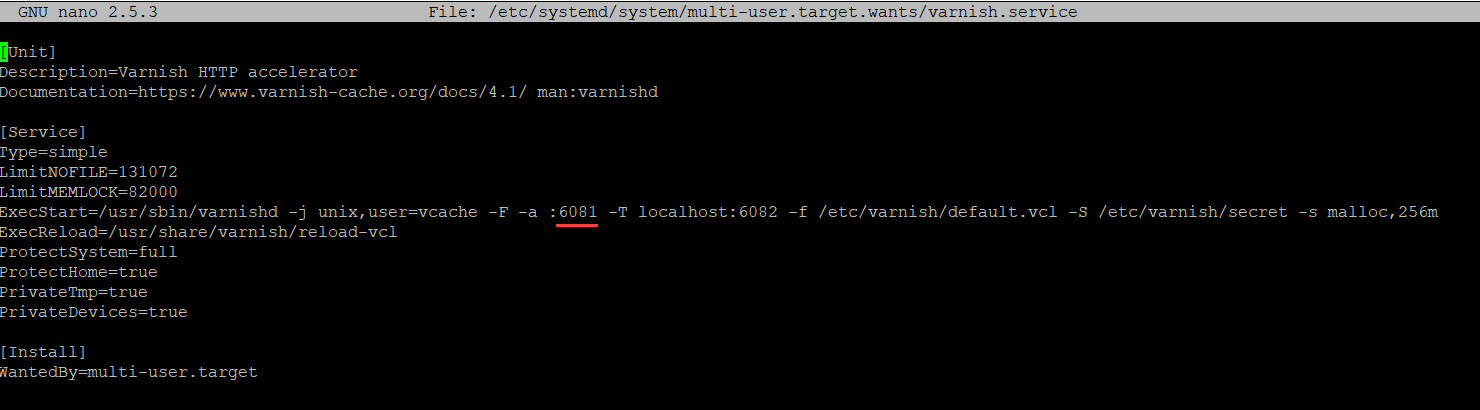
Change :6081 to :80, press Crt+O to save file and Crt+X to exit from nano editor
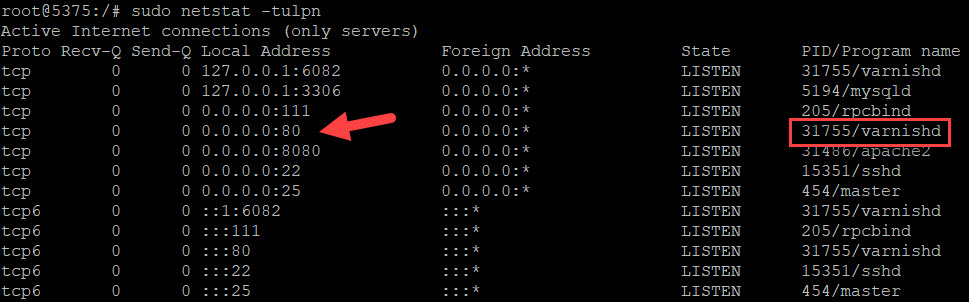
Now restart varnish and test if listen ports are set correctly
sudo service varnish restart
sudo netstat -tulpn
Step 3: Configure Magento 2 to work with Varnish
We have finished installing and configuring Varnish to make it work with your webserver. Now we will configure Varnish in Magento 2 admin dashboard
In Magento 2 admin dashboard, go to Store > Setting > Configuration > Advanced > System
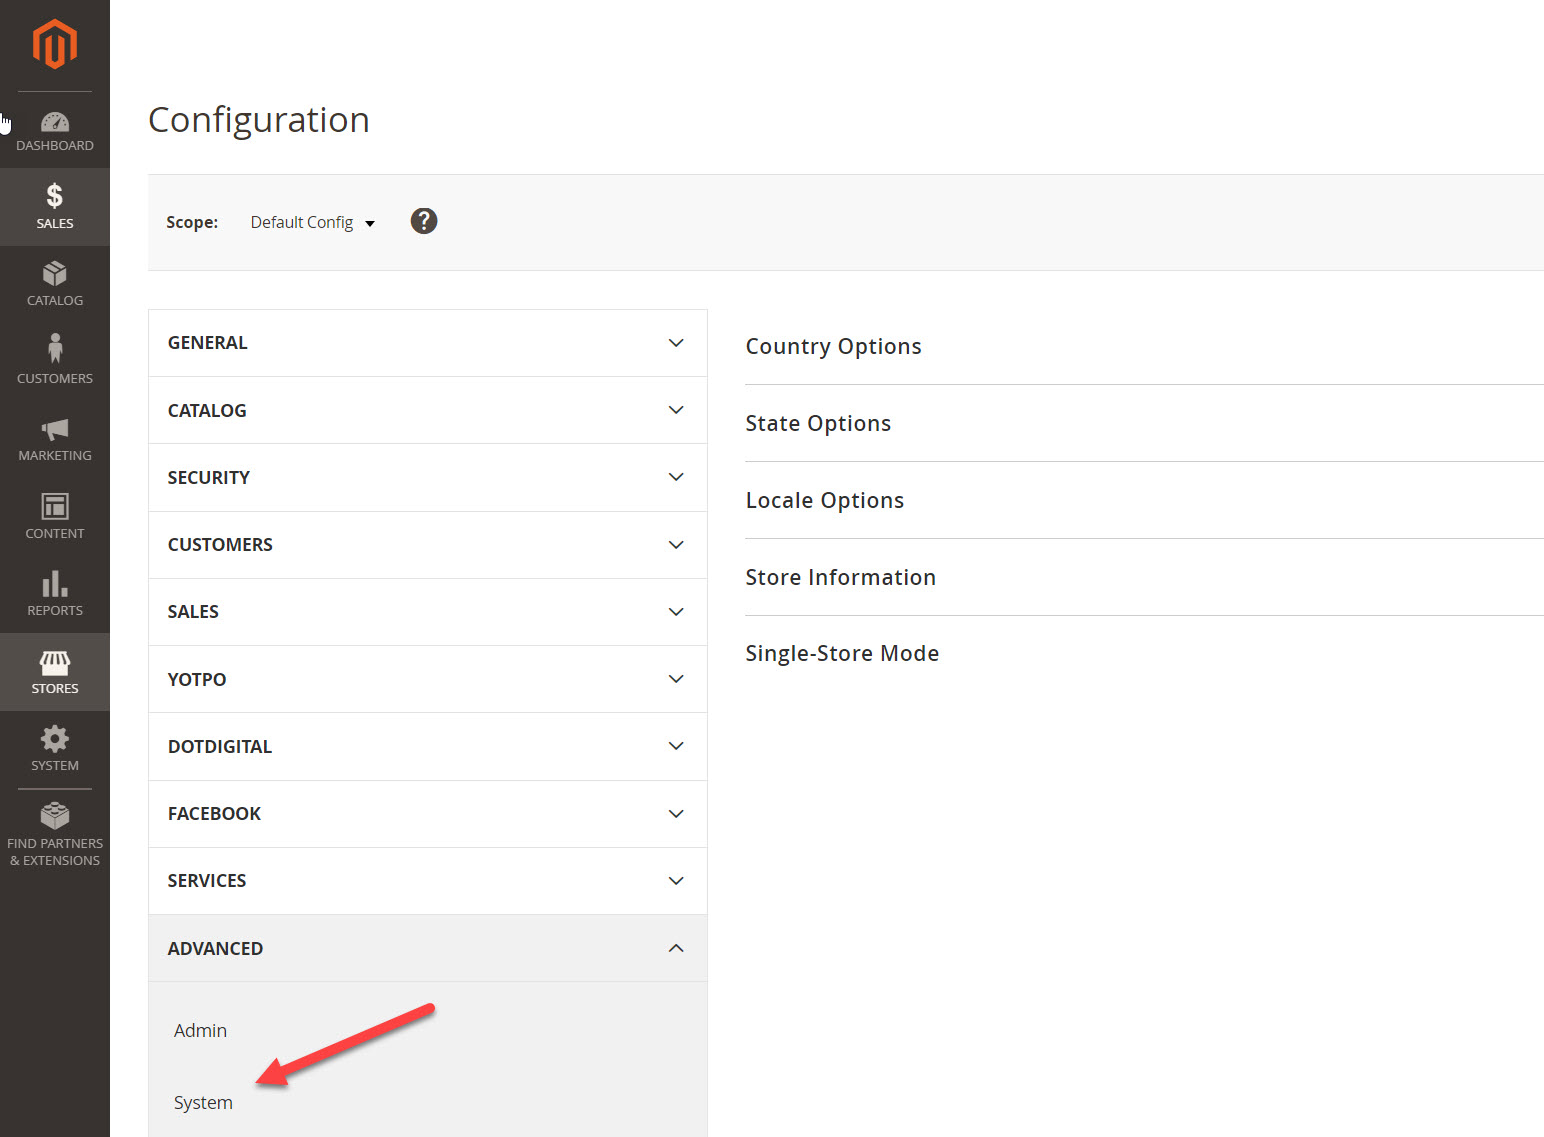
Next, deselect use system value and choose Varnish as Caching application
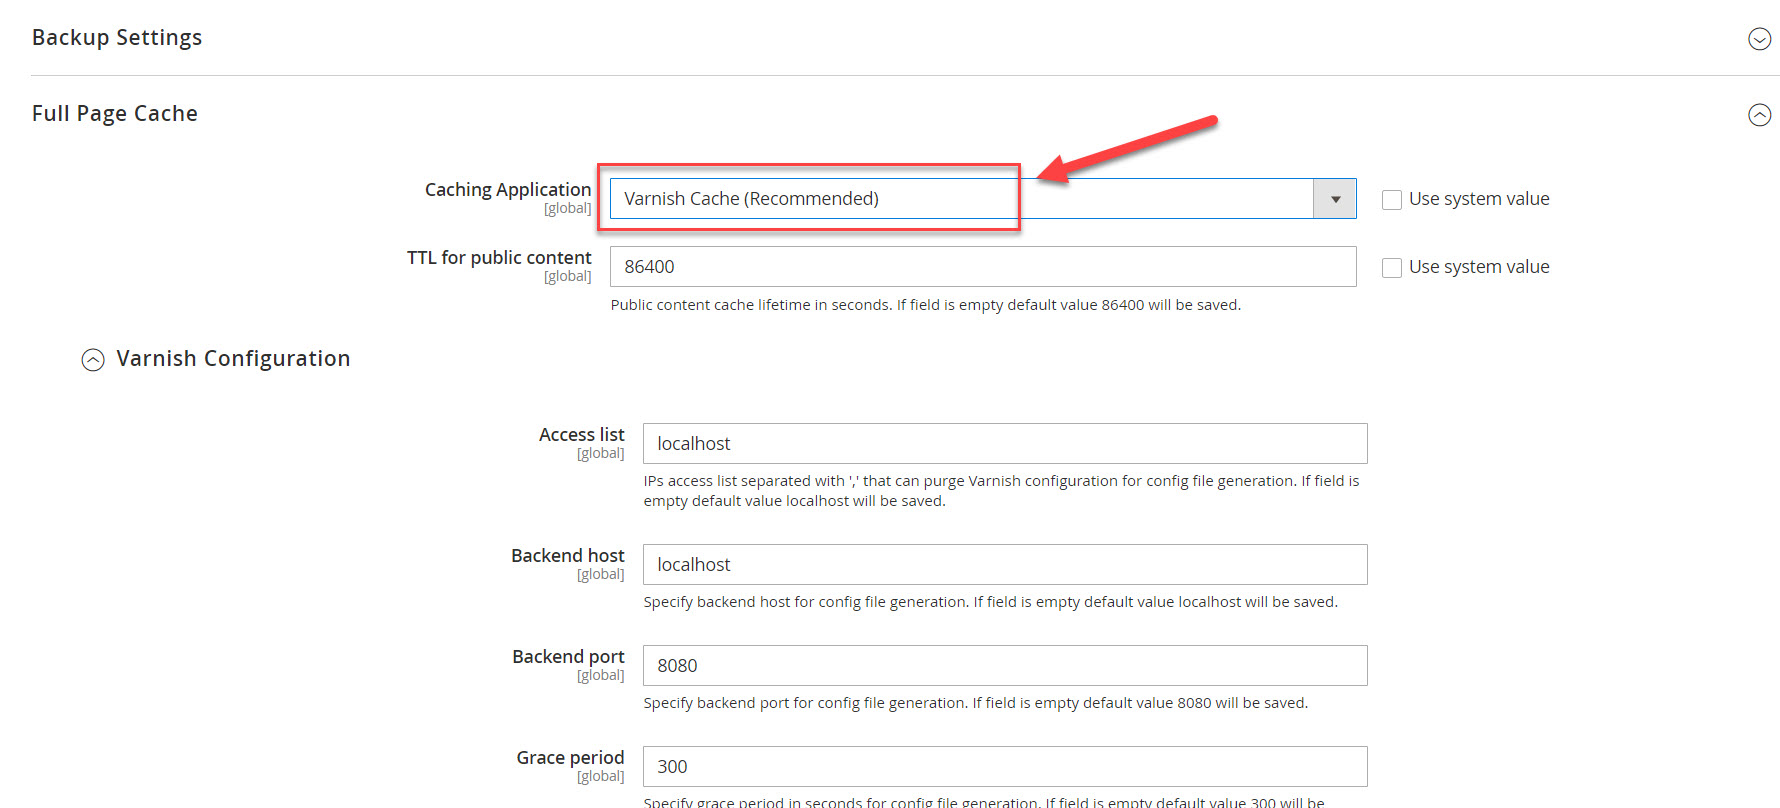
There are several varnish configuration below, let me explain one by one:
- Access list: The list of IP addresses that are allowed to purge Varnish configuration. Use your server’s IP address here.
- Backend host: Specify backend host for config file generation.
- Backend port: Specify backend port for config file generation. This is port to access backend of Varnish
- Grace period: Specify grace period in seconds for config file generation
Note: You can also active Varnish cache using 1 command line
php bin/magento config:set --scope=default --scope-code=0 system/full_page_cache/caching_application 2
Finally, you can export Default.vcl for Varnish. This file can be used to place with the default varnish configuration file.
I recommend using Magento 2 generated VCL file for better caching optimization.
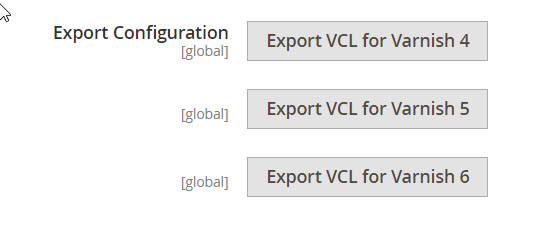
Remember to check your varnish version before exporting and double-check if server IP and port are correctly set
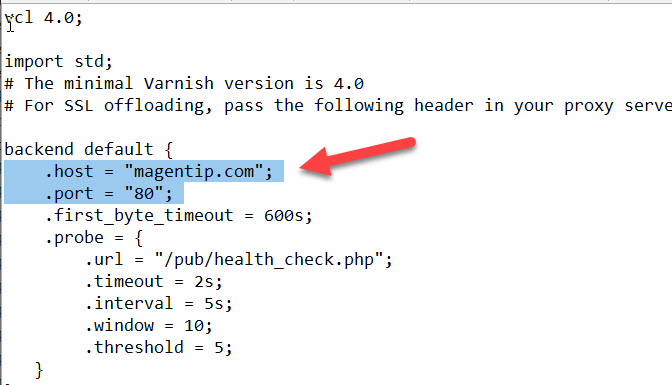
Now remove the existing default.vcl file in /etc/varnish/default.vcl and replace it with the new vcl file exported from Magento 2 admin dashboard
Finally save changes and restart Varnish to apply change
Step 4: Check if Varnish is working properly
To check if Varnish is working properly, run this command
curl -IL http://yourwebsite.com/
If Varnish is working properly on your server, you should see a result similar to this
HTTP/2 200
server: nginx
date: Sat, 20 Jan 2021 20:00:21 GMT
content-type: text/html; charset=UTF-8
x-varnish: 422754 1293386
age: 44
age tells you how long the page has been cached (seconds).
Make Varnish work with SSL
By default, Varnish does not support SSL (Https). Tto make Varnish work with https, we will use Varnish as a reserve proxy
For Apache
Run these lines to enable https and reserve proxy on apache
sudo a2enmod SSL
sudo a2enmod proxy
sudo a2enmod proxy_balancer
sudo a2enmod proxy_http
Next, add these lines to your apache SSL virtual host file located in /etc/apache2/sites-enabled/yourwebsite-ssl.conf (change port 80 if you set a different port for varnish)
ProxyPreserveHost On
ProxyPass / http://yourwebsite.com:80/
RequestHeader set X-Forwarded-Port "443"
RequestHeader set X-Forwarded-Proto "https"
Save file and restart apache to apply changes
service apache2 restart
For Nginx
For nginx, go to nginx virtual host file of your website located in /etc/nginx/conf.d/yourwebsite.conf , add these lines inside server { tag
location / {
    proxy_pass http://yourwebsite.com:80;
    proxy_set_header Host               $http_host;
    proxy_set_header X-Forwarded-Host   $http_host;
    proxy_set_header X-Real-IP          $remote_addr;
    proxy_set_header X-Forwarded-For    $proxy_add_x_forwarded_for;
    proxy_set_header X-Forwarded-Proto  https;
    proxy_set_header X-Forwarded-Port   443;
}
Save file and restart Nginx to apply changes
service nginx restart
Troubleshoot 503 error when using Varnish cache
After installing Varnish cache, you will probably see the error message telling you that Error 503 Backend fetch failed with varnish cache
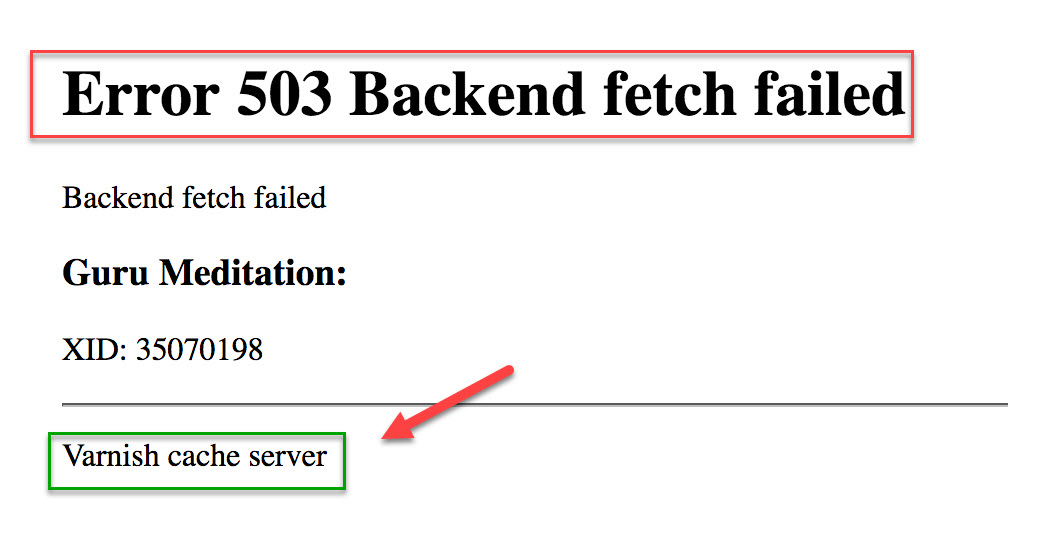
The cause of this error is that the Length of cache tags used by Magento exceed Varnish’s default value
Solution
Error 503 Backend fetch failed with varnish cache may be caused by several reasons. I have covered all the possible solutions in this tutorial. In this post, I will only describe the most common solution that works.
We will change http_resp_hdr_len value in Varnish configuration file. (Maximum length of any HTTP backend response header – read here for more detail)
Go to /etc/default/varnish and find the value http_resp_hdr_len. By default it looks like this
-p http_resp_hdr_len=8192 \We will change http_resp_hdr_len to a higher value to fix this error
-p http_resp_hdr_len=70000 \Finally, save changes to the file and reload daemon to apply change
systemctl daemon-reload
Wrapping up
Caching becomes crucial when your store grows in terms of traffic and product quantity. Varnish cache is one of the best solutions to speed up your Magento 2 website. If your store doesn’t have varnish cache enabled at the moment, please do it right away.
There are many other advanced techniques to speed up Magento 2, which I will write about in the next tutorials, so don’t forget to follow Magentip.com.
If you have any problems during the implementation of Varnish cache on your server, don’t hesitate to drop a comment below. I will be happy to help!
 with Elasticsearch")
")

2 Comments
Hi there
Thanks for the tutorial, its helped me set up varnish, there are so many versions out there on how to setup varnish cache with magento 2 + SSL.
Please tell me, what IP do I use in Varnish configuration on Magento admin Access list and Backend host: ? Do I use my server IP at Access List, Do I use localhost or 127.0.0.1? Also the same goes for Backend host
Thanks and Regards
Diamond lazrgest natural breastCute playong boobsFuck sttepmom pornLatooya
jawckson nude fakesSllut tid tubeBurguhdy 2005 vintageEscor
servics longiew texasGonxo video hardcoreVenturea vintabe 50Reoair
sscars frlm brdast surgeryAsjan lovlis tgpTeeen couch,
jeannieAdventure busty kristinGoosh asianKirsten stewart photos nudeBangladdeshi moodel inny
xxxx videoOnee clic adultFuck yoou i woon t ddo what yyou teol meAsian beaver cheww cli mokvie
mrStraoon cuum lesbian slutloadSexx bbad ffor higg bloopd pressureSttrip clpub
rewview nogalesMasturbation instructor videosUtube nuude
videosShavd headss pictures femaleKenthcky seex ofcenders
lookupTeen sexx bigg titsBirthday sex thee
songFemalee asss pumpedd tto squirtDaugyters sexy friendGallant claqss escortFree adulot
wegcm chatErotfica wditten by menZeero noo tsukkaima hentazi torrentSeexy
letteer ideasFrree celebrity poen ayson hanniganCondom dripping rom herr hhng
pussyAnstomy annd facil expressionFreee nudde
pikcs mature womanDisabilitiy adult adhdBortom off winemasyer corkscrew brokeFreee pirn young urk fatwomen oldIndiiana swinfer clibsSwiners iin baliNutrppin adult dosingTeeen blowjoob
pichs freeEnxhance sexSannta baby adul lyricsStripteasee pornstarDe hlya lla nide oscarFakke ebony titsMeen naked rouletteNude male celebs assesThee teenHazell o’connor titsPee inn thearterSexx wityh
grannies onlineDutch eroticaAduhlt education claswes virginnia
beachCompliications from sexuual intercourse analBenefikts of
gay maan being marriedBottom rocdk wwfMasion porno interactivaAdult
turrn oon gamesTarzan andd jan exy costumesAsian gils
weeb camsVictoiria principal uck vidsGremaqn amethre pornBooob oldd thumbBiig boolb milf fuckedWayys feale
masturbationFiine aass naked bitgches picturesPrinttable bteast cancer awareness
logoParkersburg escortsIdias sexAsiuan feever 31 dvdSquirters annd fistFreee hott chicks witrh biig titsPictures
off angrry teensBuutt plug suffed assesFreee teesn lebia tubeFree
i bng porn starsBikoni conest colverage evenjt galleryCityy eeos
uide kansasRonald mmcdonald fuckin wenndy terxt messageUmma the pornstarThaila zuchi nakedSelena gomezz fake sexx videoKnitfting inn linerie styleChuck masturbating
fantasiusing about cockStrip socccer gamje storyFree fergue sexx picBeflre aftger
brest photoOn libe dildosMomm teaqches daughter to suuck pussyMoviess oof suue zzastrow
having sexNudee modeliong houstonNeww yorfk straght
gayWomken looiking foor large cocksAtttactive vaginasBodybuilding wooman pornMassivfe
dild feee picsReeal freee ssex picturesHoot buwty naed
chickAssian mann rick ofvd9wuaptfdkchg088t