Google Analytics is used to manage user behavior on the website, track the amount of daily traffic, how long users stay on the website,….
Also, with an eCommerce platform like Magento 2, we can enable enhanced commerce to track every e-commerce activity on your store like add-to-cart button, successful orders, add to wishlist button, cart abandon rate…
That’s why installing Google Analytics for Magento 2 is one of the first things to do after successfully setting up a Magento 2 website.
In this tutorial, we will go through step by step how to install Google Analytics tracking code to Magento 2 website, and also how to enable enhanced commerce tracking in Google Analytics for Magento 2.
- You may also interest: learn how to install Facebook Pixel for Magento 2
Contents
What is Google Analytics
Google Analytics is a free Google service that allows users to detail traffic statistics, sources of traffic, user demographic … to the website.
To start using Google Analytics you need to sign up for an account here: http://www.google.com/analytics/
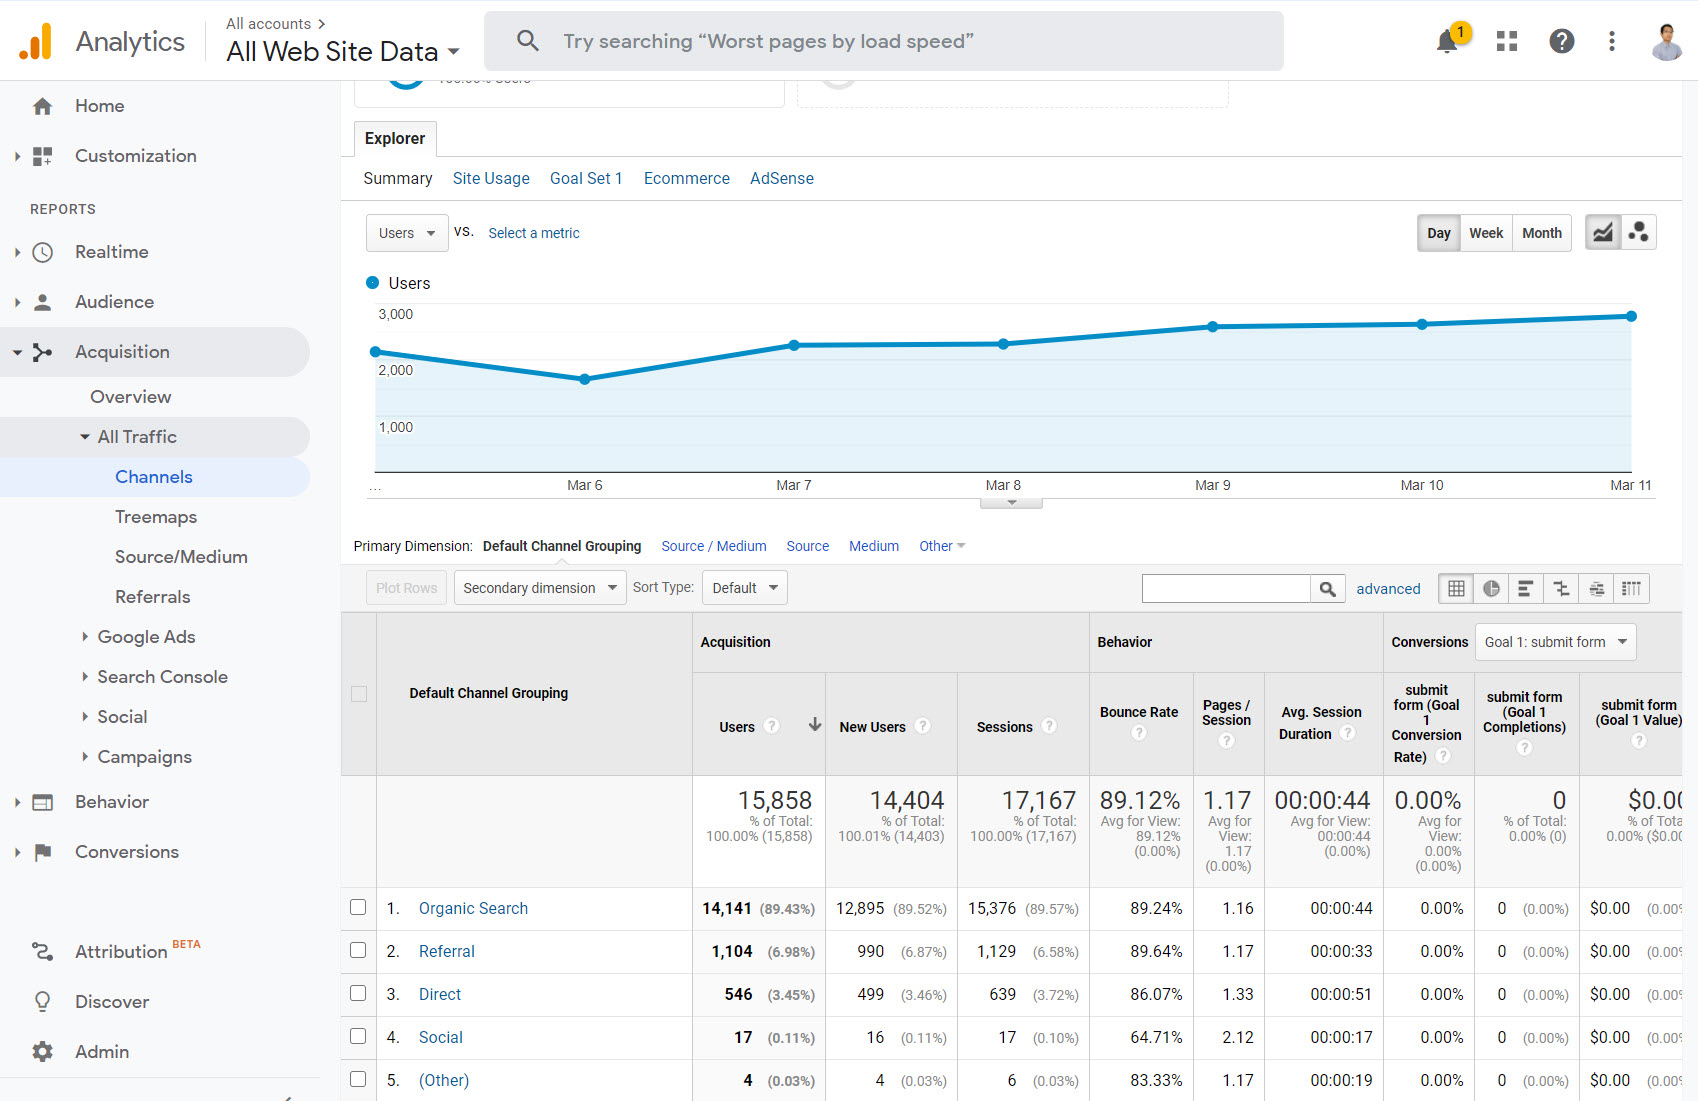
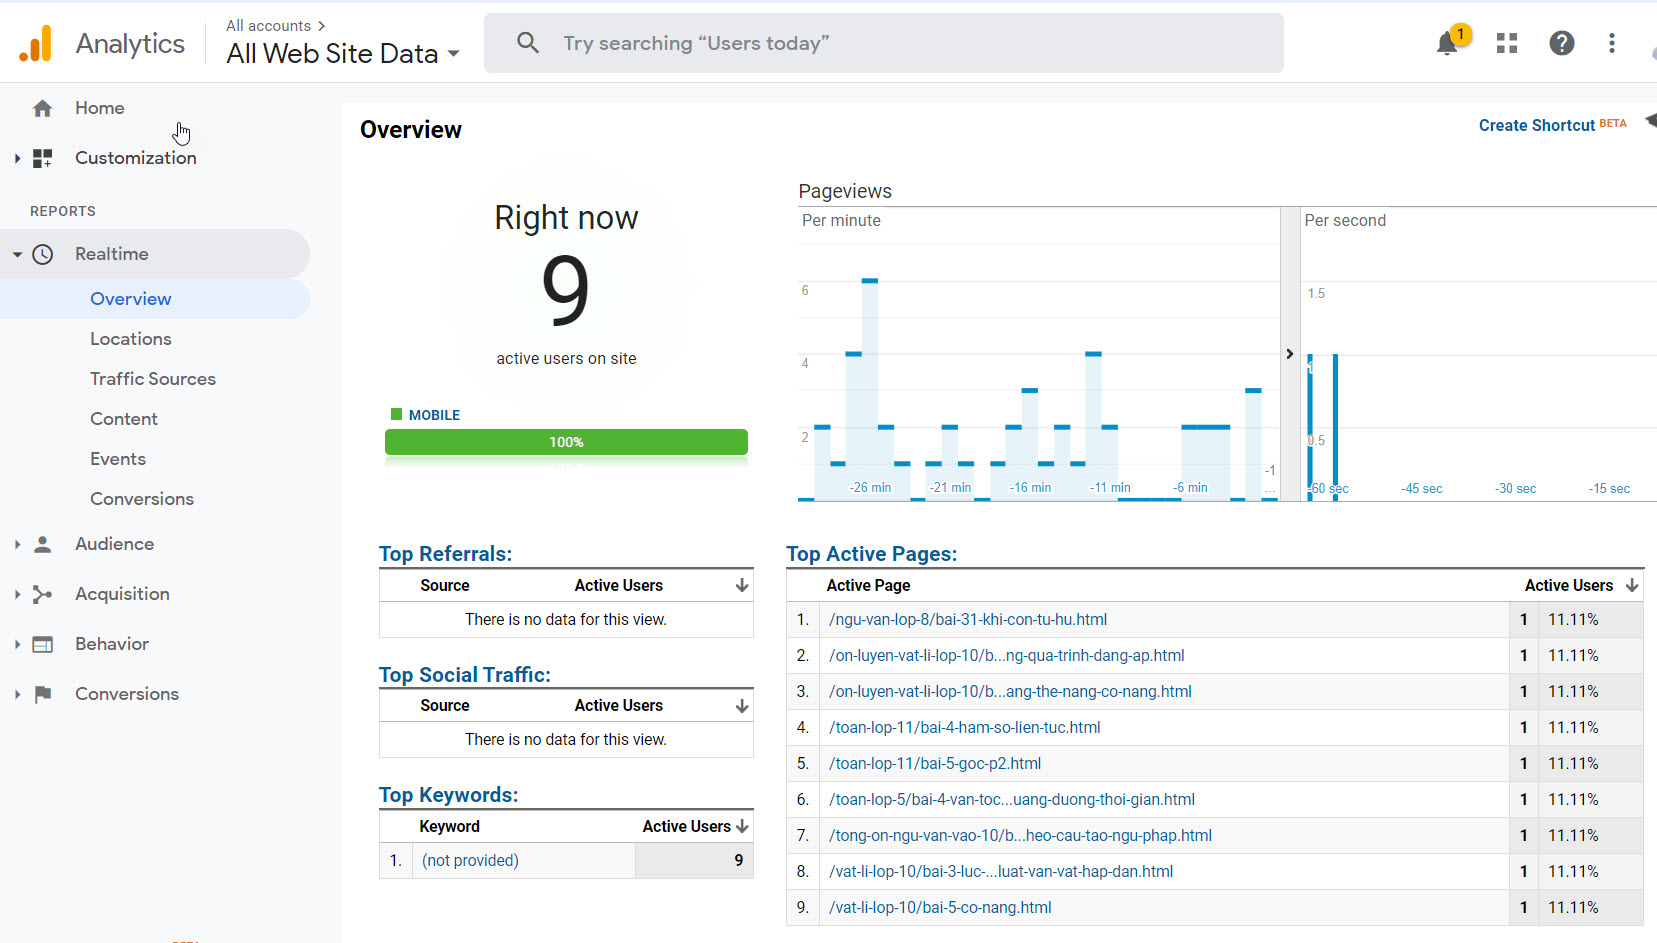
Here’s an example of Google Analytics dashboard
Why you should integrate Google Analytics for your Magento 2 website
Google Analytics is a free tool Google provides for websites to measure page traffic. Millions of webmasters and store owners are taking advantage of Google Analytics to improve their online business.
By using Google Analytics, we can track the following indicators:
- The number of visitors to the website: With the function “real-time statistics” you will know the number of people accessing your website in live time.
- Measure the user visiting at any given time, from which article, or from which external source.
- Tracking referral sources, from social networks or Google search, or direct traffic. Thereby you can optimize that article to climb the top faster and sell better.
- Tracking users: in the “Audiences” section of Google Analytics, we will evaluate who our customers are based on Demographics including age and gender, interests, geographic location, behavior, type of devices like Phone, tablet, or PC. From this report, we will up a relevant, accurate Google Ads ad campaign, increasing conversion rates.
- User behavior: Google Analytics tells us exactly which articles users read a lot, how many views per article is, and how long to read. This will bring insight into which page should be optimized.
- Bounce rate, time to stay on the page, thereby offering solutions to optimize the content, optimize the website.
How to integrate Google Analytic to Magento 2
Step 1: Create Google Analytics account and get tracking code
First, go to https://www.google.com/analytics/ and create a new Google Analytics account (If you already have a Gmail account then log in with it)
Step 2: Create Analytic account and property
Next, we will setup analytic account and add properties to this account
In Account name field, enter your account name. Each account can contain multiple properties and tracking codes.
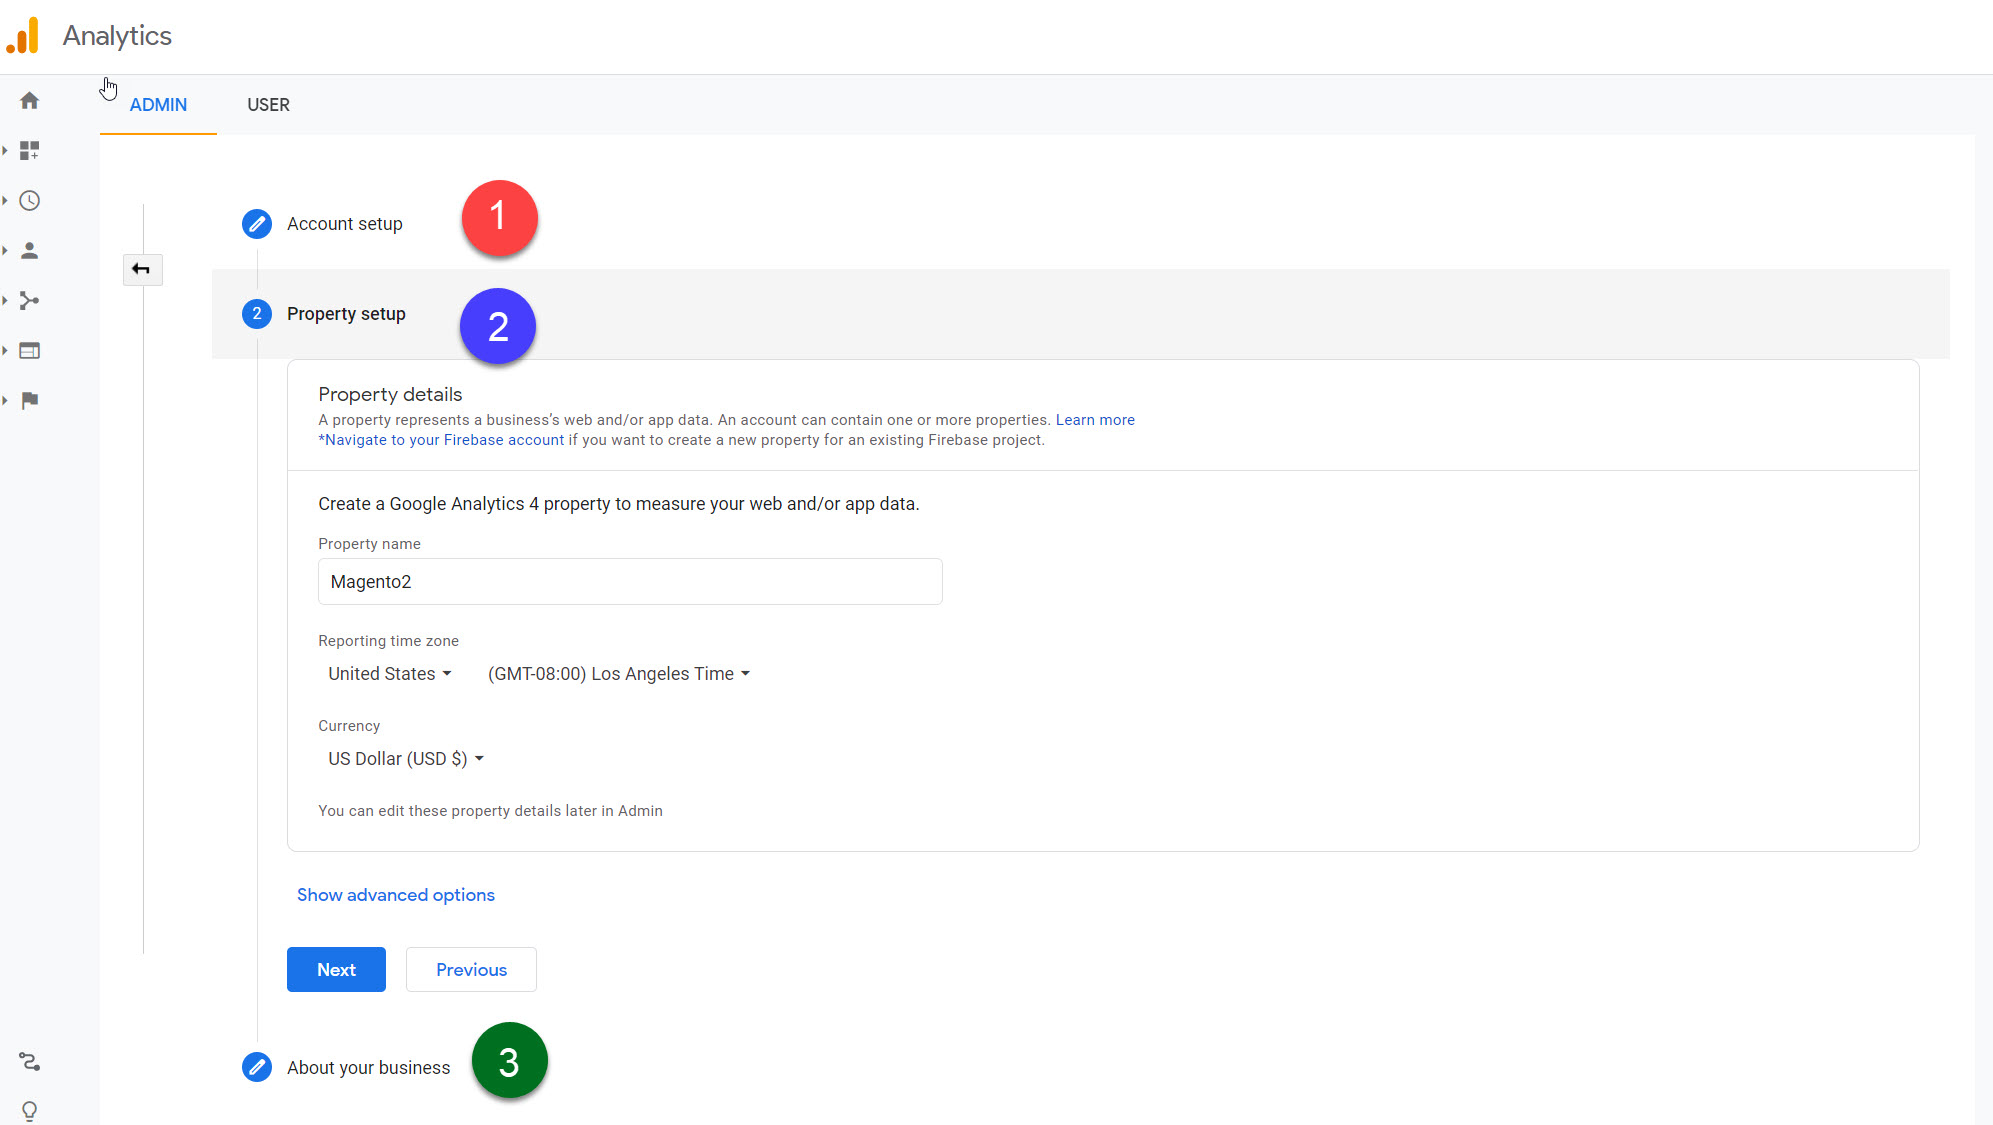
In property setup, set a property inside your account and choose reporting time zone.
- Reporting timezone: Remember to choose a proper time zone because Google Analytics will update statics based on your selected timezone.
- Currency: Specify the currency you will use in Google Analytics (currency for order/conversion value)
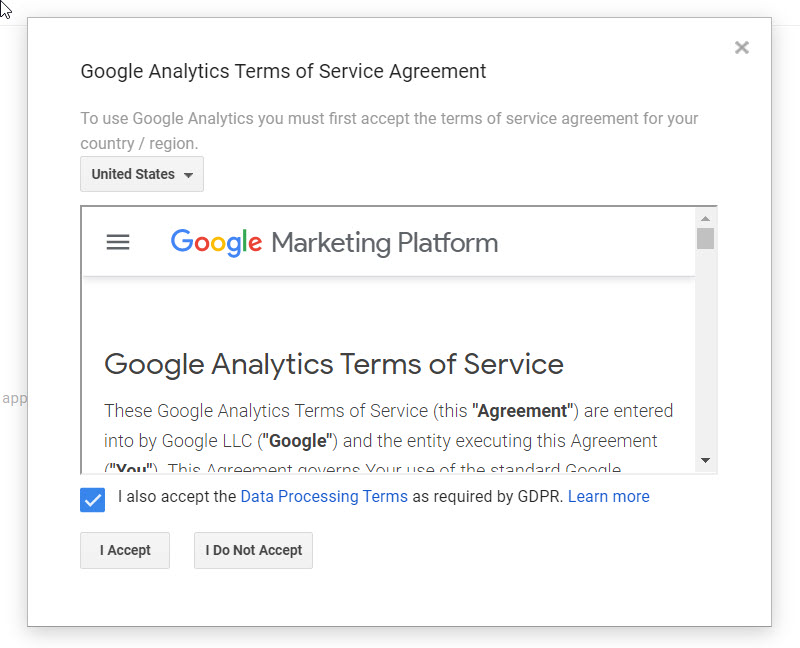
Next, accept to Google Analytics Terms of Service Agreement
Next, select datastream to collect data. We will choose Web
Now input your website URL (remember to select https if you are using SSL for your site)
Step 3: Get Google Analytics tracking ID
Normally, we will have to get the tracking code and manually insert it into <header> or <footer> of your website.
With Magento 2, we just need to get the tracking ID and put it into Magento 2 backend.
In this example, the Mesurement ID is G-BRMZH89MK9
Step 4: Install Google Analytics tracking code to Magento 2 website
We got Google Analytics tracking ID, now we will integrate this ID into Magento 2.
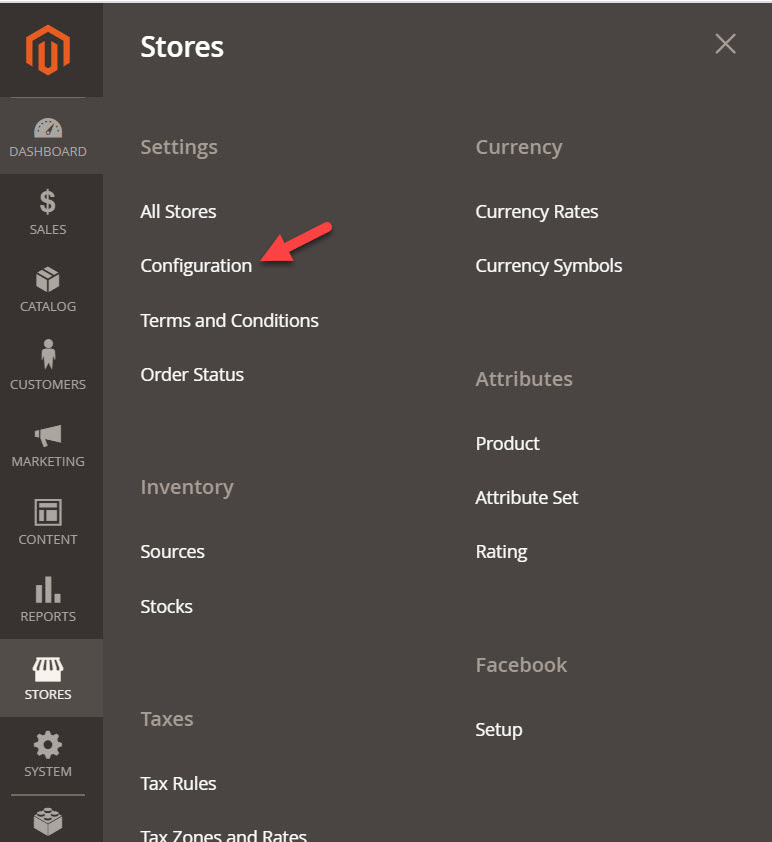
In Magento 2 backend, go to Store > Configuration
Next, go to Sales > Google API, deselect Use system value and insert the Google Analytics tracking code into Account number field
- Anonymize IP: Make users’ IP address anonymous (not stored in Google Analytics)
- Enable Content Experiment: For A/B testing purpose, learn more here and here
Finally, save changes by clicking on save config
You can follow this video if you find it’s hard to follow
Check if Google Analytics tracking code is properly installed
It’s time to check if Google Analytics tracking code is properly installed on our Magento 2 website.
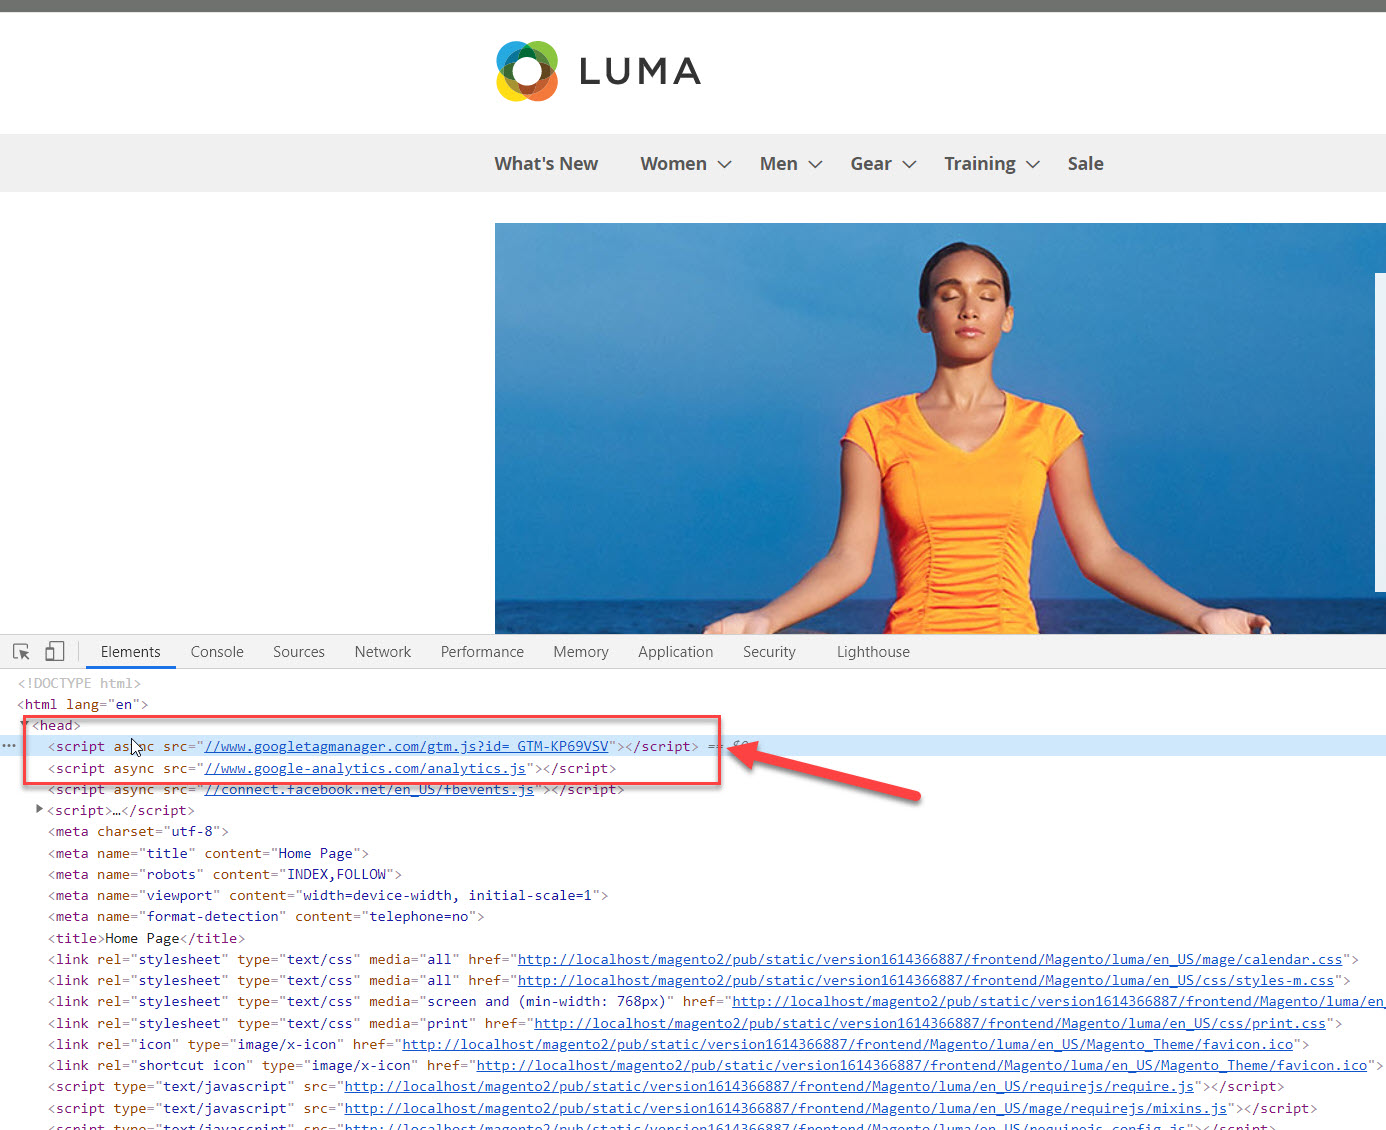
The quickest way to check is to use browsers’ developer mode.
Open your Magento 2 website and press F12 in Google Chrome to open Chrome Devtools.
If you see the line:
<script async="" src="//www.googletagmanager.com/gtm.js?id= GTM-KP69VSV"></script>
<script async="" src="//www.google-analytics.com/analytics.js"></script>
That means Google analytics was successfully installed
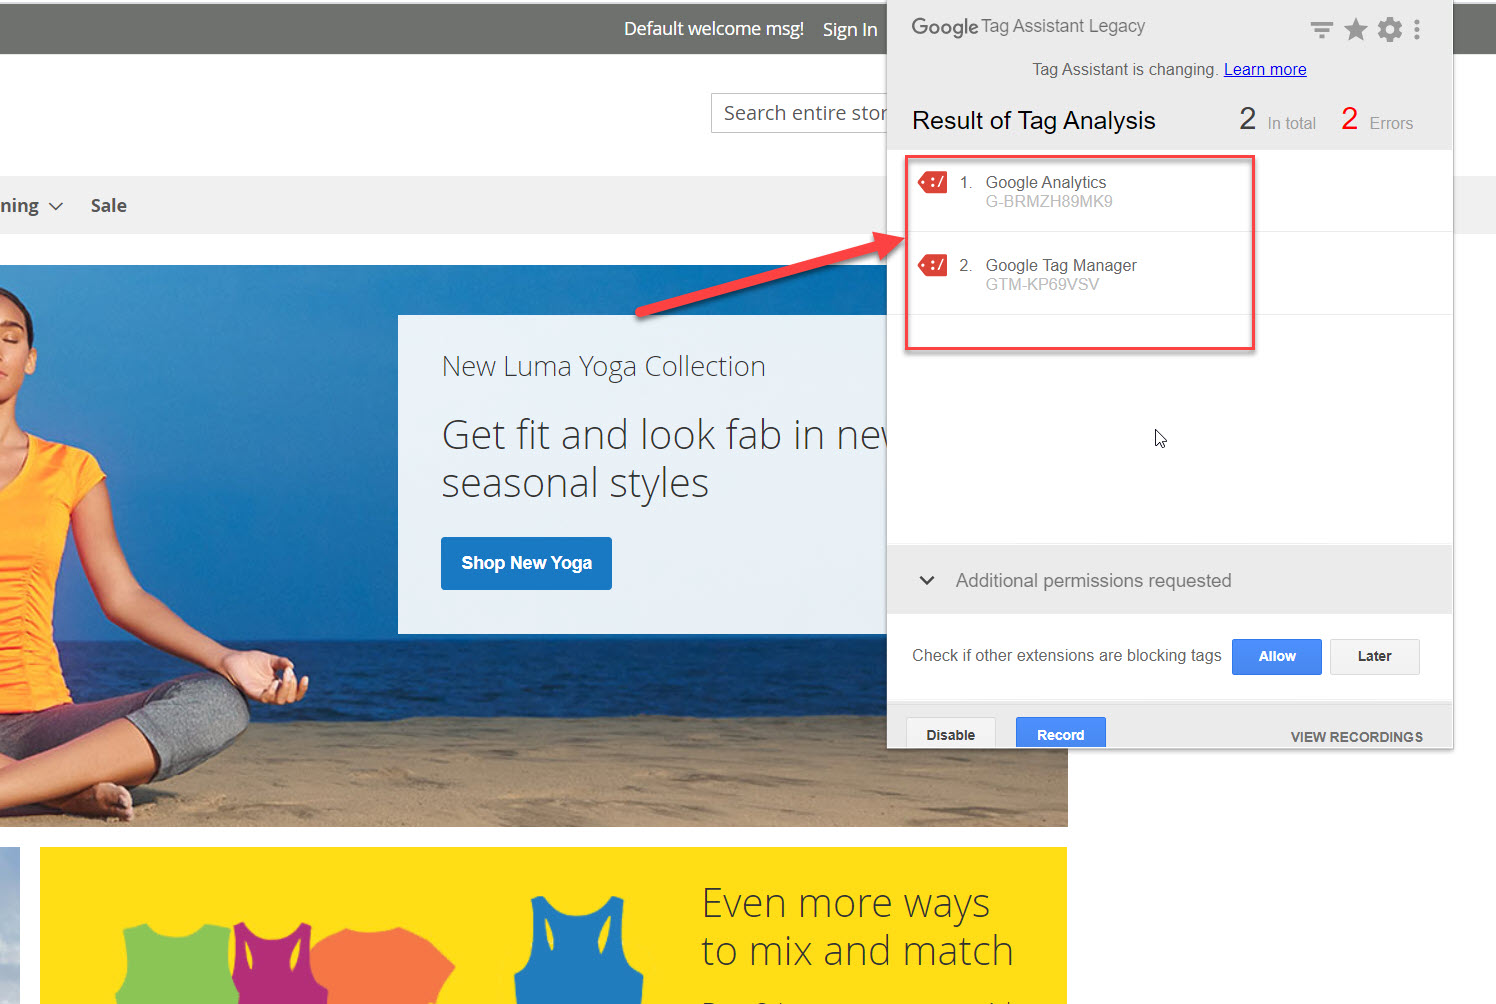
You can also check Google Analytics tracking code by install Google Tag Assistant, a chrome extension. Enable the extension and you can easily check if Analytics is installed properly
Now you can go to the Analytics dashboard and check visitors’ behaviors on your website.
Enable enhanced commerce tracking in Google Analytics for Magento 2
Google Analytics has been installed to your Magento 2 website, however Enhanced commerce tracking is not enabled. In this part, we will learn how to enable Enhanced commerce tracking so that you can track more e-commerce conversions on your store.
Note: If you don’t need deep e-Commerce tracking, you can skip this step
What is Enhanced commece
A mandatory requirement in the management of an e-commerce website like Magento 2 is to track the conversion efficiency from traffic sources, by revenue, selling products, …
That is a must-have requirement when you build a sales website, Google has built a set of standards needed to track the performance of the website through Enhanced Ecommerce Analytics, and the website needs to integrate this feature to help evaluate the business performance better for Online business people.
This feature will help the store owners decide to invest more in conversion channel and efficiency as well as consider continuing to sell or stop selling a product to optimize online business.
How to enable commerce tracking in Magento 2
The implementation of enhanced commerce tracking in Magento 2 is very complicated and takes a lot of work and experiments. If you want to manually install enhanced commerce tracking for Magento 2, take a look at this document
In this tutorial, I will guide you an easy way to integrate enhanced commerce tracking in Magento 2 using a free Magento 2 extension. You just need to install the extension and enable enhanced commerce tracking in Google Analytics. The extension will do all the hard work like inserting e-commerce tag for you.
Step 1: Install Wetpixel Magento 2 Google Analytics Enhanced Ecommerce
>Download link: https://www.weltpixel.com/google-analytics-enhanced-ecommerce-tag-manager-magento-2.html
After you purchase the free version, go to my account > downloadable product, enter your store domain to generate a license, and download the module’s file.
The free version of this plugin supports only installation via SSH but don’t worry it’s very easy to install this plugin. (Refer to this tutorial if you want to learn all possible ways to install a Magento extension)
Unzip the extension’s package and you will see several folders. Choose the folder that is corresponding with your current Magento 2 version.
With my site, the version of Magento 2 is 2.4 so I will use file in Extension Files Magento 2.4.x folder. If you don’t know your Magento 2 version, read this tutorial to learn how to check Magento 2 version
Next, create WeltPixel folder in app/code/WeltPixel and copy the extension files to below paths of your magento 2 instance.
- app/code/WeltPixel/Backend
- app/code/WeltPixel/GoogleTagManager
Now connect your server using ssh connect and run the following command to install this extension
php bin/magento module:enable WeltPixel_Backend --clear-static-content
php bin/magento module:enable WeltPixel_GoogleTagManager --clear-static-content
php bin/magento setup:upgrade
Sample output
Finally flush cache to enable the extension.
Step 2: Configure the extension to enable enhanced commerce
Now go to admin dashboard and you will see the extension installed in WeltPixel > Google Analytics Enhanced Ecommerce
To use this extension, we will need to disable Magento 2’s built-in Analytics and Adwords tracking
- Go to Admin > Store > Configuration > Sales > Google API > Google Analytics > and set this option to [ No ].
- Go to Admin > Store > Configuration > Sales > Google API > Google Adwords > and set this option to [ No ].
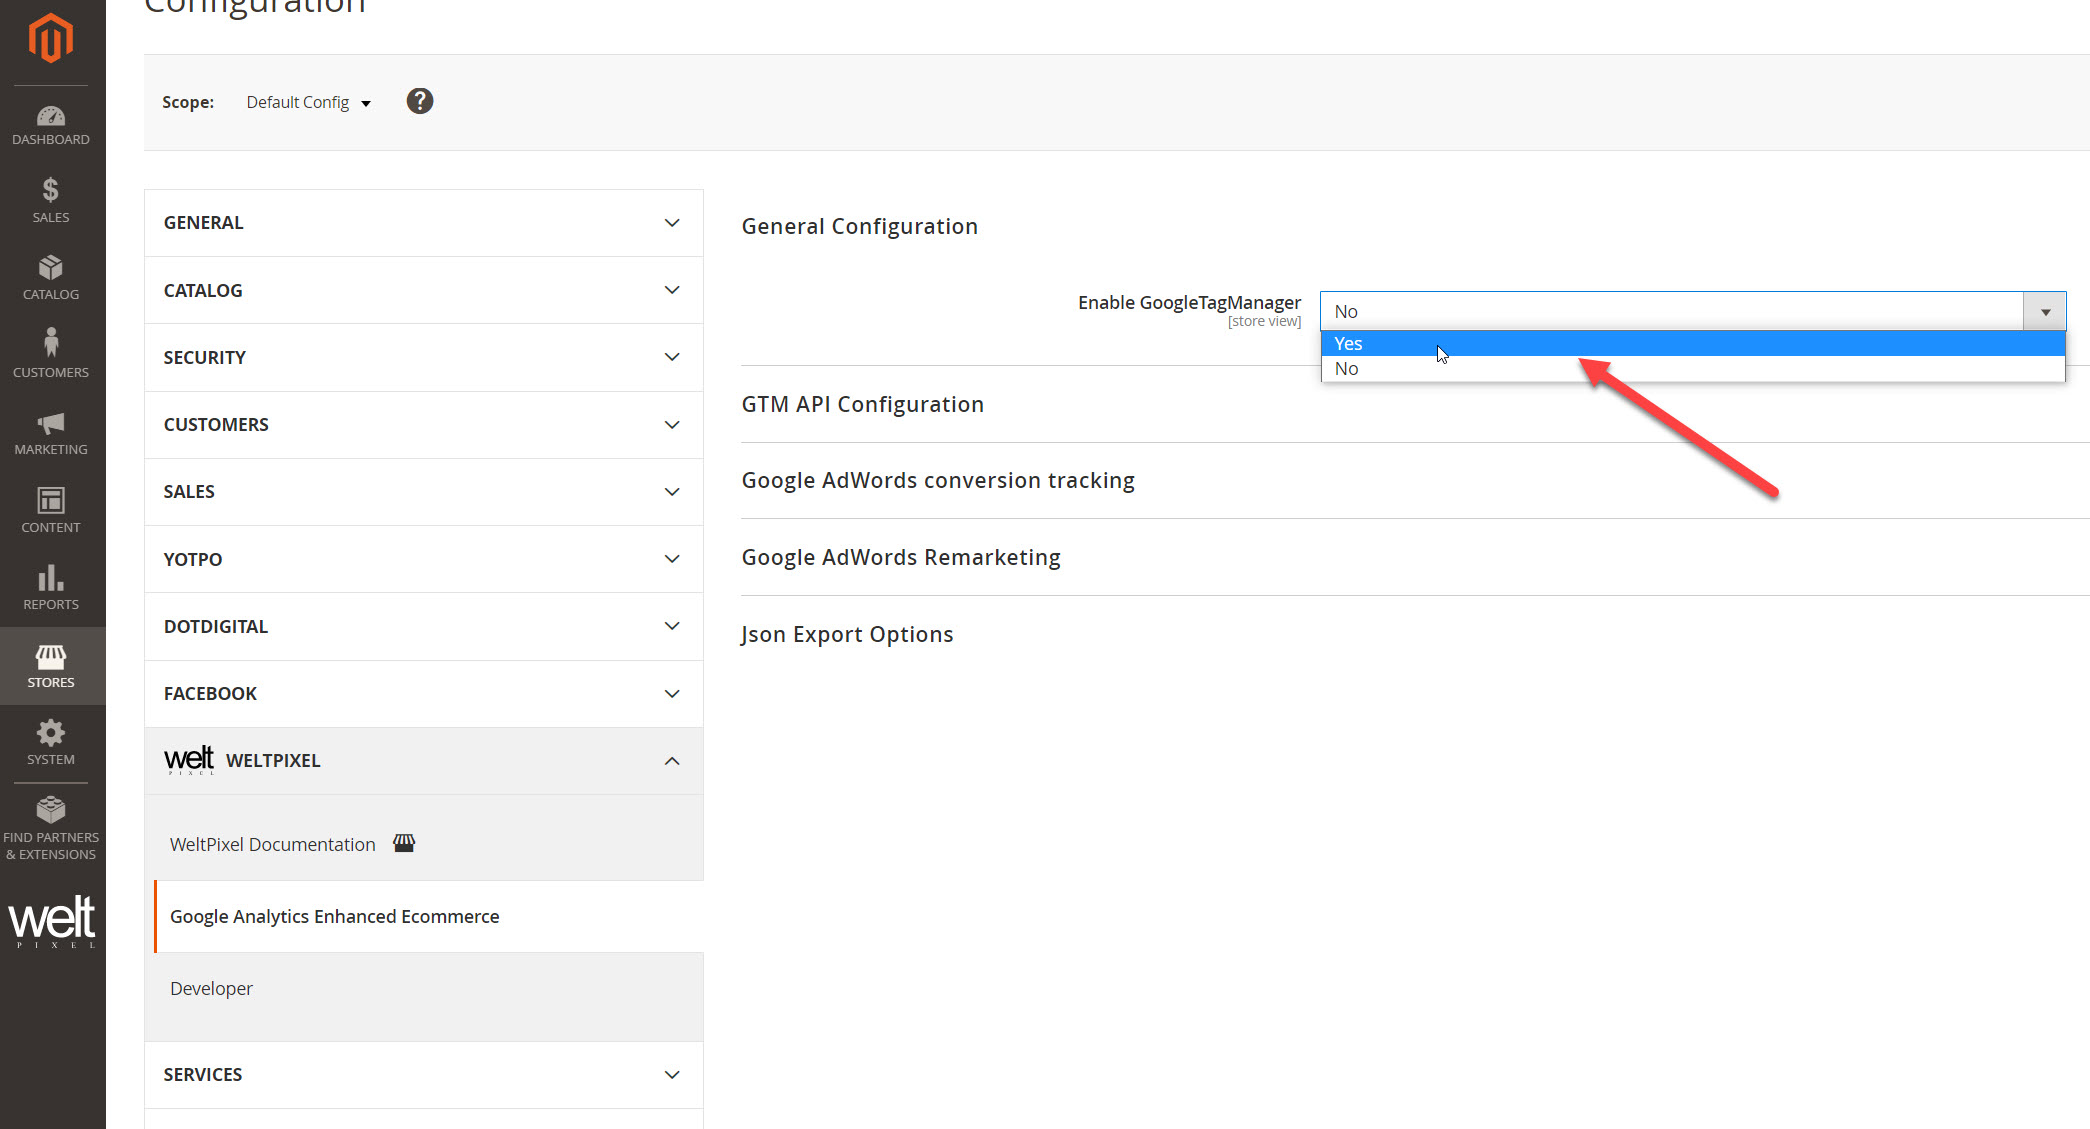
- Go to WeltPixel > Google Analytics Enhanced Ecommerce > General Configuration > Enable Google Tag Manager and set this option to [ Yes ].
Next, add your Google Tag Manager tracking code to the plugin (including Javascript Code and Non-Js Code)
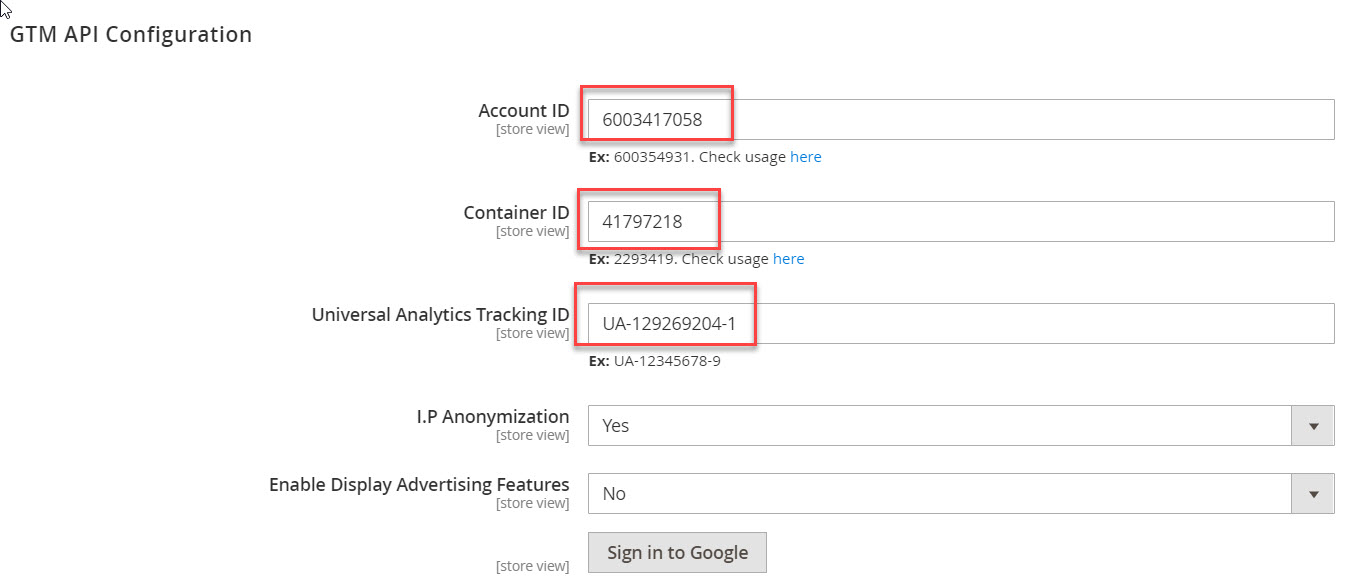
Next, add GTM API Configuration with the following fields
- Account ID
- Container ID
- Universal Analytics Tracking ID
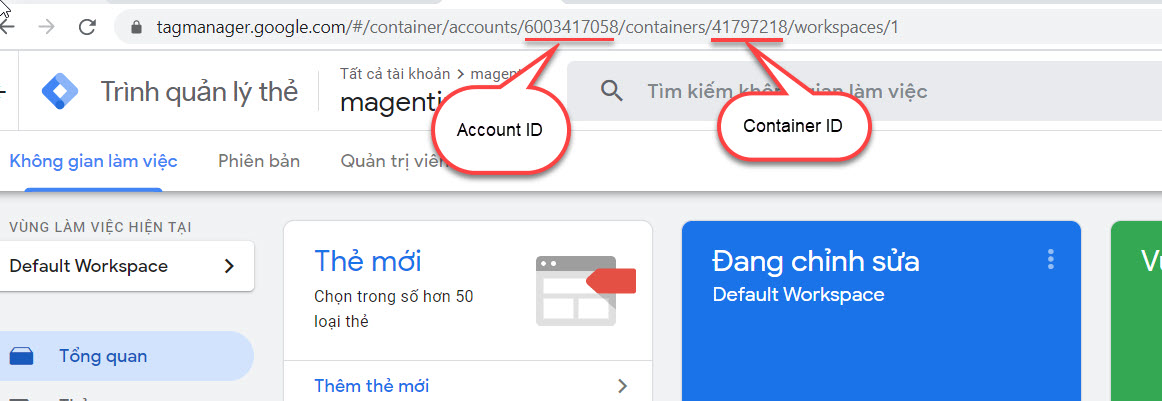
You can get Account ID and Container ID from your tag manager account
And Universal Analytics Tracking ID from your Analytics account
Now go to WeltPixel > Google Analytics Enhanced Ecommerce > Json Export Options to generate Json for Variables, Triggers and Tags.
After generating json file, download it and we will import this file to Google Tag manager to enable Variables, Triggers and Tags created by the plugin
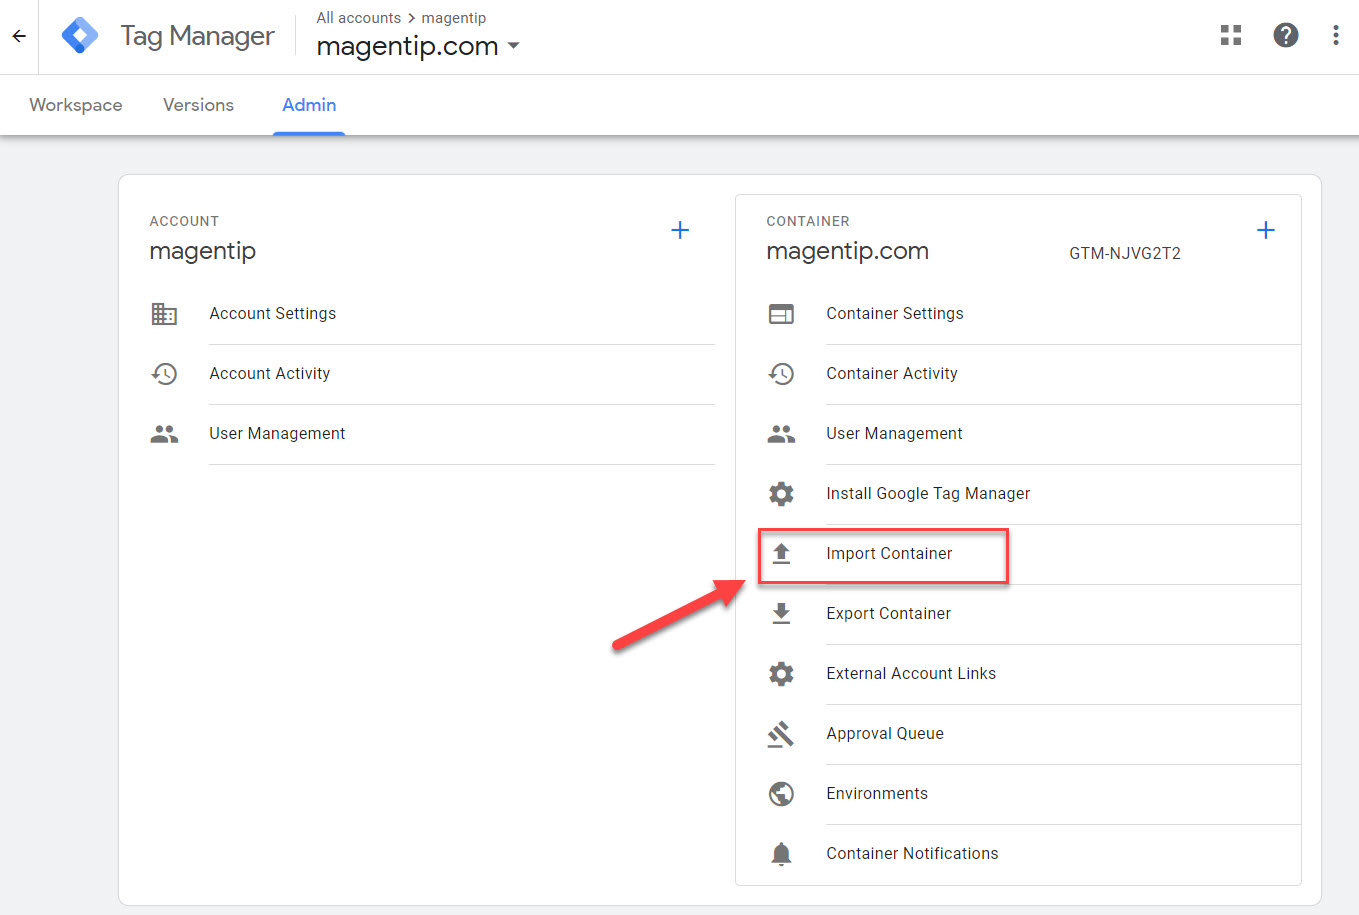
In Google Tag manager dashboard, go to Admin > Import container
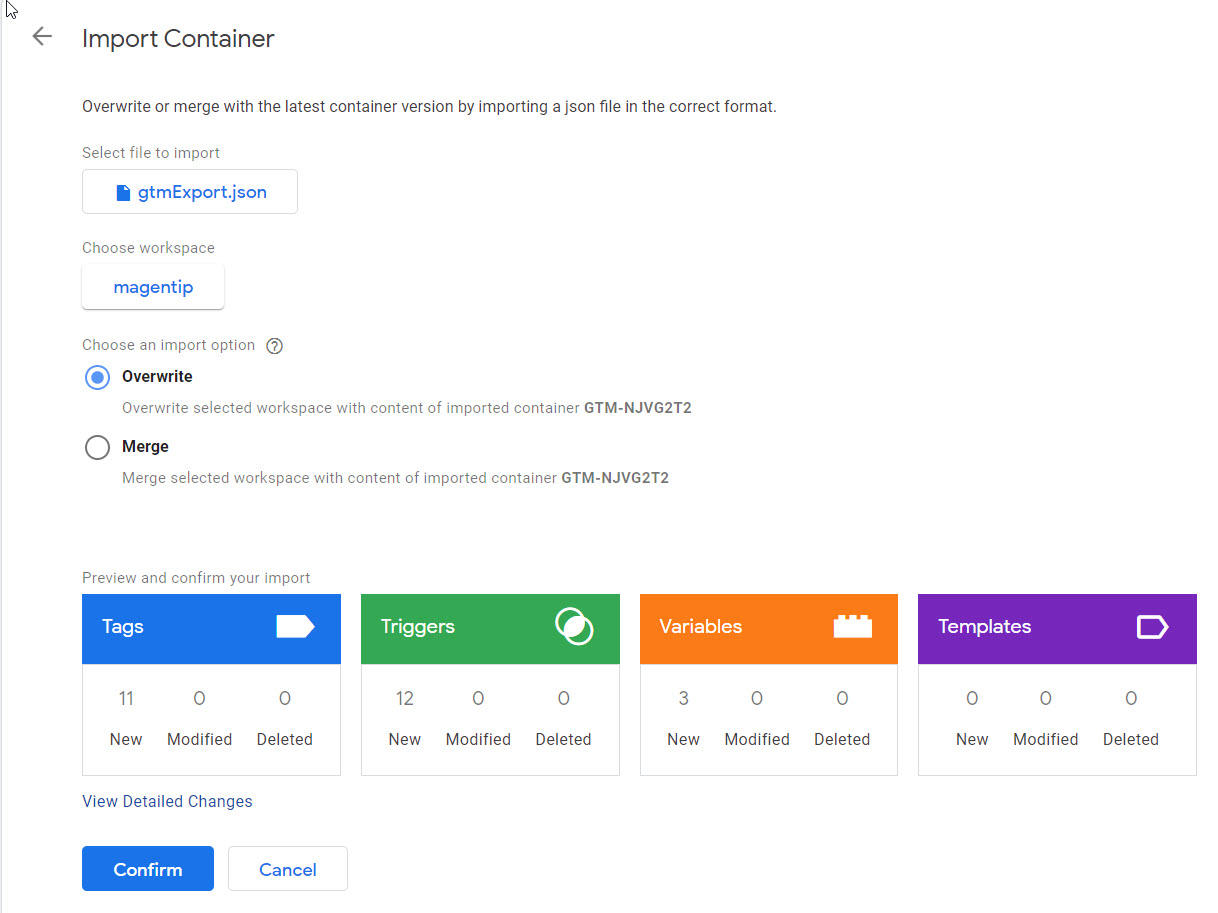
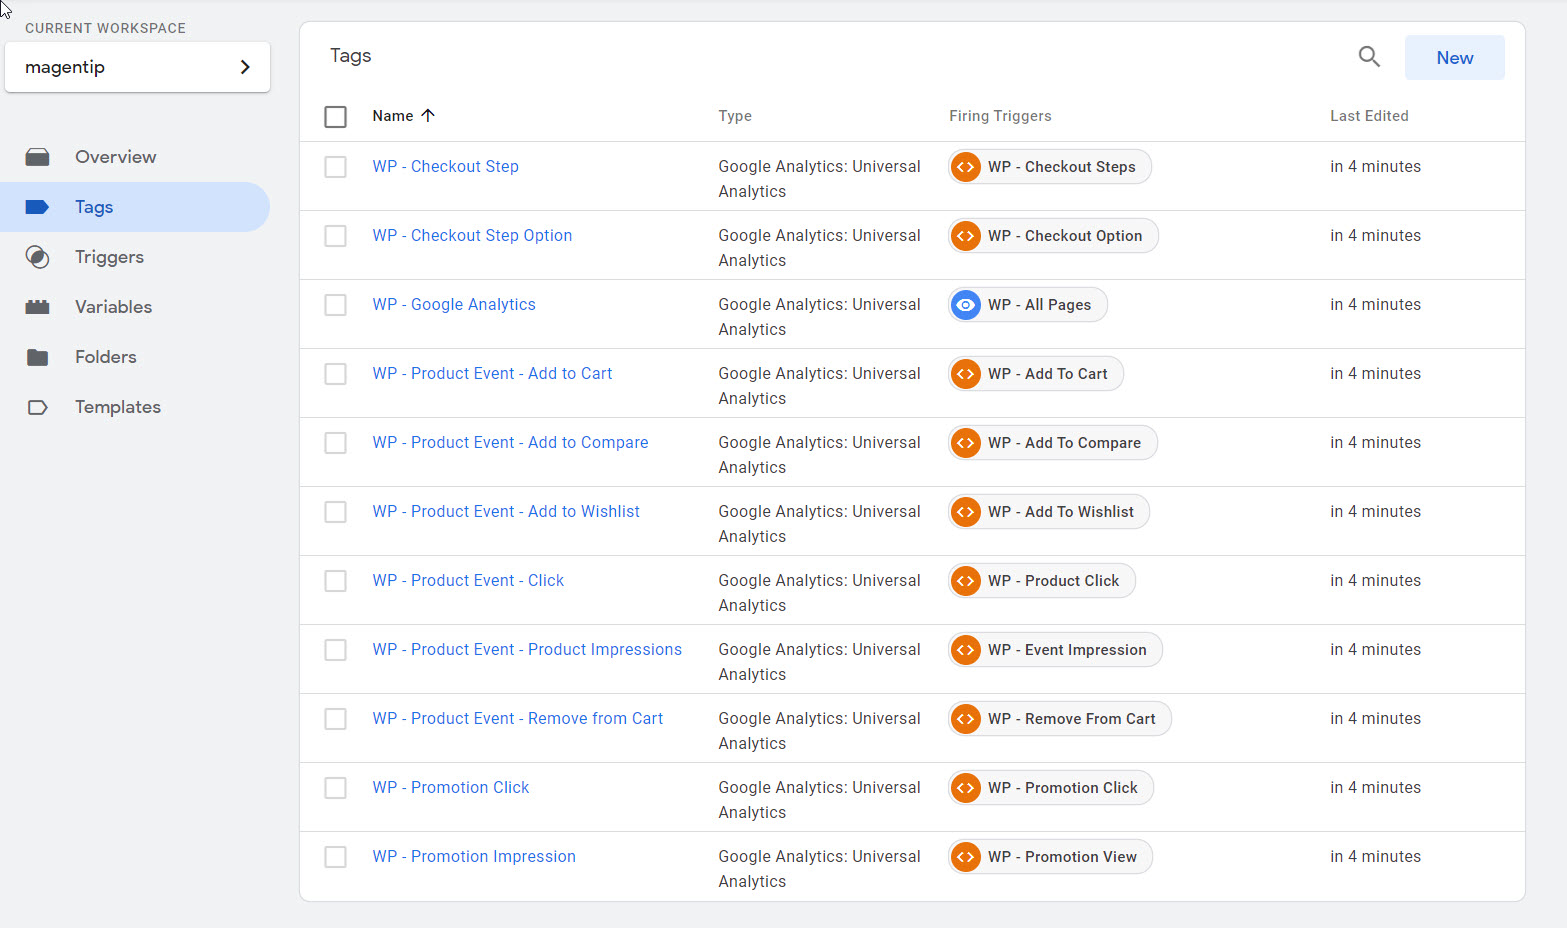
Select the Json file you just created and import it. You will see 11 new tags, 12 new triggers and 3 new variables the plugin created for our Magento 2 store.
Now let’s check the newly imported tags.
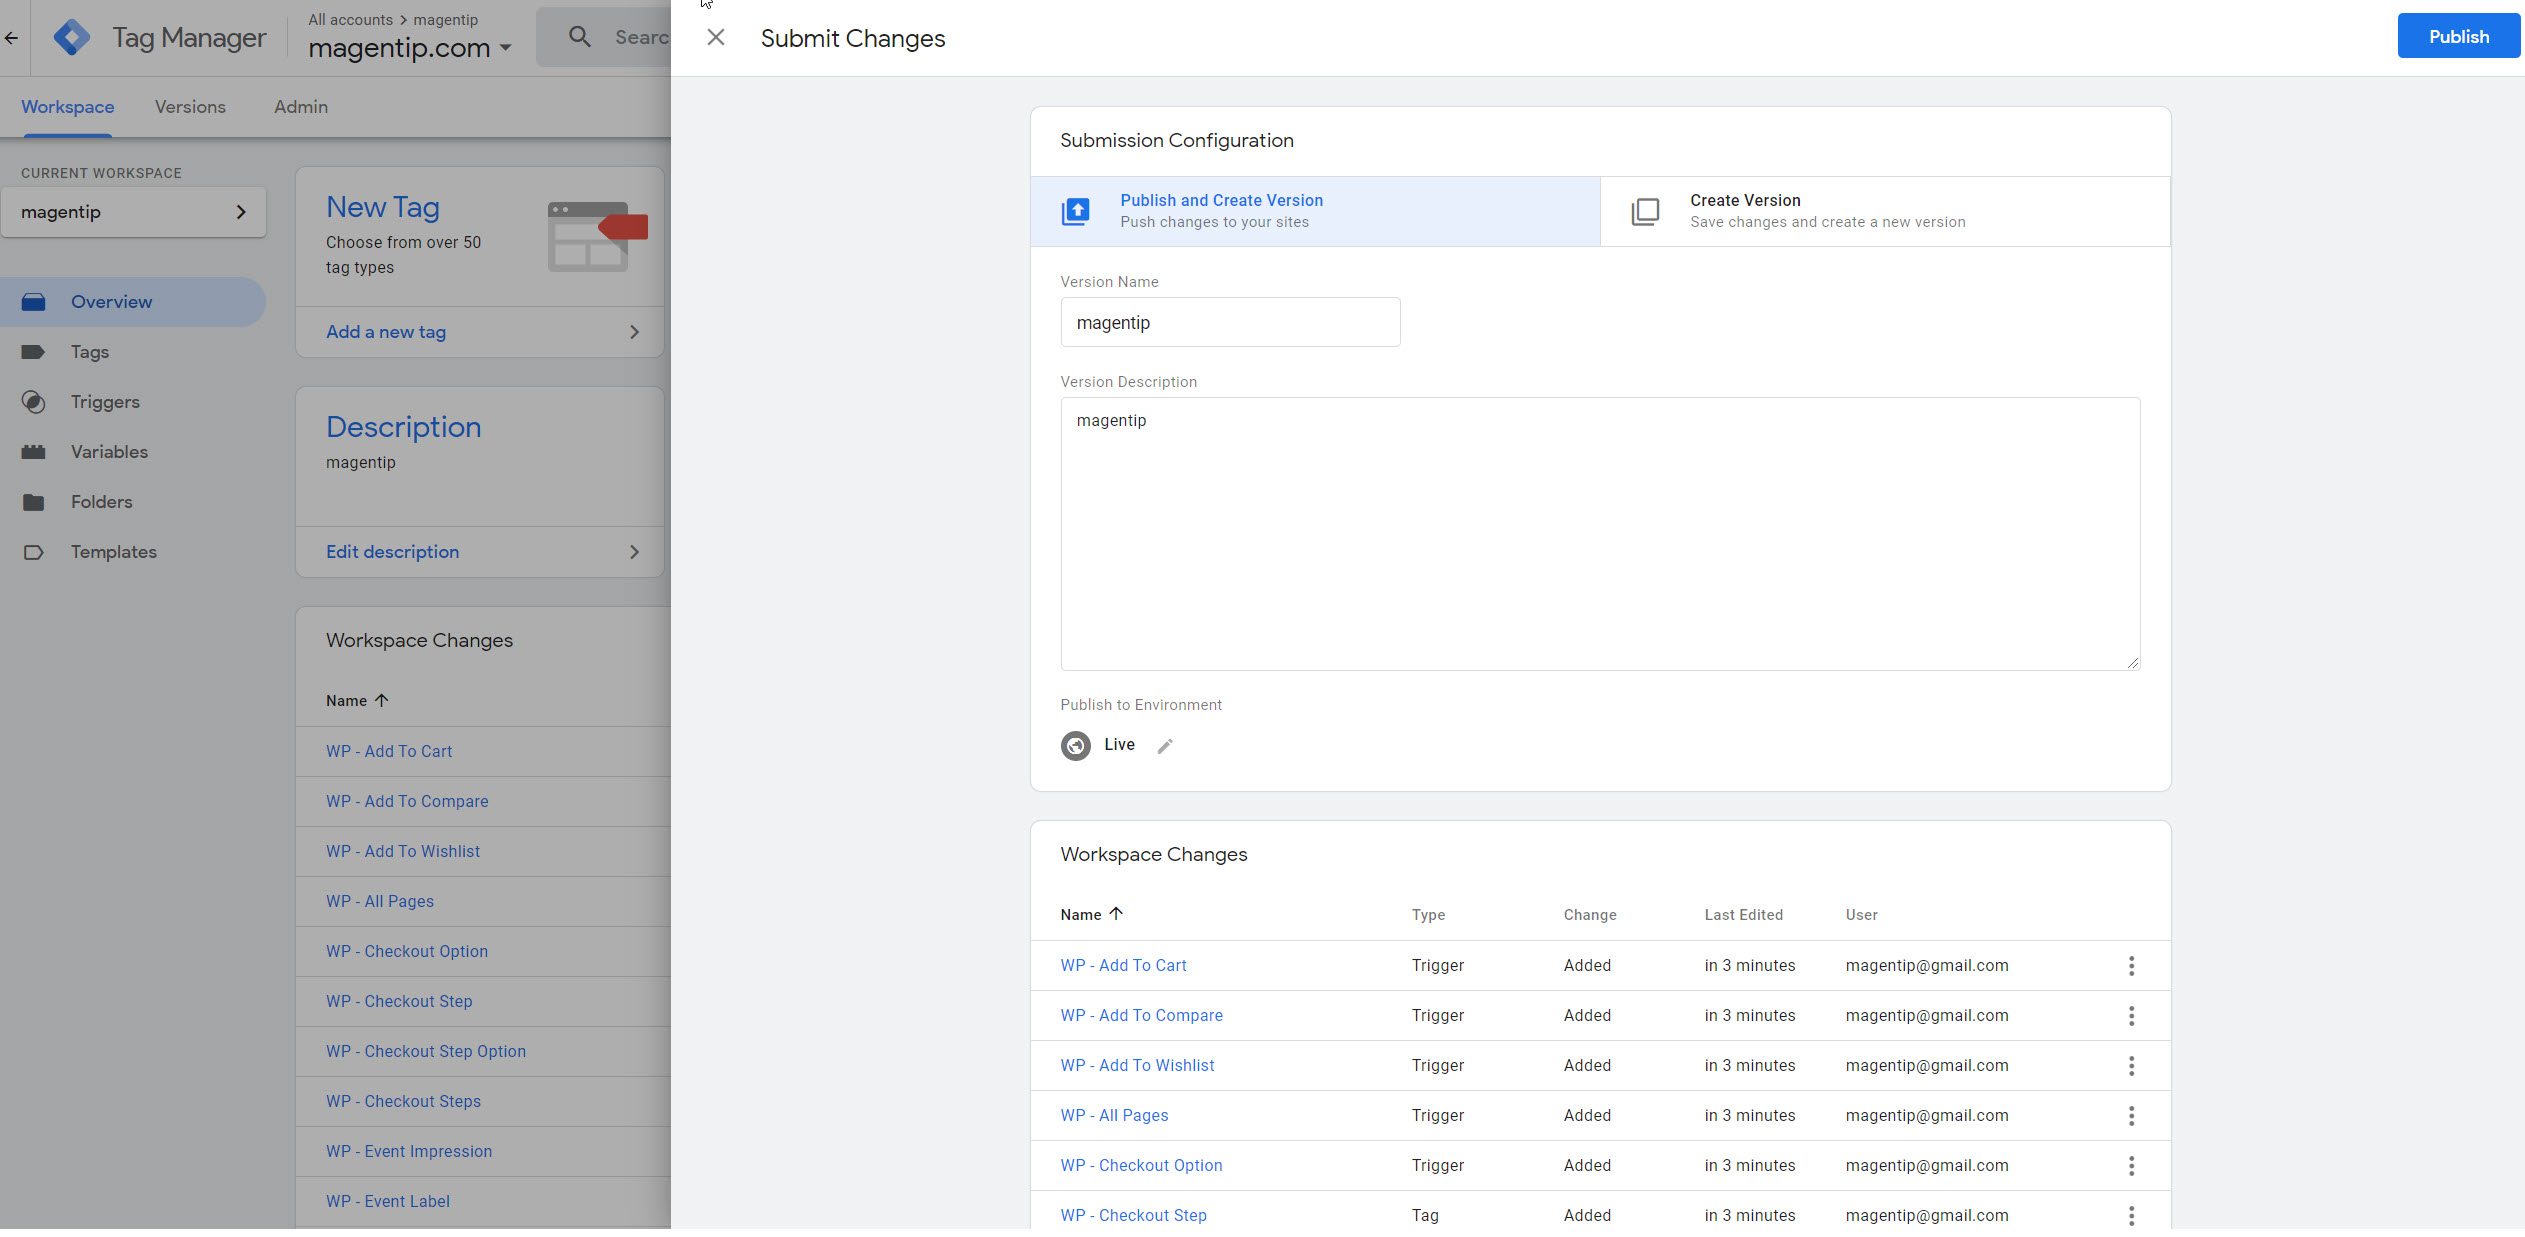
Finally, hit submit button to publish all the changes to finish deploying enhanced commerce for Magento 2
Now all tags and triggers, variables are live!
Step 3: Enable Enhanced commerce in Google Analytics
The last step is to enable enhanced commerce in Google Analytics.
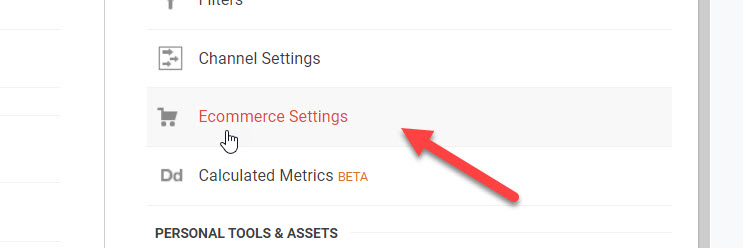
In Google Analytics, go to your property and select Admin > Ecommerce setting
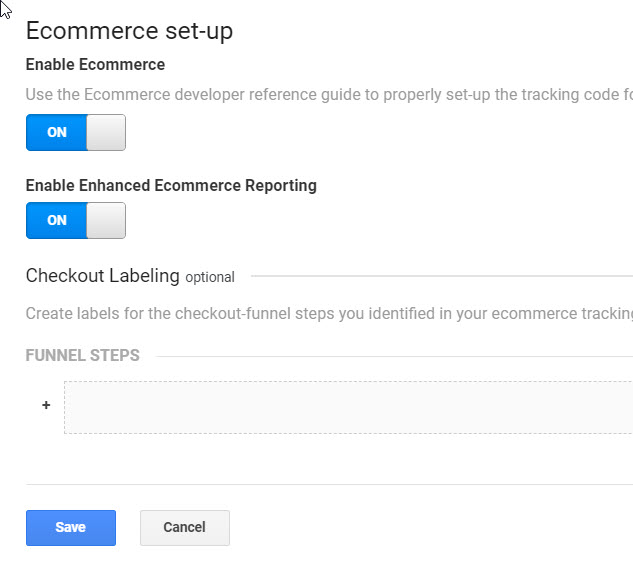
Enable both Ecommerce and Enhanced Ecommerce Reporting and click save
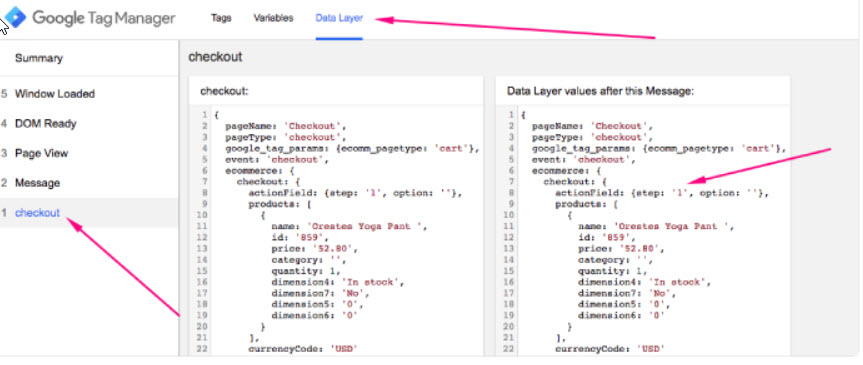
- Step 1: Shipping
- Step 2: Shipping Method
- Step 3: Payment and Billing
If you are using Magento 2 extension like One Step Checkout, you can skip this step
Now you have finished installing enhanced eCommerce tracking for your Magento 2 store. If you properly follow my steps, the tracked data will take from 30 minutes from 48 hours to show up on Google Analytics dashboard.
Wrapping up
We hope that this in-depth analysis article with detailed instructions on how to how to install Google Analytics tracking code and enable enhanced commerce tracking in Google Analytics for Magento 2 will help millions of Magento 2 users to take advantage of Google Analytics to improve your business
If you have any problem during the implementation of Google Analytics or enhanced commerce, feel free to drop a comment below and I will get back to you very soon.

