
One benefit of using Open source software is that users can add many features to their website using custom extensions. With Magento 2, there are tons of useful extensions that allow users to add new features to a Magento 2 website.
Install a Magento 2 extension should be an easy task for experienced users, but not for new users. Many of you may be familiar with WordPress and know that it’s quite simple to install a new WordPress plugin.
Magento 2 is also an opensource platform, however, it’s not easy to install Magento 2 extension like how we install WordPress plugins.
This tutorial will show you 3 different ways to install Magento 2 extensions.
- Install Magento 2 extension using composer
- Install Magento 2 extension manually (using extension package files)
- Install Magento 2 extension using web setup wizard in Magento 2 admin panel
Each method has its own pros and cons, just use the method that works best for you.
Contents
What is Magento 2 extension
An extension is a small extension that is individually programmed based on Magento 2’s APIs and built-in functions to create a feature that Magento 2 doesn’t have by default. In a nutshell, an extension is a module that adds a certain function that you can install in Magento 2.
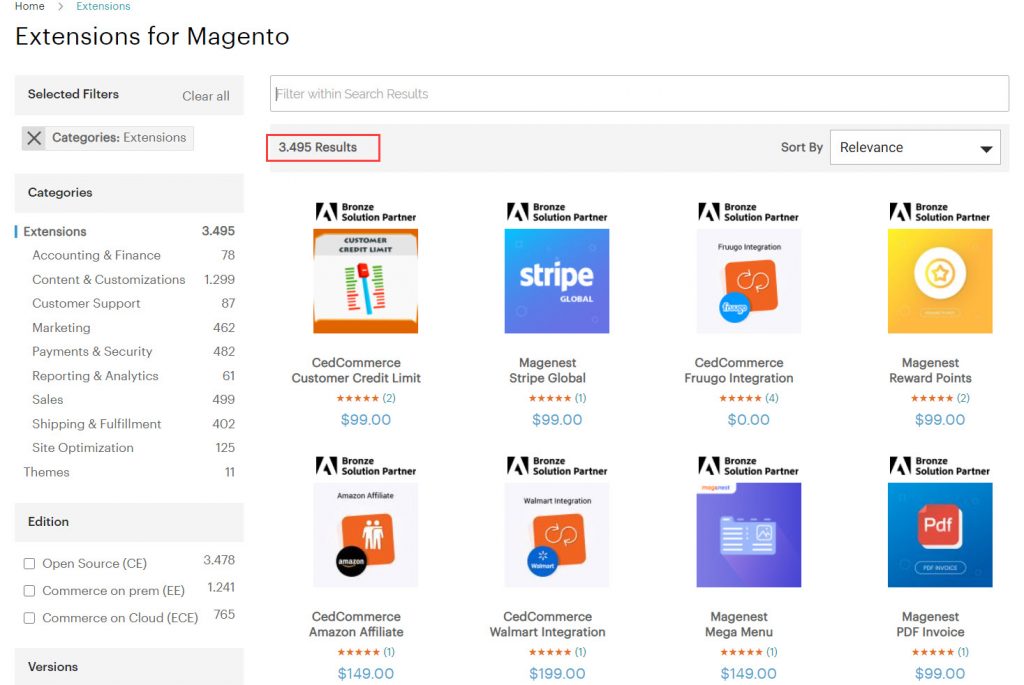
Currently, the number of extensions for Magento 2 can be said to be uncountable. On Magento 2 extension marketplace, there are thousands of extensions (3495 extensions at the moment) serving different purposes. Extensions are categorized into many categories based on their function.
Besides the official Magento 2 marketplace, there are also many extensions selling developed by different Magento 2 extension providers. We call them as 3rd party extension providers. Some reputed extensions provider are: Aheadworks, Amasty, Mageplaza, Mirasvit

I have reviewed several good Magento 2 extension that should be bought for your store, you can refer to these article here:
- Top 5 Megamenu extensions
- Top 5 One step check out extensions
- Top 5 Affiliate extensions
Install Magento 2 extension via composer
Composer is a tool for dependency management in PHP. Composer will help users to install extensions package. More precisely, Composer manages dependencies on project resources. It allows declaring the libraries your project uses and composer will automatically load the library code.
Composer creates the necessary files into your project, and updates the libraries when a new version becomes available.
=> This means you can use Composer to install Magento 2 extension easily without accessing the file manager to upload Magento 2 extension code folders.
To install Magento 2 extensions using Composer, follow these steps.
Step 1: Connect to your Magento 2 server using SSH protocol, login with root user.
Step 2: Check if composer is installed by running a random composer command:
composer --help
If the output like this:
-bash: composer: command not found
=> Composer is not installed.
Install Composer using these lines:
curl -sS https://getcomposer.org/installer | php
mv composer.phar /usr/local/bin/composer
Run this to enable composer globally so that you won’t need to type php composer.phar every time you run Composer command.
mv composer.phar /usr/local/bin/composer
Step 3: Before installing new Magento 2 extension, follow this tutorial to Set Magento 2 to maintenance mode
Or just use this command to set Magento 2 to maintenance mode while we installing new extension to prevent system exploit by hackers
php bin/magento maintenance:enable
Step 4: Get the extension’s name and version
If you get extension from github, you can find extension name and version in description, or directly in composer.json file.
Here’s an example composer.json file from Mageplaza Magento 2 blog extension on Github:
https://github.com/mageplaza/magento-2-blog/blob/2.4/composer.json
In composer.json, look for these lines:
{
"name": "mageplaza/magento-2-blog-extension",
"description": "Magento 2 Blog extension",
"require": {
"mageplaza/module-core": "^1.4.5"
},
"type": "magento2-module",
"version": "4.0.0",
"license": "proprietary",
- Extension composer name: mageplaza/magento-2-blog-extension
- Extension version: 4.0.0
Step 5: Install extension using Composer
The syntax to install Magento 2 extension on composer is:
composer require <extension-name>:<extension-version>
With the name and version we retrive in step 4, now run the following command to install this extension
composer require mageplaza/magento-2-blog-extension:4.0.0
Now composer will ask for Magento 2 access keys. Access keys include 2 keys: Public key (username) and private key (password)

You can get these keys by creating a free account at magento.com and go to Access key page.
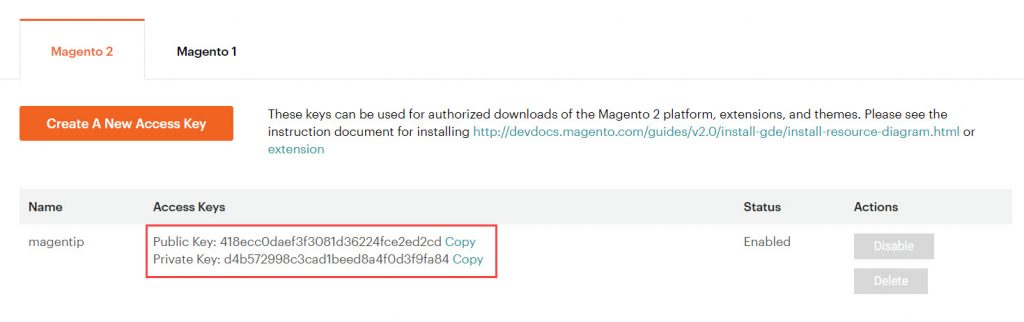
My access keys, in this example, are:
Public Key: 418ecc0daef3f3081d36224fce2ed2cd
Private Key: d4b572998c3cad1beed8a4f0d3f9fa84
If you are too lazy to create a new account at Magento website, then just feel free to use my access keys 🙂
If the installation is succeeded, the following message will be displayed
Updating dependencies (including require-dev)
Package operations: 1 install, 0 updates, 0 removals
- Installing mageplaza/magento-2-blog-extension (4.0.0): Downloading (100%)
Writing lock file
Generating autoload files
Step 6: Enable extension
This syntax is used to enable Magento 2 extension
php bin/magento module:enable <Extension-name>
For example, we will enable Mageplaza free blog extension with the following command:
php bin/magento module:enable magento-2-blog-extension --clear-static-content
Sample output:
The following modules have been enabled:
- magento-2-blog-extension

To make sure that the enabled modules are properly registered, run 'setup:upgrade'.
Cache cleared successfully.
Generated classes cleared successfully. Please run the 'setup:di:compile' command to generate classes.
Generated static view files cleared successfully.
Check if the extension is enabled
bin/magento module:status magento-2-blog-extension
Sample output:
Module is enabled
Step 7: Clear cache and deploy static content
Upgrade Magento 2 dabase
php bin/magento setup:upgrade
If you are not in developer mode, run this command to recompile code.
php bin/magento setup:di:compile
Clear cache to make the extension display properly
php bin/magento cache:clean
and flush cache
bin/magento cache:flush
Finally, deploy static view files to make the plugin work properly on frontend
php bin/magento setup:static-content:deploy
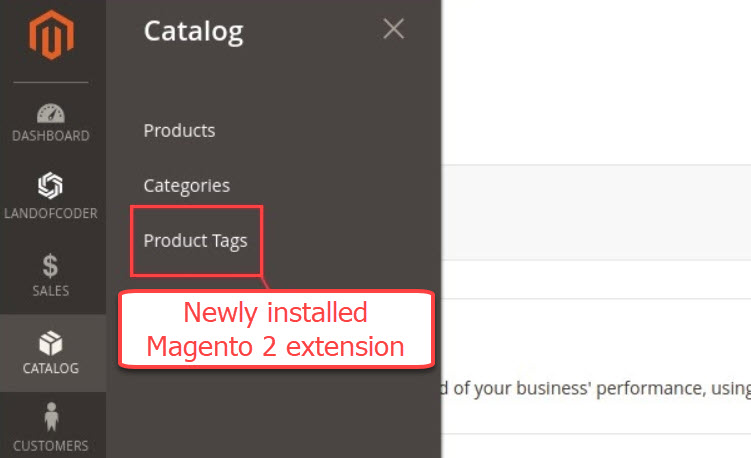
If you have done every step precisely, you will see the newly install Magento 2 extension in admin panel
Install Magento 2 extension manually from .zip file
If you purchase an Magento 2 extension from an extension provider, you will probably receive an extension package file (normally contains .app folder)
Here is how to install Magento 2 extension from a package file.
Step 1: First, download the extension package file. You can download extension package files from My downloadable product section if you purchased from 3rd party extension provider.
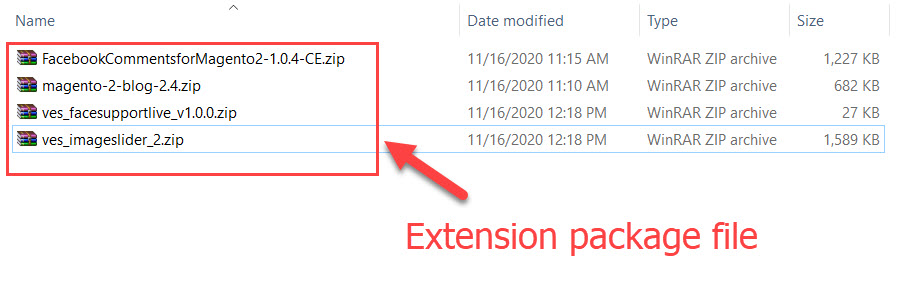
Step 2: Next, unzip the extension package file, you will see the app/code folder.

Now connect to your server using SSH protocol (you can use software like Bitvise, Putty to establish ssh connection) and upload that app folder to your Magento 2 installation folder
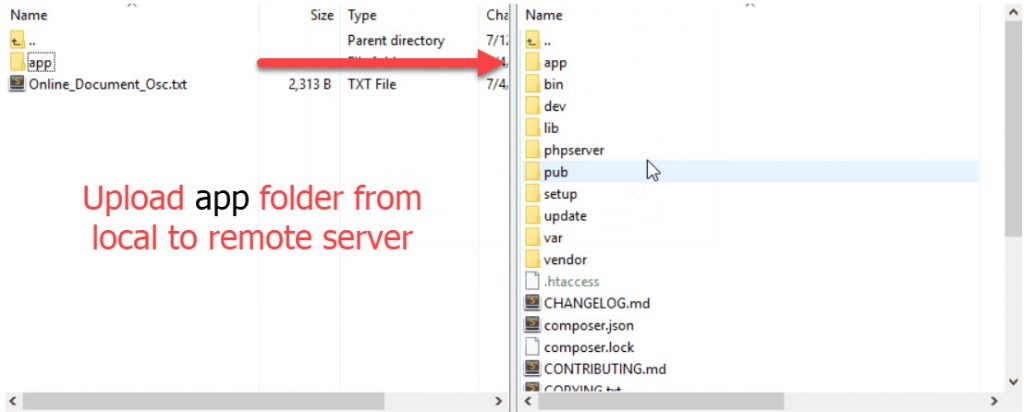
Remember to choose not to overwrite if asked while uploading. This option will prevent overwriting Magento 2 core files that may lead to unexpected errors.
Step 3: After the upload process is done, run the following command in ssh terminal:
Update Magento 2 database
php bin/magento setup:upgrade
Deloy static view files
php bin/magento setup:static-content:deploy
Recompile code:
php bin/magento setup:di:compile
Reindex Magento 2
php bin/magento indexer:reindex
Clean cache:
php bin/magento cache:clean
Now refresh your website and the new extension should be found in the admin dashboard.
Install Magento 2 extension via web setup wizard
For those who want to install Magento 2 extension directly in admin dashboard (like the way we install WordPress plugin), you can use Magento 2 web setup wizard function.
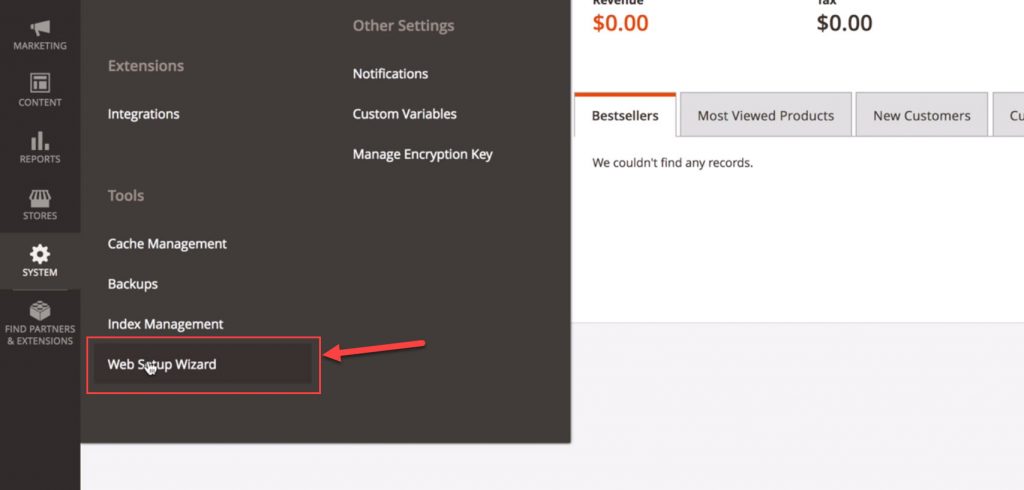
Step 1: In admin dashboard, go to System > Web setup wizard
Step 2: Log into your Magento 2 marketplace account
Click on System Configuration and sign in using your Magento 2 marketplace account.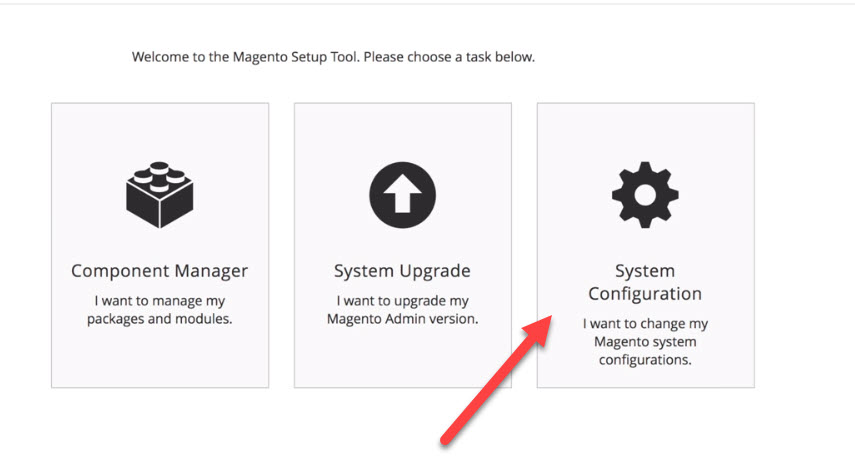
Now enter public access key and private access key you retrieve from your Magento market place account.
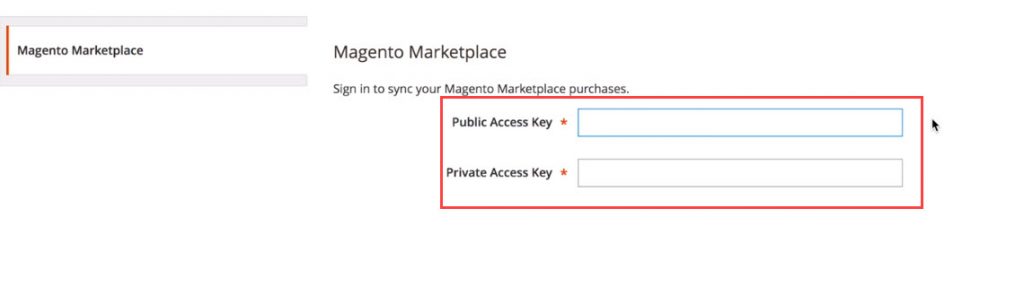
You can get access keys in Access Key section on Marketplace account page: https://marketplace.magento.com/customer/accessKeys/
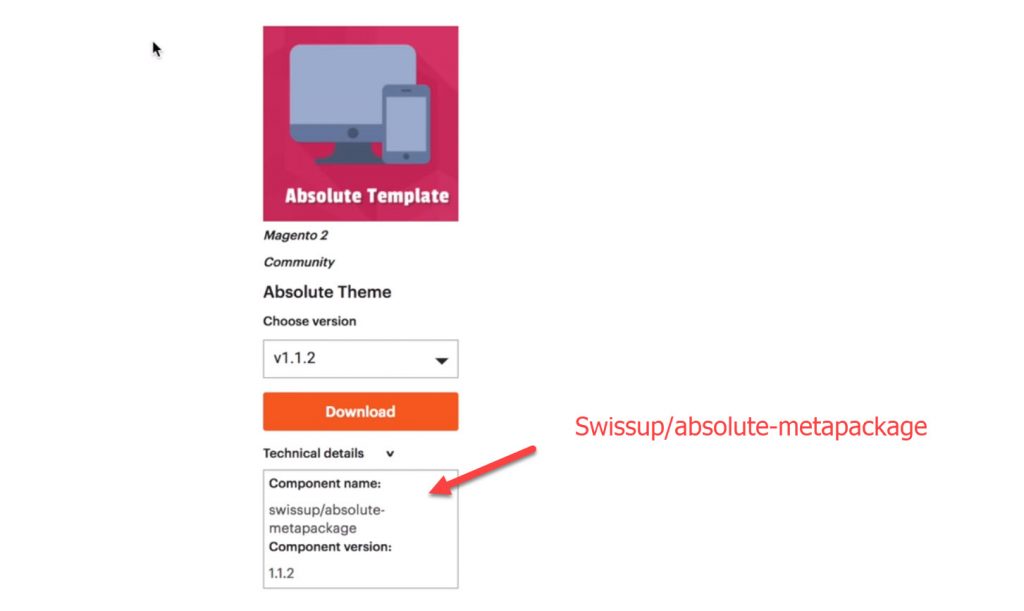
After you logged in, Magento 2 will sync purchased items from Marketplace account with your website. For more detail about this part, take a look at my tutorial on how to install a Magento 2 theme from Marketplace
Now go to component manager section

Click on install, the new page Extension Grid will display all item on your marketplace account
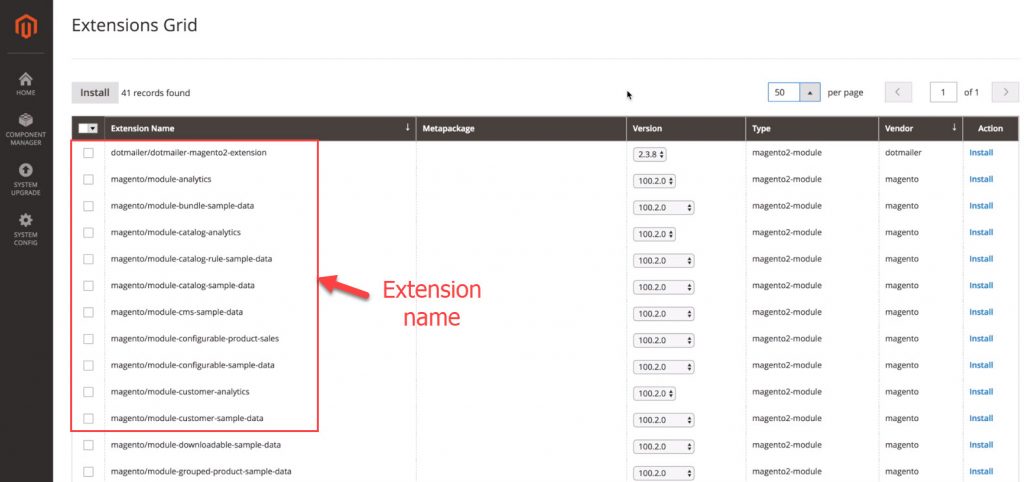
There maybe a lot of extensions here, if you are not sure what the extension you want to install is, just go to marketplace account and double check package name
After you are done checking, select the extensions you want to install to your website and click on install.
Now Magento 2 will bring you to readiness check page to check if your system is ready to install the selected Magento 2 extensions
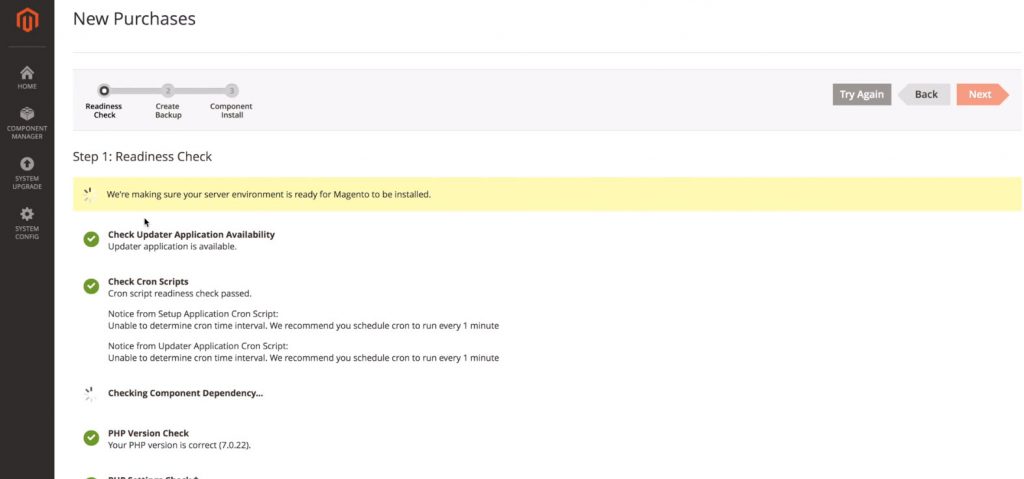
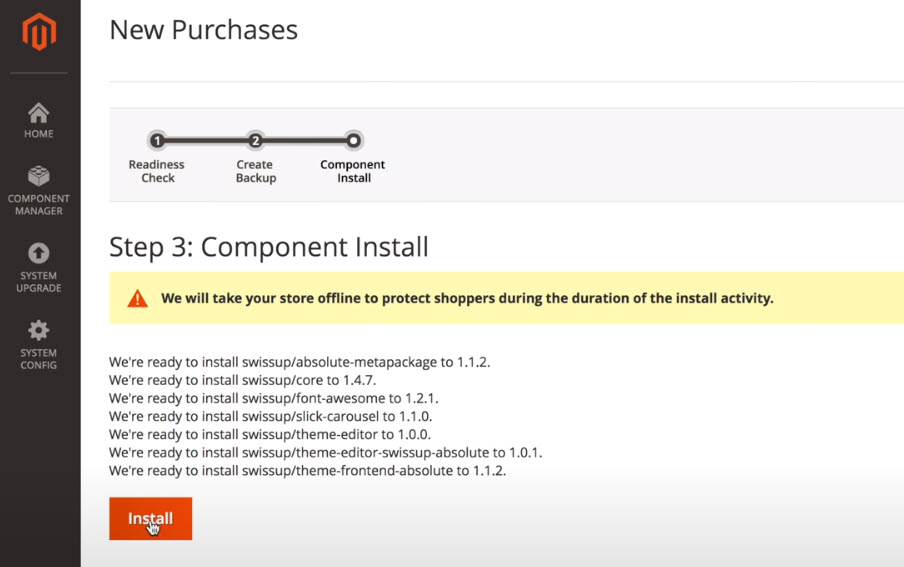
Proceed all steps and your Magento 2 extensions will be ready to be installed. (Magento 2 will automatically change your store to maintenance mode during the installation process)
You will see this page if there’s no problem during installation process
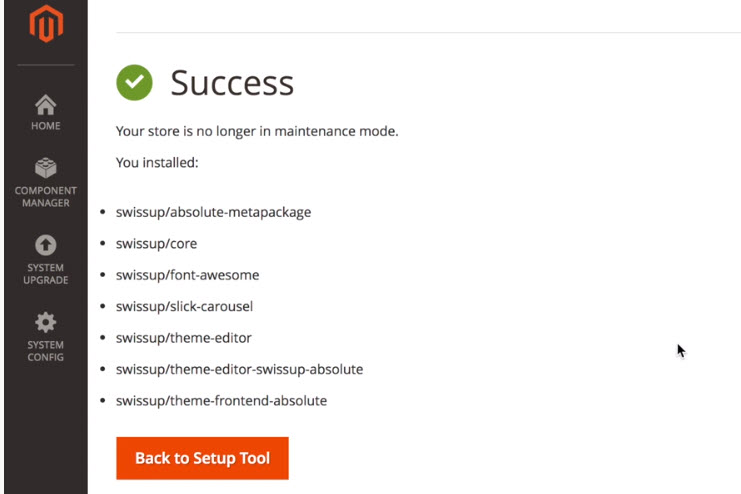
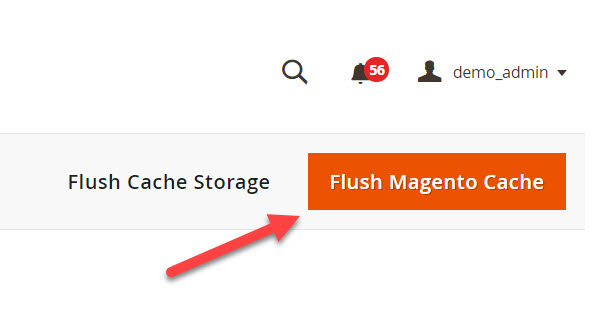
Finally, flush cache in System > tool > cache management and there you go, your new extension is ready to use!
Note: If you don’t see Web Setup Wizard option in System, re-enable by making this change in virtual host file of your server.
In virtual host file (apache) stripe the /pub in document root
<VirtualHost *:80>
    DocumentRoot /var/www/html/mymagento2website.com/pub
    ServerName mymagento2website.com
    ServerAlias *.mymagento2website.com
</VirtualHost>
The virtual host file should be like this after we commit changes
<VirtualHost *:80>
    DocumentRoot /var/www/html/mymagento2website.com/
    ServerName mymagento2website.com
    ServerAlias *.mymagento2website.com
</VirtualHost>
Save changes and restart web server to apply change
service apache2 restart
If you find it hard to follow, take a look at this Video tutorial by Max Pronko.
Wrapping up
There’re numerous useful extensions for Magento 2 out there but remember not to install too many redundant extensions to your store because it may cause slow performance.
Another thing to take into account is that you should not install too many extensions from different extension providers due to extension conflict. Extensions from different providers do not have the same code structure or quality standard, which may result in not functioning properly when being used together.
Also, make sure your Magento 2 server or hosting has enough resources to handle the new extensions or the store will become very slow. Check this article to pick a good Magento 2 hosting for your business.
I hope you find this tutorial helpful and if you have any trouble during Magento 2 extension installation, feel free to drop a comment below. I will be happy to help at my best.
 with Elasticsearch")
")

2 Comments
Good explanation about Magento Extensions, Did you know about SunCart Store?SunCart, A Product-based Modern E-Commerce Platform for All the needs of E-Commerce merchants and Enterprise Businesses. SunCart extends your shoppable experience to the next level, including the best feature-rich technology products, solutions, and platforms. Explore our products at https://www.suncartstore.com/ and email us products@sunarctechnologies.com“.
I have read your blog on Why Your Website Needs To Be Mobile-optimized.It was very informative & helpful for new beginners and new people but I have some points to share with you and other people.Here are the steps to work with extensions in Magento:
1.Choose the Extension
2.Download and Install the Extension
3.Magento Marketplace
4.Composer
5.Manual installation
These are some of the extra points I thought to include in your article.