
There will be times when you want to prevent access to your Magento 2 website for a specific reason. For example, you want to maintain the website, fixing some error or upgrading Magento 2 version, installing new Magento 2 extensions or theme …
This is when you should change Magento 2 to Maintenance Mode. When maintenance mode is ON, visitors will not be able to access your website to perform any action like making purchases, reading articles… Besides that, when maintenance mode is on, you will not be worried about system exploit when making changes to code.
There is no option to put Magento 2 in maintenance mode via admin backend, however, we can easily turn on Maintenance Mode for Magento 2 using 2 methods in this tutorial.
I will also guide you on how to put any IP to maintenance mode’s exception list as well as create a custom maintenance mode page to notify your website’s visitors.
Contents
#Method 1: Enable or disable maintenance mode using Maintenance.flag
Just like Magento 1, Magento 2 use maintenance.flag file to detect if website is in maintenance mode. The system works like this:
- If .maintenance.flag file exists in /var/.maintenance.flag => Magento 2 is put in maintenance mode => Users cannot access website unless their IP address is in exception list (see step 3).
- If .maintenance.flag file is not in /var/.maintenance.flag => any user can access website normally
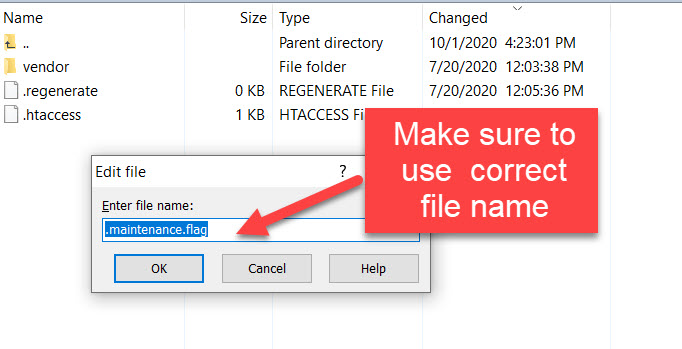
Note: .maintenance.flag is just a blank file
So with this method, we will put Magento 2 in maintenance mode by creating .maintenance.flag file in /var/ folder of Magento 2
Enable maitenance mode
Step 1: Access to your Magento 2 website folder using file manager
If you are running on a server with Cpanel or Directadmin, you can use built-in file manager. Otherwise, you can use some popular file managers to connect to website using FTP or SFTP protocol such as: Winscp, Filezilla, Bitvise
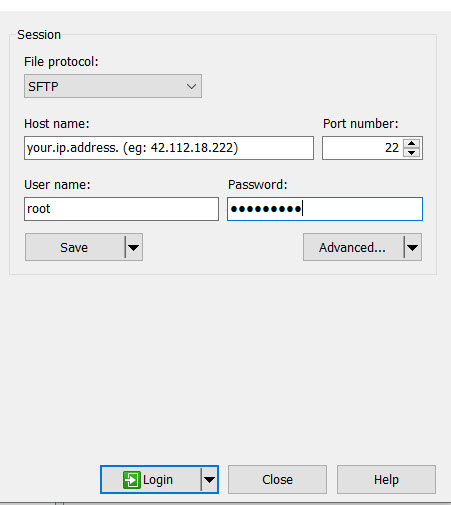
This information is provided by your hosting provider.
Step 2: After you logged into file manager on your server, go to /var/ folder and create .maintenance.flag file with blank content
Now access your website and you will see this message

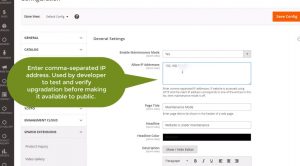
Step 3: You can make an exception rule which allows some IP addresses to access website even while maintenance mode is enabled.
In /var/ folder, create a file named: var/.maintenance.ip
Next, insert a list of IP addresses that you want to allow accessing your website in maintenance mode, eg:
42.113.45.223
42.113.45.224
42.113.45.225
42.113.45.112
42.113.45.113
42.113.45.115
42.113.45.117
If a client accesses your website and his IP address corresponds to one of the IP addresses in that list, then maintenance mode is off
Disable maintenance mode
To turn off maintenance mode, simply remove .maintenance.flag file in /var/ folder and your website will go back to normal
#Method 2: Enable or disable maintenance mode using Magento 2 CLI
If you have SSH access, you can also enable/disable maintenance mode using Magento 2 CLI with just 1 command line
Enable maintenance mode using CLI
Connect to your server using SSH and use this syntax to put Magento 2 to maintenance mode
php bin/magento maintenance:enable --ip="192.168.0.20" --ip="192.168.0.21"
In this syntax, –ip=”192.168.0.20″ –ip=”192.168.0.21″is the IP address you want to add to the exception list. This should be the IP of the developer who will deal with Magento 2 problem on your website
After you use that command, Magento 2 system will create .maintenance.flag and .maintenance.ip file (with exempt IP) in /var folder (basically, it’s the same as method 1)
To add more IP to .maintenance.ip file, use this syntax
php bin/magento maintenance:allow-ips 192.168.0.22 192.168.0.23
Disable maintenance mode using CLI
Use this syntax to turn off maintenance mode and allow customers to visit your website
php bin/magento maintenance:disableSyntax to check maintenance mode on or off
php bin/magento maintenance:status
Refresh your website to see changes
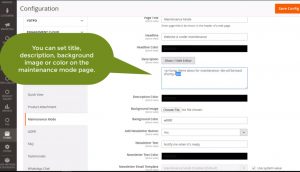
Customize maintenance mode page
The default Maintenance mode page looks boring and it does not provide any helpful information to your customers.
You can easily change it’s design and text to bring more information to your customers
Go to /pub/errors/default/503.phtml => This is where maintenance mode page skin located.
Open this file and you will see this
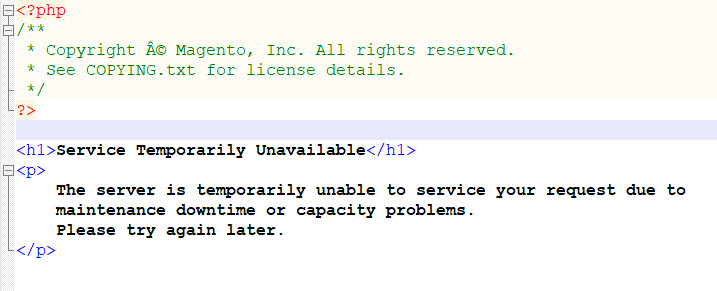
This is default code of maintenance mode page.
Now you can edit this file to change your maintenance mode page to provide more information, here’s an example
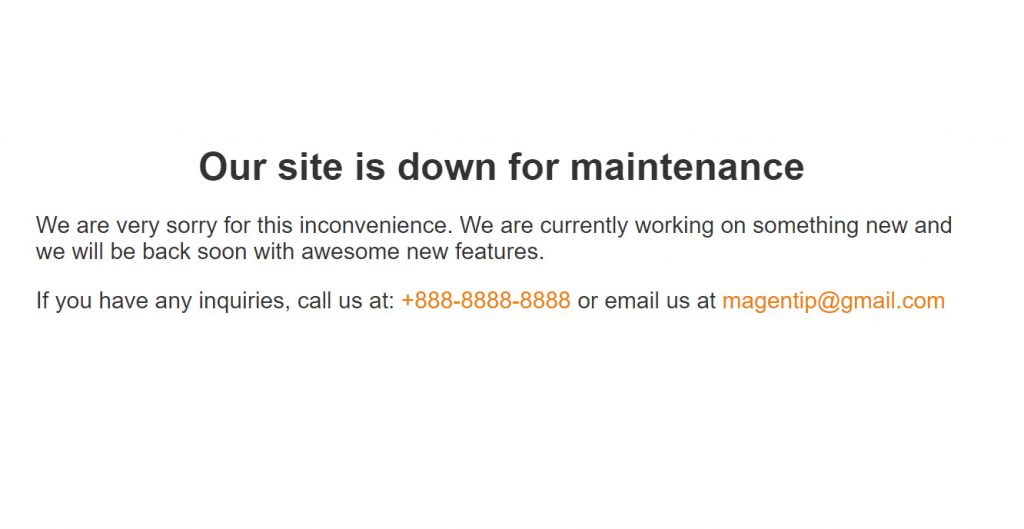
Code I used in this example
<?php
/**
 * Magegentip.com maintenance mode page for Magento 2.
 */
?>
<h1>Our site is down for maintenance</h1>
<p>
    We are very sorry for this inconvenience. We are currently working on something new and we will be back soon with awesome new features.
	If you have any inquiries, call us at: +888-8888-8888 or email us at magentip@gmail.com
</p>
#Method 3: Enable or disable maintenance mode using free Magento 2 extension
You can also use some free Magento 2 extension to enable maintenance mode page right from admin dashboard, this one is a good free module: Maintenance Mode by Sparsh Technologies
The module allows you to enable/disable and edit maintenance mode message right from admin dashboard

Conclusion
There are many methods to enable/disable maintenance mode in Magento 2, just use what you feel most comfortable with. I hope this tutorial help you manage maintenance mode in Magento 2 effeciently.
Please make sure to edit maintenance mode page design and content to provide more details to your customer so that your customer will be able to get in touch with you and you won’t lose potential customer.
Still have questions? Drop a comment below and I will get back to you in no time.
 with Elasticsearch")
")
