
Magento 2 has multiple store function which allows store owners to create multiple stores running under one database and code folder.
This function is extremely helpful if you want to expand your business, running more than 1 store without having to set up extra Magento 2 installations.
In this tutorial, we will go through the steps of setting up multiple store function in Magento 2. I will also guide how to config virutal host for Apache and Nginx users if you want to use subdomain as base URL for multiple stores.
Contents
When to use Magento 2 multiple store
With multiple store enabled, you can use different attributes and content for each store, such as:
- Default languages
- Domain names
- Categories
- Products
- Currencies
So, you should use multiple stores if you want to:
- Run multilingual stores.
- Run multiple stores with different domains/subdomains but same database.
- Using the same customer database for multiple stores.
- Running multiple stores with different themes/layout.
- Since multiple stores are running on the same Magento 2 installation, you can use 3rd party Magento 2 extensions on every store without purchasing additional licenses.
Be noticed that all stores share the same inventory
Relationship of Website – Store – Store view in Magento 2
Before we start, let me explain the hierarchy of a Magento 2 website.
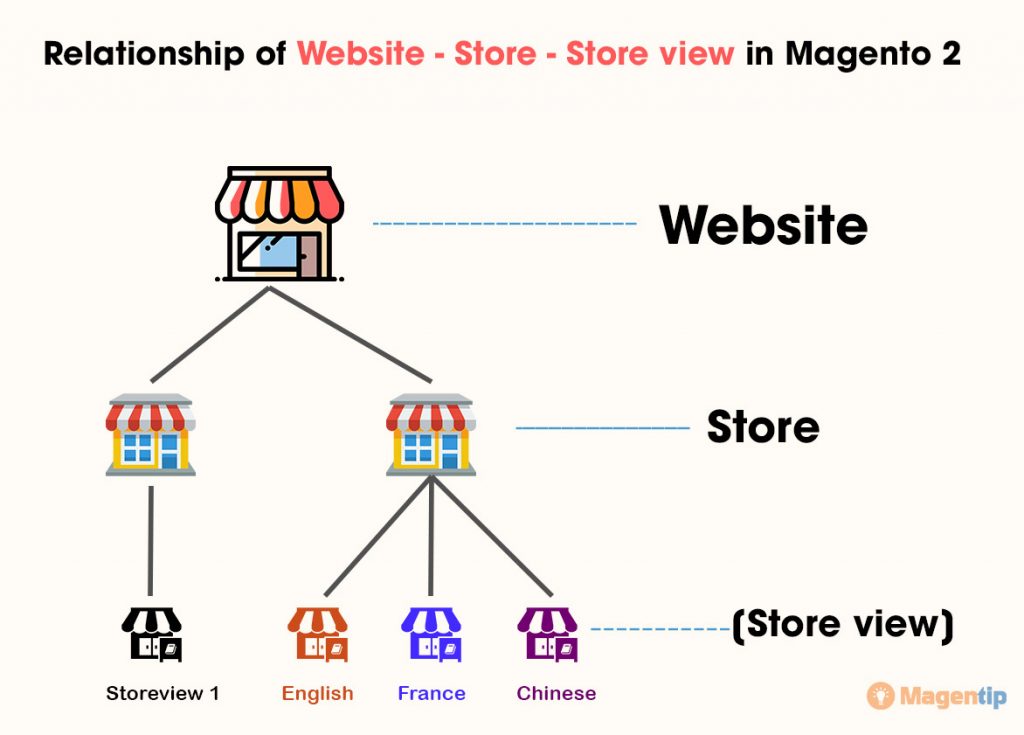
Basically, there are 3 levels:
- Website: for each installation of Magento 2, there’s 1
websiteby default which is called Main Website. You can create morewebsitesthat run on the same database and have the same admin panel. Everywebsitecan have their own payment/shipping methods, products of each website can have different prices, currencies, and websites. Also, each website can have its own customer database or share the same customer database. With Magento 2, it’s possible to set each website with unique IP address and domain or all websites running under the same ip/domain - Store: we can create multiple stores on a website. Each
storecan have a unique layout such as main navigation, theme styles, categories, products. All stores share the same payment method, currency, customer accounts… Likewebsite, you can set unique domain/subdomain for each store or make all stores run on the same domain. - Storeview: Every
storecontains multiplestore views. Store view is mainly used for a multilingual store or multiple-currenciesstore. Customers can switch betweenstore viewsin the Language dropdown at top navigation of Magento 2 website
In this article, we will go through the process of creating multiple stores for a Magento 2 website and learn how to add unique domains for each store.
Create multiple stores in Magento 2
Now we will begin the process of creating multiple stores in Magento 2.
In this tutorial, we will learn how to create a multilingual Magento 2 store.
Step 1: Create a new store
First of all, we will create a new store which contains multiple store views. Each store view will use a specific languague.
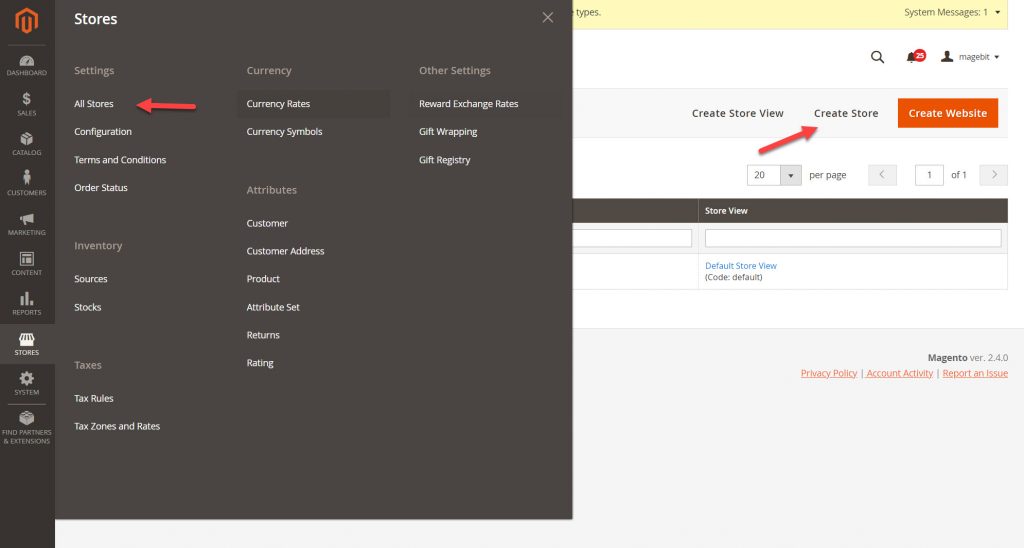
In admin panel, go to Store > Setting > All store, click on Create Store button to create a new store
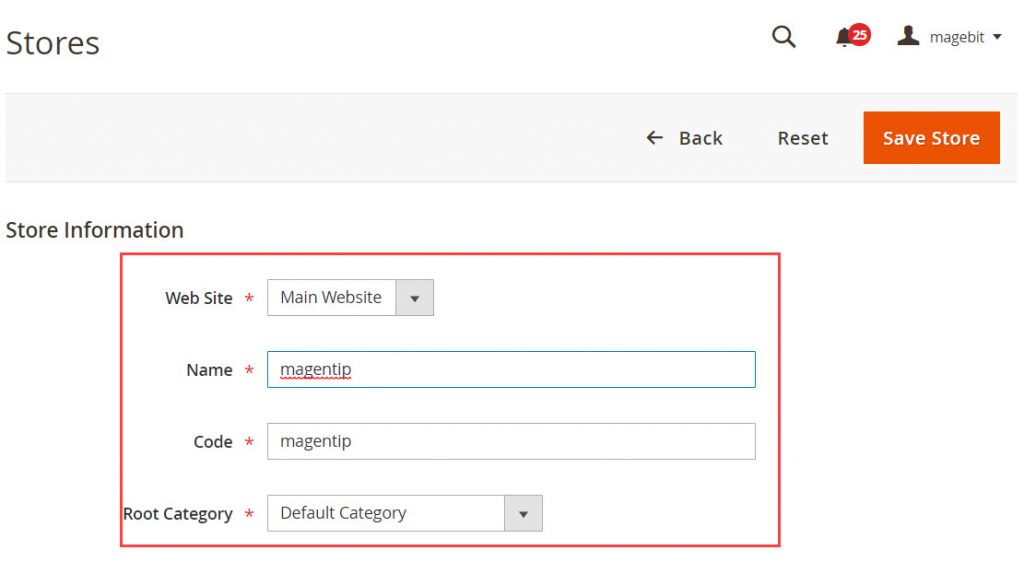
Next, select website, enter store name and store code , select root category for store
Finally, click on save store to create a new store.
Step 2: Create new store views
In this step, we will create multiple store views, each store view represents a language
In admin panel, go to Store > Setting > All store, click on Create Store View button to create a new store view
In store view information, select the store you want to assign this store view
- Name: Name of the store view, for example
english - Code: Store code (we can include store code in store’s url)
- Status: set to
enableto enable this store view - Sort order: specify store view order in dropdown menu
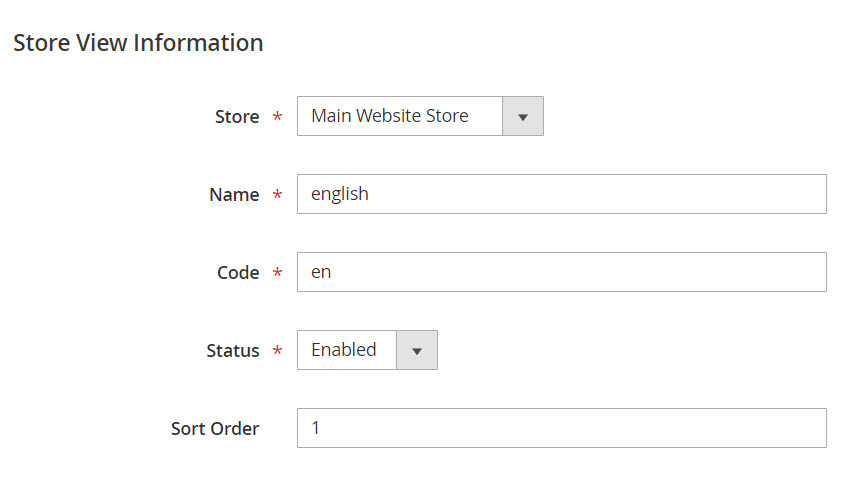
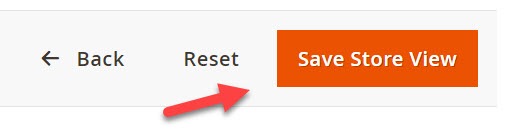
Finally, click on save store view to create storeview
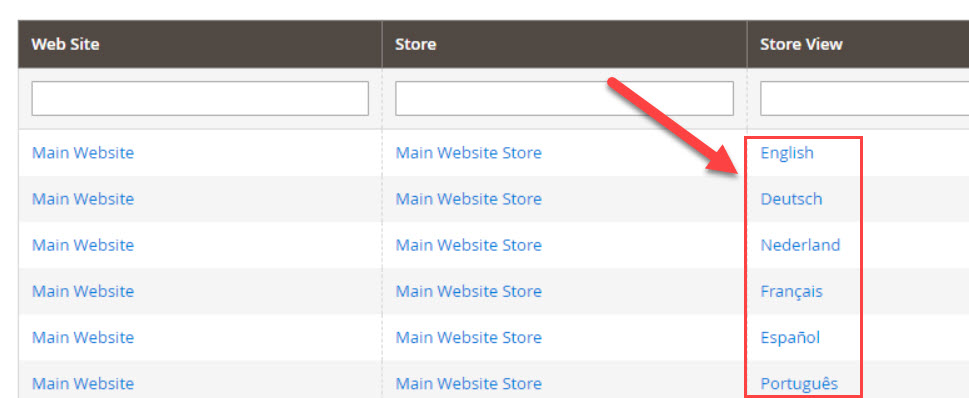
Create other store views for other language as well. For example, we create Deutsch, France, Espanol, Portugue store view for according languages
Step 3: Set language for each store view
Once we finish creating store views for all language, we will assign a language to each store
In Admin Panel go to Stores > Settings > Configuration.
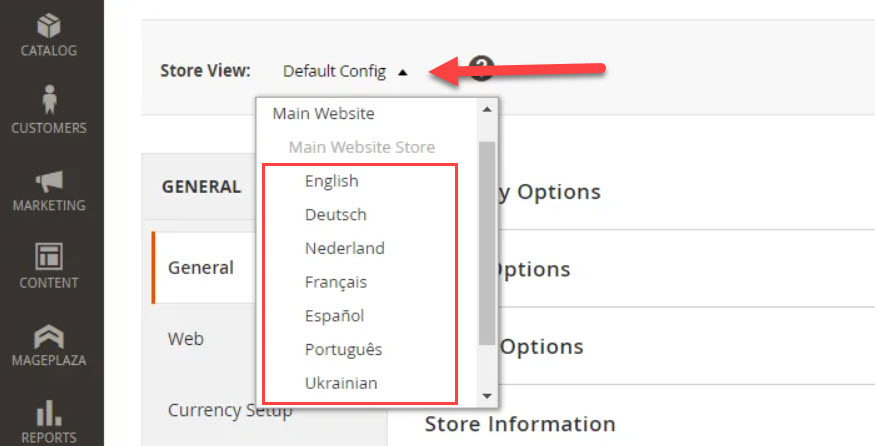
In scope dropdown menu, select the store you want to configure language (locale)
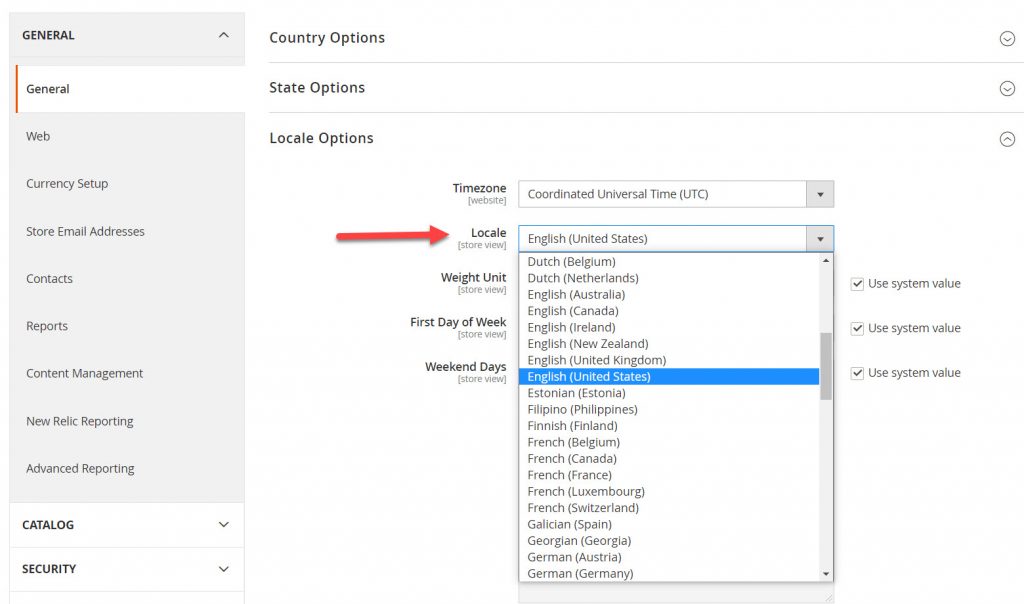
Next, navigate to General > Locale options and specify the language you want to the current store view. For example, for US store view, we set Locale as English (United State)
Finally, click on save config to apply change
Do the same for other store views.
Step 4: Setup store view URL
In this step we will set base url for each language-specific store view
First, select the storeview you want to change options in store view selection section
Next, go to Stores > Settings > Configuration > Web
Now we have 2 options to set URL for each store view
- The easy way: Let Magento 2 add store code to site base URL automatically (for example: yourstore.com/en, yourstore.com/fr, yourstore.com/cn).
In Web > URL options, change Add Store Code to Urls setting to Yes
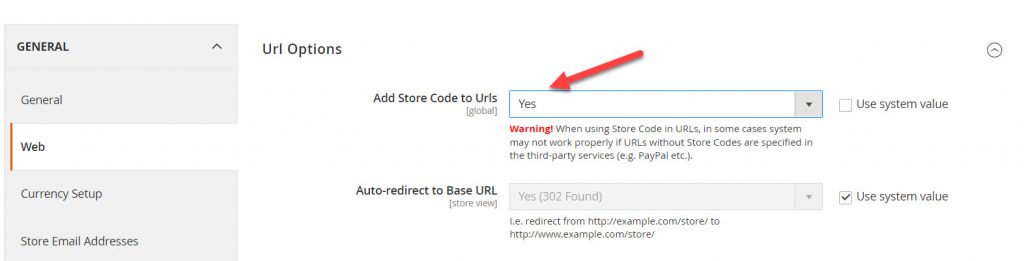
This method will simplify the process of setting URL for multiple store views. If you do not want to use this option, you will have to manually create separate directories on Magento 2 installation folder for each store view with separate index.php and .htaccess files inside each folder.
- The advanced method: Specify an url you want for each store view. (for example: en.yourstore.com, yourstorefr.com, cn.yourstore.com).
By using this method, you can specify unique url for each store view.
In Web > Base URLs, enter the URL you want to set for the current storeview in Base URL and Base Link URL fields. Eg: http://en.magentipdemo.com
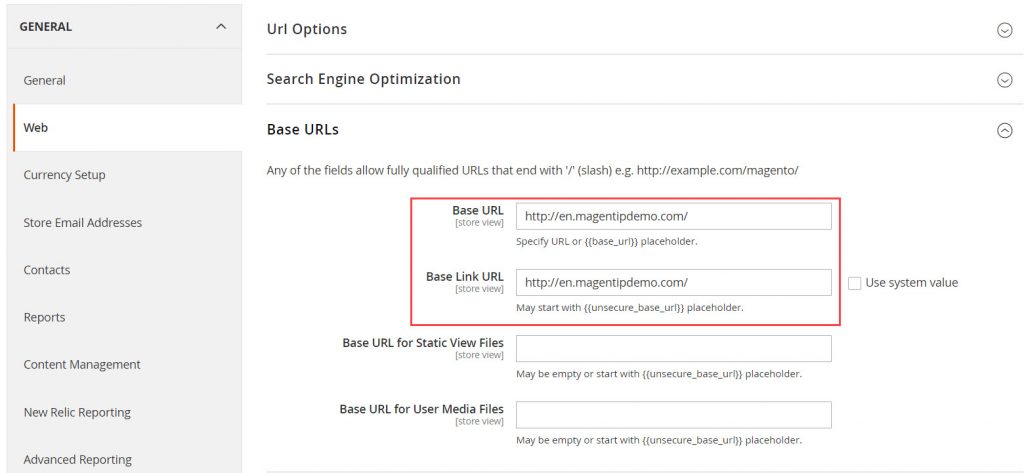
Next, click on save config to update changes
Repeat these steps for other storeviews
Now, if you use Subdomain, go to step 4
Step 4: Config Virtualhost for subdomain of each store view
Now we will add virtual host for each subdomain.
Let’s say you create 2 store views with the following base url and store code
-
french.yourwebsite.comwith website codefrenchand store view codefrenglish.yourwebsite.comwith website codeenglishand store view codeen
Also, The Magento 2 software is installed in /var/www/html/yourwebsite.com
For Apache user
Connect to your server using SFTP and go to etc/apache2/site-enabled and create a virtual host files like this:
multiplestore.conf
<VirtualHost *:80>
   ServerName          yourwebsite.com
   DocumentRoot        /var/www/html/yourwebsite.com/
</VirtualHost>

<VirtualHost *:80>
   ServerName          french.yourwebsite.com
   DocumentRoot        /var/www/html/yourwebsite.com/
   SetEnv MAGE_RUN_CODE "french"
   SetEnv MAGE_RUN_TYPE "website"
</VirtualHost>

<VirtualHost *:80>
   ServerName          english.yourwebsite.com
   DocumentRoot        /var/www/html/yourwebsite.com/
   SetEnv MAGE_RUN_CODE "english"
   SetEnv MAGE_RUN_TYPE "website"
</VirtualHost>
Finally save the file and restart apache to apply changes.
service apache2 restart
Now you should be able to access french store at: french.yourwebsite.com and english store at: english.yourwebsite.com
For Nginx user
Connect to your server using SFTP and go to /etc/nginx/sites-available/ and create a virtual host files like this:
multiplestore.conf
map $http_host $MAGE_RUN_CODE {
    default '';
    french.yourwebsite.com french;
    english.yourwebsite.com english;
}

server {
    listen 80;
    server_name yourwebsite.com french.yourwebsite.com english.yourwebsite.com;
    set $MAGE_ROOT /var/www/html/yourwebsite.com;
    set $MAGE_MODE developer;
    set $MAGE_RUN_TYPE website; #or set $MAGE_RUN_TYPE store;
    include /var/www/html/yourwebsite.com/nginx.conf;
}
Save changes and connect to your server using ssh protocol
Enter the following commands:
Change directory to Nginx virtual host folder/
cd /etc/nginx/sites-enabled
Create symbolic link
ln -s /etc/nginx/sites-available/magento magento
Next, edit nginx.conf.sample file of Magento 2 located in <magento2_root_folder>/nginx.conf.sample
Edit this file with a text editor and add these 2 lines to this file (before include fastcgi_params; line)
fastcgi_param MAGE_RUN_TYPE $MAGE_RUN_TYPE;
fastcgi_param MAGE_RUN_CODE $MAGE_RUN_CODE;
Sample working nginx.conf.sample file after you add those lines
# PHP entry point for main application

location ~ (index|get|static|report|404|503|health_check)\.php$ {
    try_files $uri =404;
    fastcgi_pass   fastcgi_backend;
    fastcgi_buffers 1024 4k;

    fastcgi_param  PHP_FLAG  "session.auto_start=off \n suhosin.session.cryptua=off";
    fastcgi_param  PHP_VALUE "memory_limit=756M \n max_execution_time=18000";
    fastcgi_read_timeout 600s;
    fastcgi_connect_timeout 600s;

    fastcgi_index  index.php;
    fastcgi_param  SCRIPT_FILENAME  $document_root$fastcgi_script_name;
    # START - Multisite customization
    fastcgi_param MAGE_RUN_TYPE $MAGE_RUN_TYPE;
    fastcgi_param MAGE_RUN_CODE $MAGE_RUN_CODE;
    # END - Multisite customization
    include        fastcgi_params;
}
Finally, save file and restart nginx to apply changes
service nginx restart
Wrapping up
After setting up multiple stores in Magento 2, remember to optimize SEO for every store to avoid duplicated content issue.
If you have any trouble while setting up multiple store for Magento 2, just drop a comment below and I will be happy to assist.
 with Elasticsearch")
")

1 Comment
Thanks for the tutorial. I have successfully setup a multilingual store with your tutorial.
I have a question: how can i install new languague pack rather than using default language pack?
I couldn’t find the language i want in locale option.