
A website’s design is undoubtedly essential, especially for an eCommerce website. A beautiful theme not only attracts your customers but also increases the chance of a successful order.
Magento 2 is a fully open-source eCommerce platform, which means you have many choices for themes and extensions.
In this tutorial, we will go through 3 methods to install a new Magento 2 theme in your store. You can choose the method that works best for you.
Before we start, it’s recommended to change your Magento 2 store to Maintenance mode
Also, click here to see the solution if you have error: “Required parameter ‘theme_dir’ was not passed” in Magento 2 during theme installation
Contents
Method 1: Install a new theme manually
This method should be applied if you have purchased or download a theme package from a 3rd party provider.
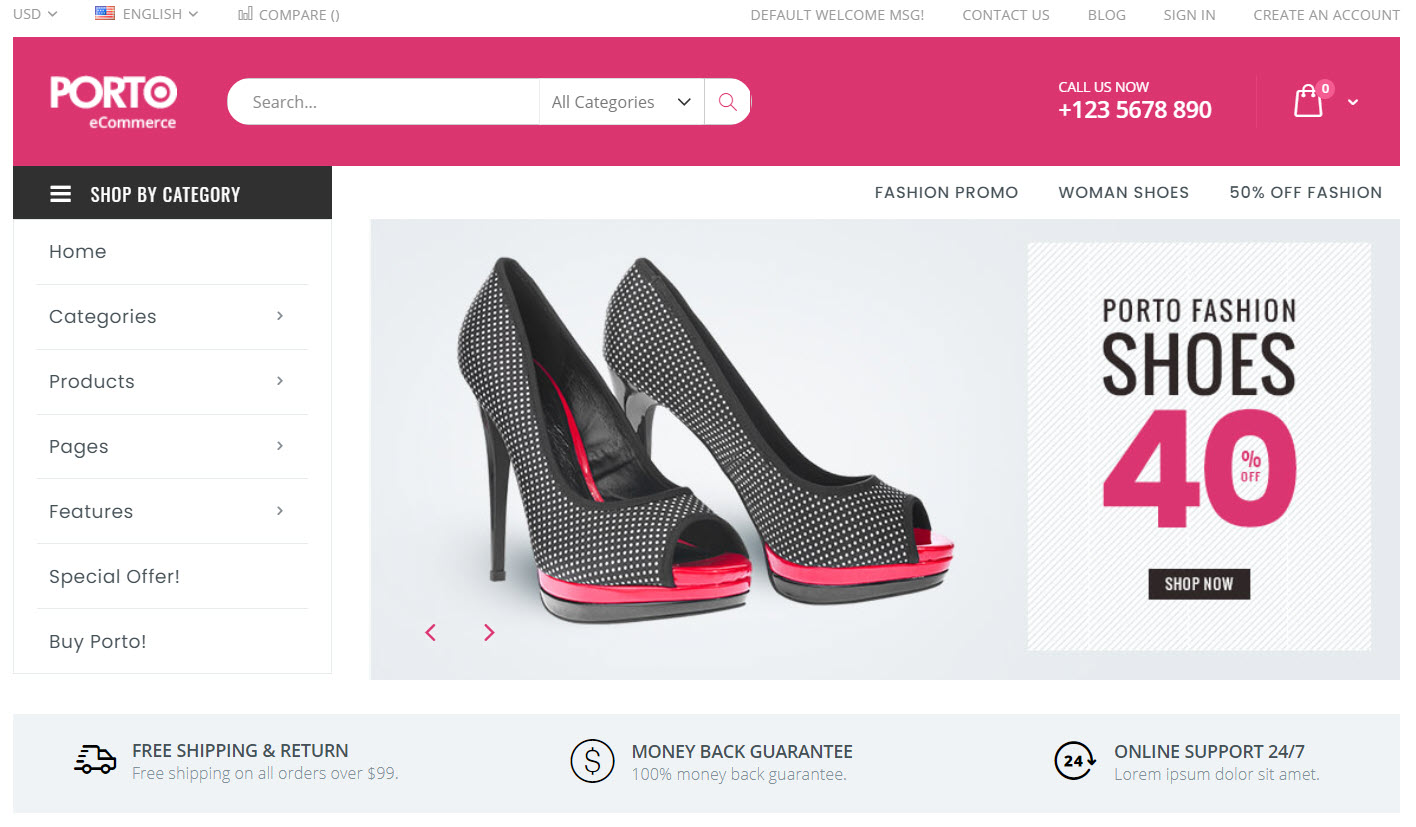
For example, you purchase a theme from Porto ThemeForest, and they provided you with a link to download the theme package in as a .zip file=> this is the method you are looking for.
The process of install a new theme is the same as installing a extension. I also wrote a tutorial about installing a new extension for Magento 2 here for your reference.
Step 1: Unpack theme file
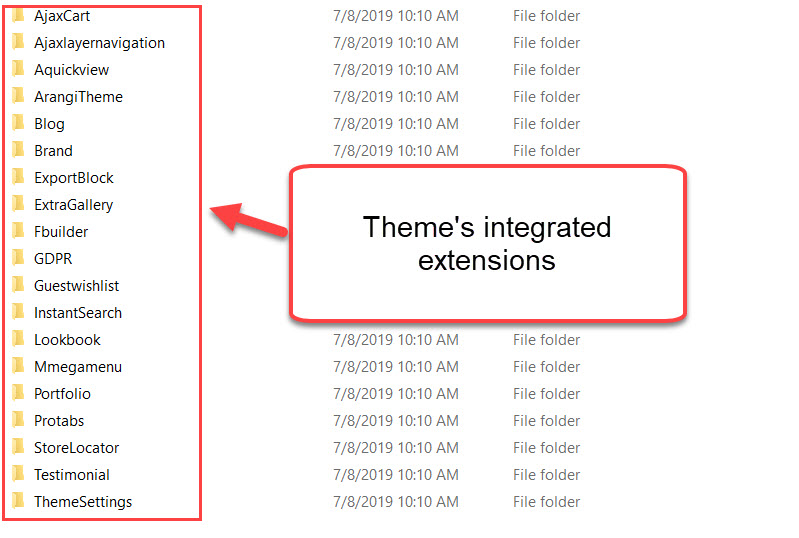
After you receive the theme package file, unzip the file, and you will find 2 directories app and pub.
- app folder contains theme’s integrated extensions and theme’s design. These extensions are included within the purchased theme to make functions like Megamenu, Ajaxcart, Shopbybrand… works.
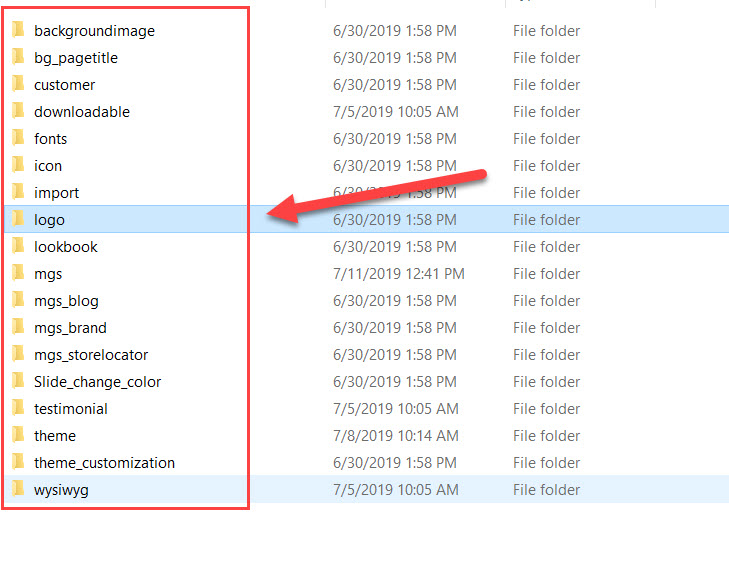
- Pub folder contains static theme files, such as: icon, background, font, logo, post images…
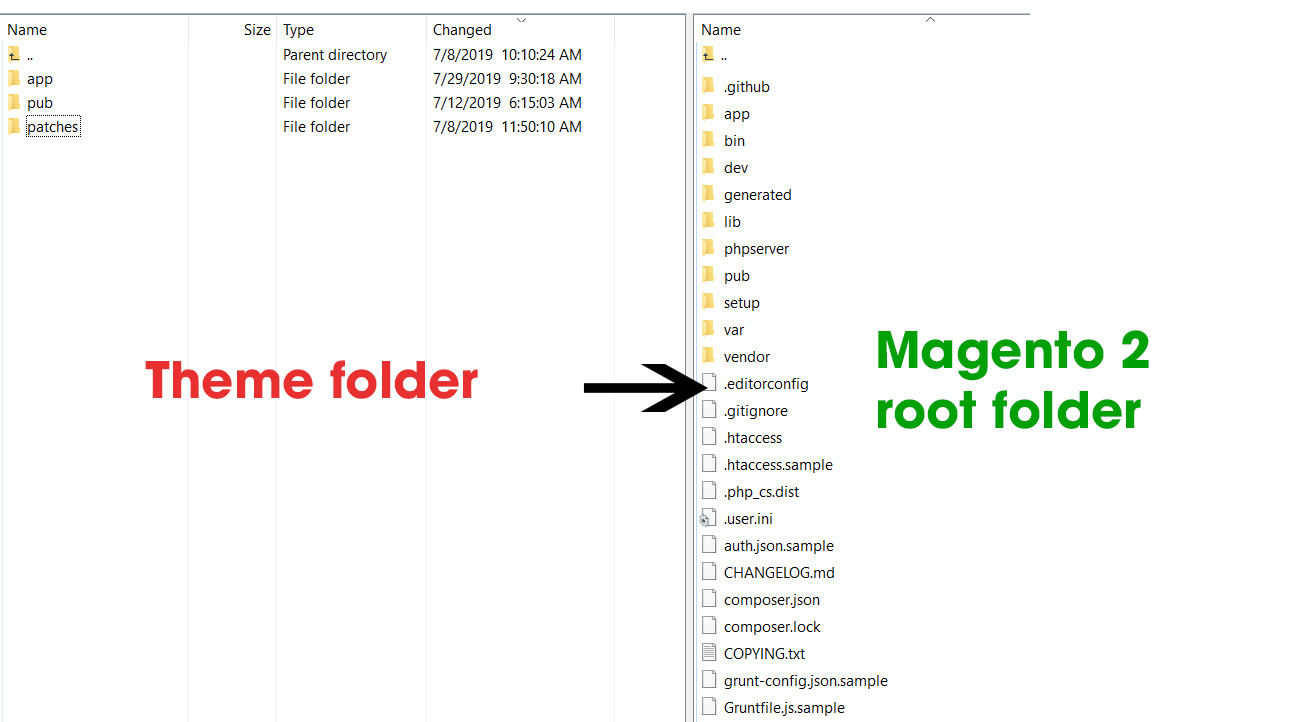
Next, we will upload these 2 folder to your Magento 2 root folder
Step 2: Run commands from Magento 2 CLI to register theme to database
After uploading theme files to Magento 2 root folder, we will register this theme to Magento 2 database so that we can change the theme from backend
Connect to your server using ssh and execute the following commands
Change directory to Magento 2 root installation folder
cd /var/www/html/mywebsite.com
Update the Magento database schema and data
php bin/magento setup:upgrade;
Deploy static view files
php bin/magento setup:static-content:deploy -h
After you are done, go to Magent 2 backend > Content > Design > Themes. The theme should be displayed here

To change storefront to the newly installed theme, go to Content > Design > Configuration
Click on “edit” on default store view and select the newly installed theme
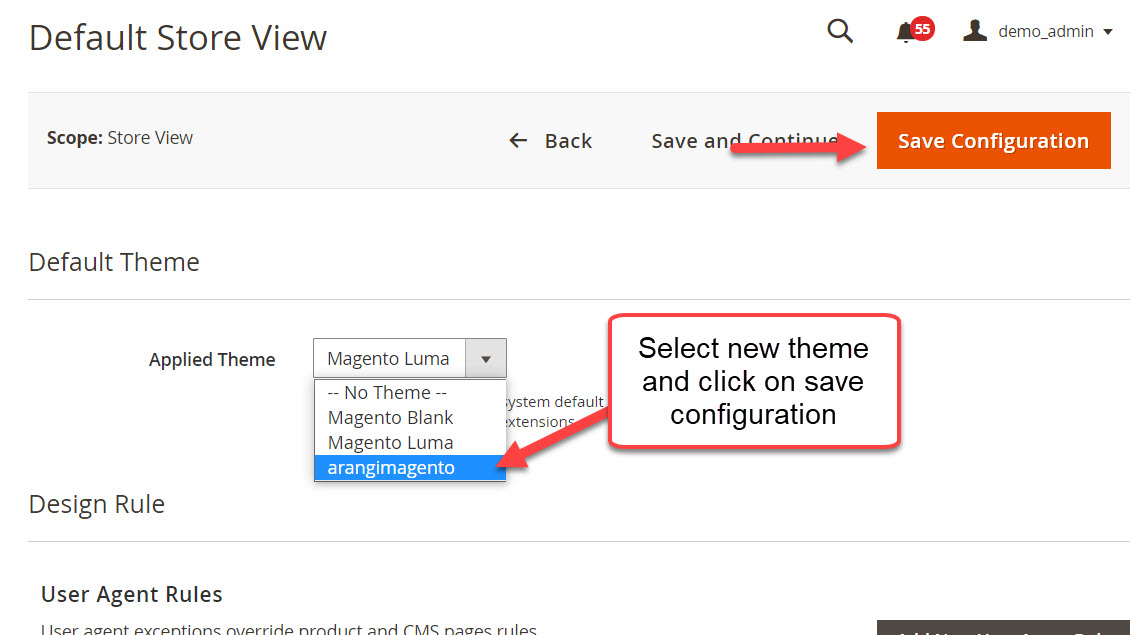
Click on save configuration and flush cache. Finally, go to your website to see the new theme

Method 1: Install a new theme using Composer
Composer is a package manager software for PHP. There are many advantages of composer such as: Reduce conflicts between different components in Magento 2 system, make it easier deploy third-party libraries…
We can use Composer to install both Magento 2 extensions and Magento 2 themes. The installation process with Composer is nearly the same for extension and theme.
Here’s how we install a new Magento 2 theme using Composer
Step 1: install composer
If you don’t have composer installed on your server, run the following command to install Composer
curl -sS https://getcomposer.org/installer | php
mv composer.phar /usr/local/bin/composer
Make composer available globally, which means we don’t need to type php/path/to/composer.phar everytime we want to execute composer command.
mv composer.phar /usr/local/bin/composerStep 2: Get composer name of the theme
If you purchased theme from a reputed Magento 2 theme, they will provide you with Composer name of the theme. The composer name of the theme should be: <vendor>/<name>:<version> in order to be installed via composer.
In this tutorial, I will install a free Magento 2 theme MASE2 Optimus theme on composer. Go to github page and you will see composer name of the theme in installation instruction.
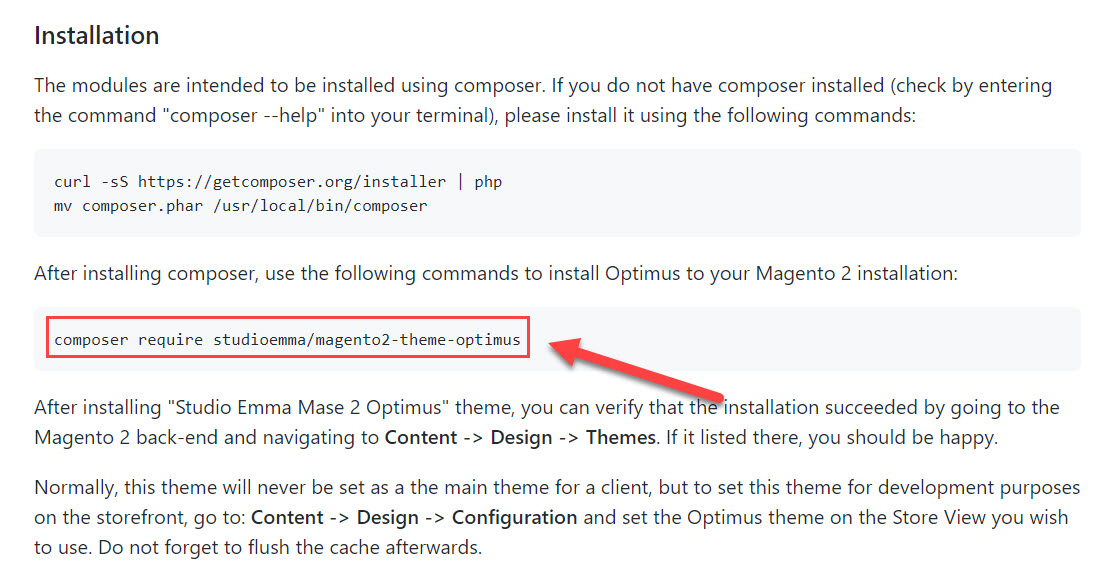
As there’s no other version of the theme => the syntax to install Magento 2 optimus theme is
composer require studioemma/magento2-theme-optimus
If you succeeded:
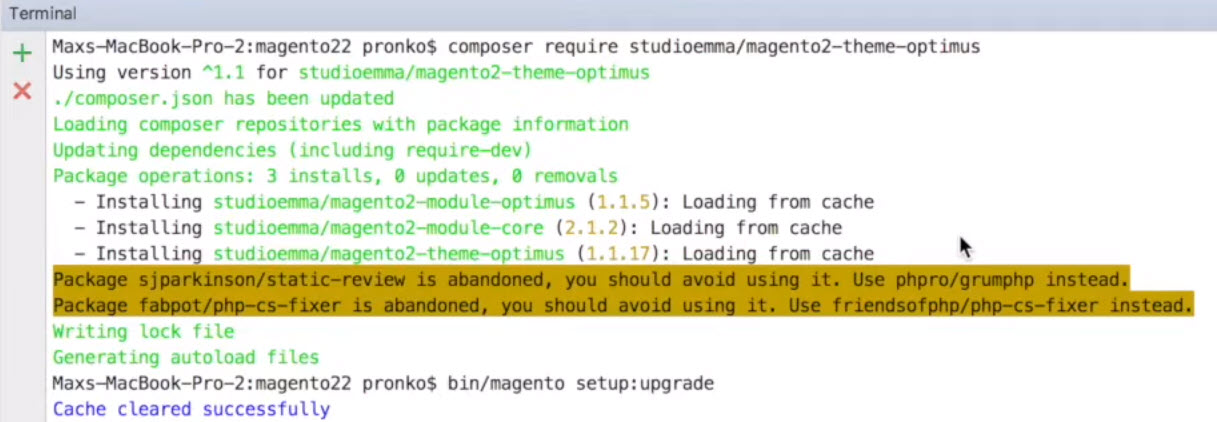
Finally, run this command to update Magento 2 database
php bin/magento setup:upgrade;
Deploy static view files
php bin/magento setup:static-content:deploy -h
Finally, go to Admin > Content > Design > Configuration to change the current theme to the newly installed theme.

Method 3: Install Magento 2 theme from Magento 2 marketplace
If you purchase theme from Magento 2 market place, you can also install theme directly from backend.
The process is the same as install extension from Magento 2 market place
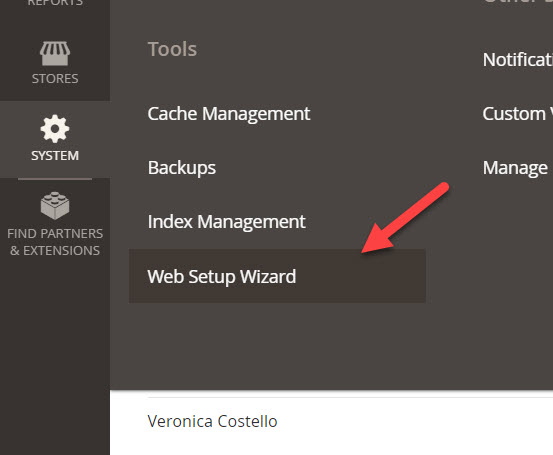
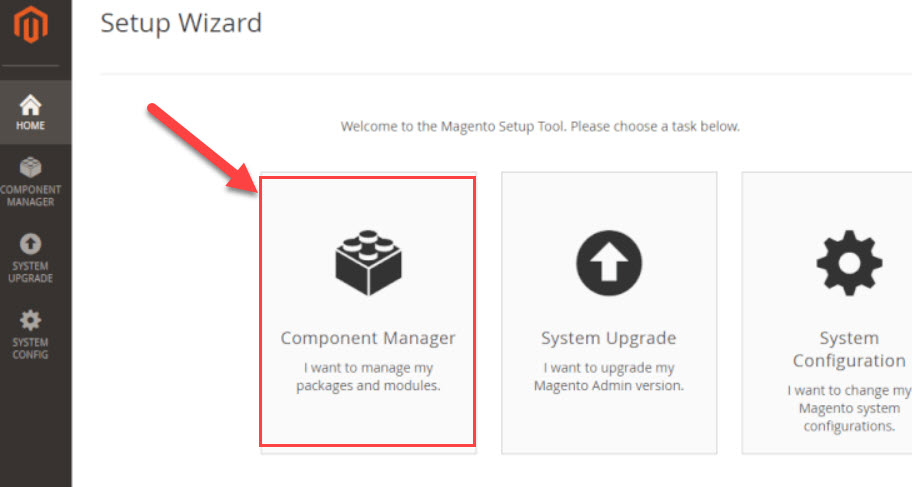
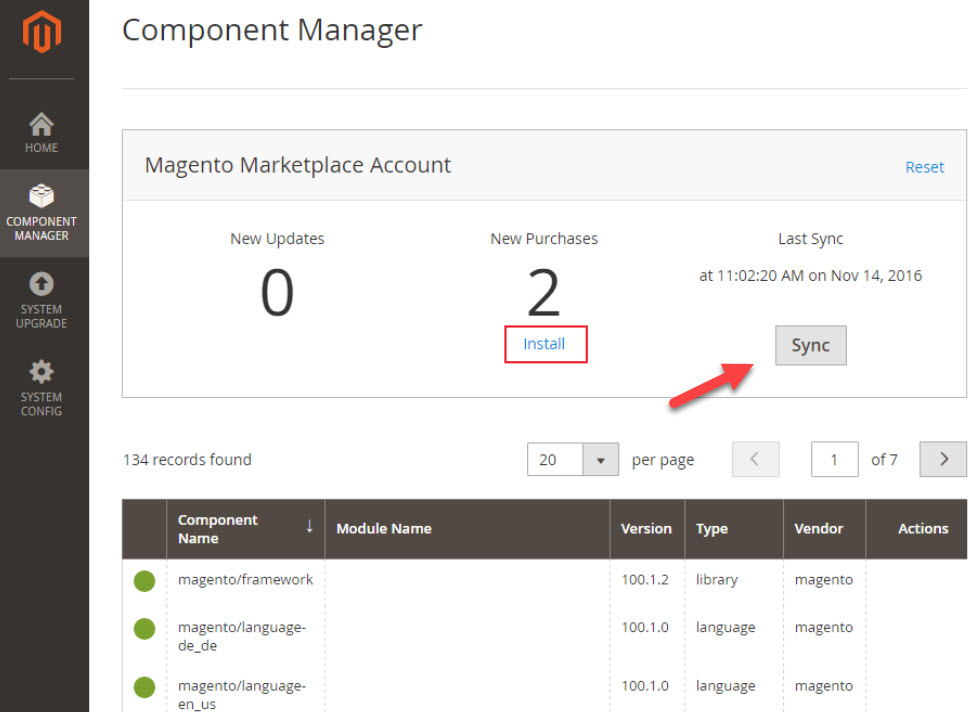
In Magento 2 backend, go to: System > Tool > Web Setup Wizard
 Select Component Manager
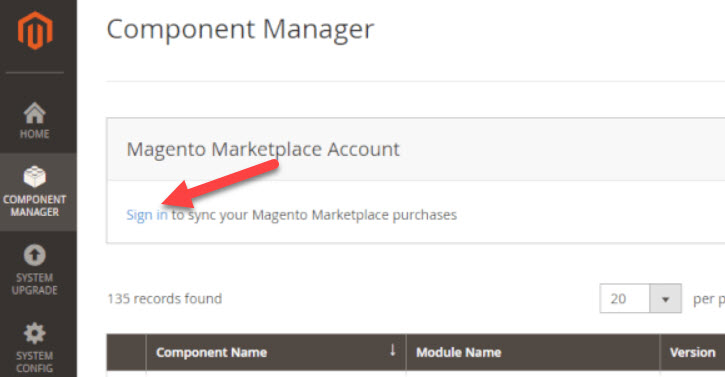
Next, you will be asked to sign in Magento 2 marketplace account
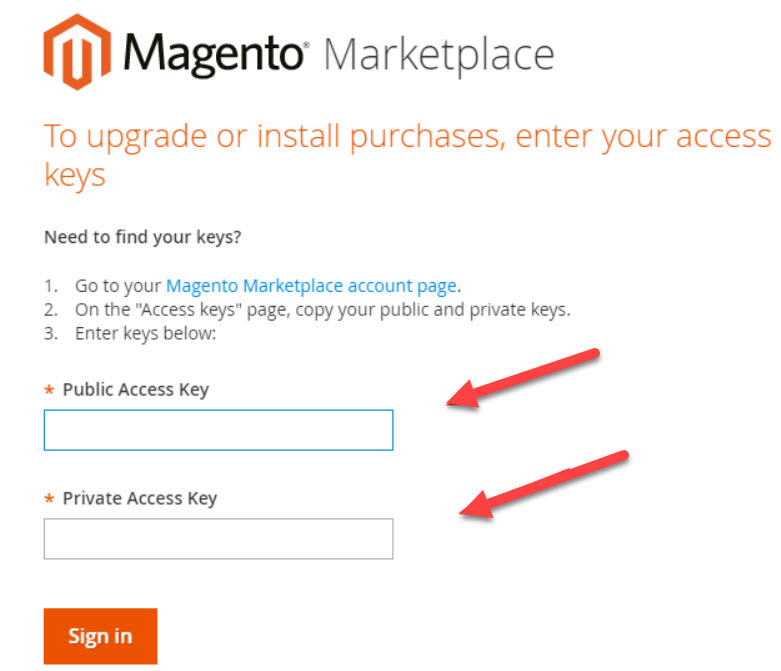
After logging in with Magento 2 marketplace account, you will be asked to provide Public access key and private access key . These keys can be found in profile section in Magento Marketplace website: https://marketplace.magento.com/customer/accessKeys/
If you don’t have any key, create a new one
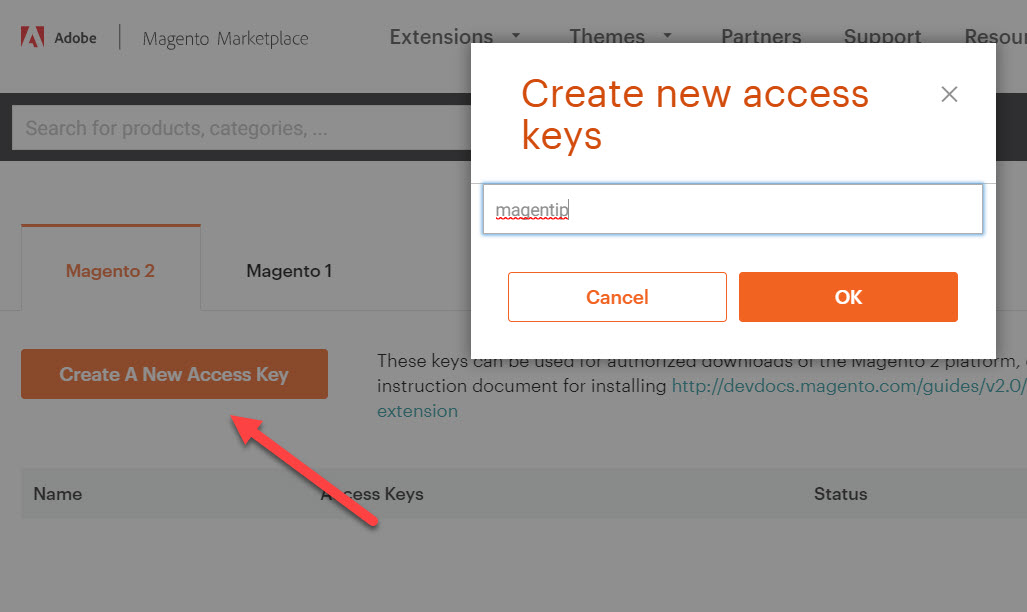
Click OK and a new pair of keys including Public key and Private key will be generated

Now to back to admin panel and input these keys to validate your purchase from Magento 2 market place
Click on Sign in and Sync button, then wait for Magento 2 system to validate your purchase from Marketplace. After the process is done, click on install
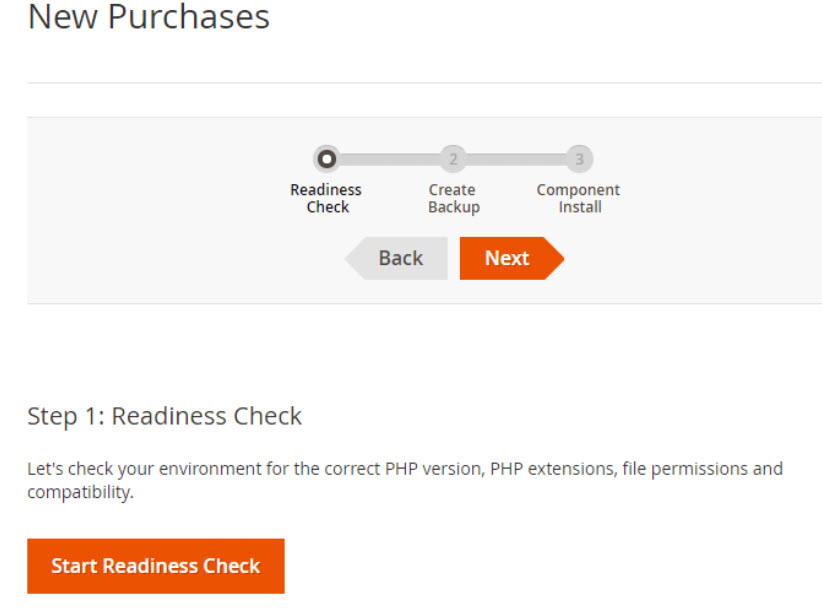
Next, select theme you want to install and complete all the steps: Readiness check – Create Backup – Component install
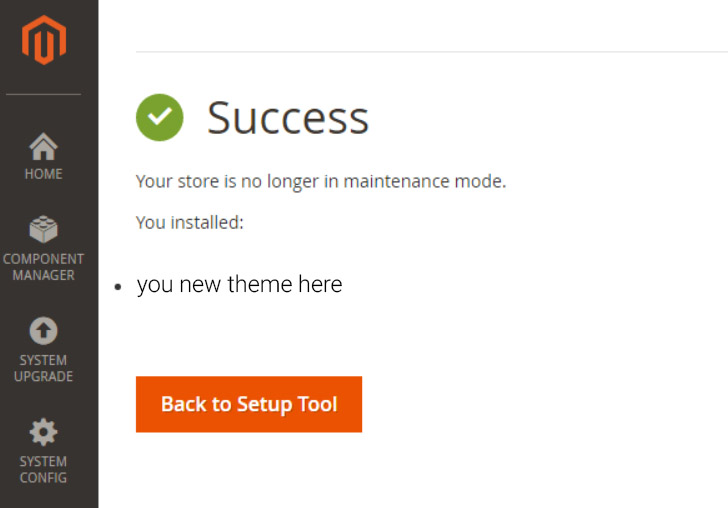
 After the installation process finishes, you will see success message
Wrapping up
There are many beautiful and optimized themes for Magento 2 available from 3rd party providers. Some trusted sources to buy Magento 2 theme are:
- Magento market place
- Themeforest
- github.com – free theme
The choice is up to you, however always remember to use themes that are
- Mobile optimized
- SEO friendly
- Support after-purchase
- Fully responsive
If you have any troubles during theme installation process, please drop a line below. I will try my best to help you out.
 with Elasticsearch")
")
