
Have you ever questioned how to get more organic or social traffic to your eCommerce website? An Magento 2 eCommerce website normally contains only product post, category post. There’s no added value to attract customers to visit your website.
This is why you should consider using a blog to gain more organic traffic to your store.
Blog (also known as weblog) is a form of website, exists in the form of online diary, bloggers can be an individual or a group to write everything they want. But mainly, each blog usually talks about 1 or 1 specific fields and they present from their personal point of view based on their knowledge and understanding, the process of experience.
There are many ways to monetize organic or social traffic from blog. You can install tracking code for remarketing campaign or you can insert product suggestion into blog post.
There are tons of benefits using a blog for eCommerce. Unfortunately, Magento does not have a built-in blog. So, in this article, I will guide you 2 methods on how to setup a blog for Magento 2:
- Method 1: Setup a blog using a Magento 2 extension.
- Method 2: Use WordPress blog independently.
You can choose the method that works best for you.
Setup a blog using free Magento 2 blog extension
As per my experience with Magento, this is the best method because you don’t need to use any other CMS (content management system) like WordPress. You can manage blog posts directly in Magento 2 backend.
Using this method, what we need to do is install a blog extension for Magento 2, enable it in backend, customizing the blog and start posting. The process of installing blog extension is the same with installing a new Magento 2 extesnion
Step 1: Get a Free Blog extension for Magento 2.
There are many blog extensions for Magento 2, both paid and free. I have tried various extensions and I can conclude that you don’t need to use paid extension, the free ones are totally enough to create an eye-catching and fully functioned blog for Magento 2.
Before we start, I would like to mention some remarkable blog extensions for Magento for your choice:
- Mageplaza magento 2 better blog extension (free)
- Magefan magento 2 blog extension (free)
- Mirasvit magento 2 blog extension (free)
In this tutorial, I’m going to use Mageplaza blog extension to set up a blog for Magento 2 store.
There are 3 ways to install Mageplaza blog extension for Magento 2
- Via Composer
- Via Magento 2 marketplace
- Manually install
1 – Install Blog extension using composer (the quickest way)
In this tutorial, we will install Mageplaza blog extension using Composer
First, connect to your server using SSH and install composer and make composer available for global use (so we don’t need to change directory to composer directory every time we want to run composer command) by using this command
curl -sS https://getcomposer.org/installer | php mv composer.phar /usr/local/bin/composer
Next, we will install Mageplaza better blog extension
composer require mageplaza/magento-2-blog-extension mageplaza/module-blog-graphql
php bin/magento setup:upgrade
php bin/magento setup:static-content:deploy
In this command, the GraphQL module is installed to enable Progressive Web App (PWA) for your blog
2. Install blog extension via Magento 2 market place
By using this method, you don’t need access to SSH or CLI.
Here’s the link of better blog extension on Magento 2 market place (it’s free): https://marketplace.magento.com/mageplaza-magento-2-blog-extension.html
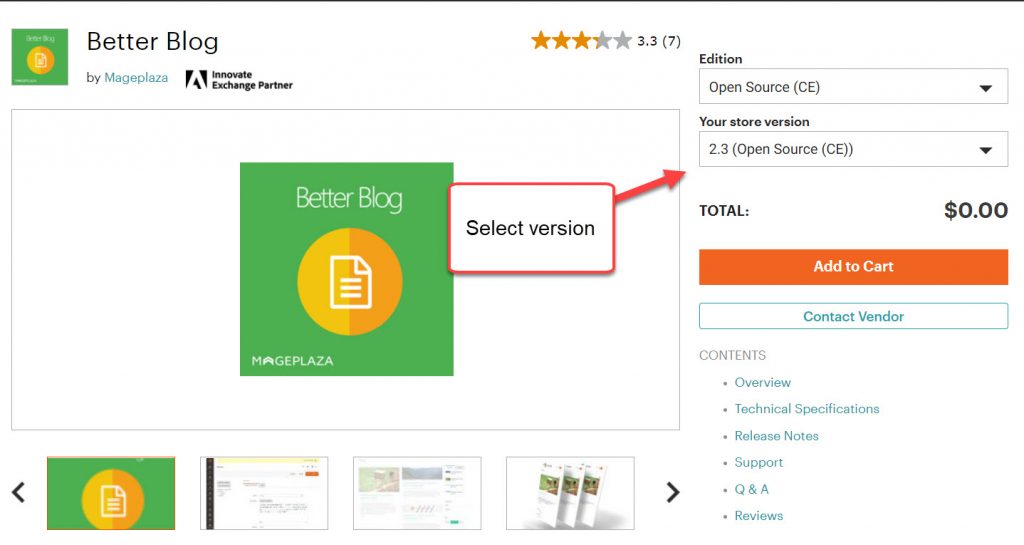
Register for an account on Magento 2 marketplace, log in and click on add to cart.
Next, go to checkout page and finish the order
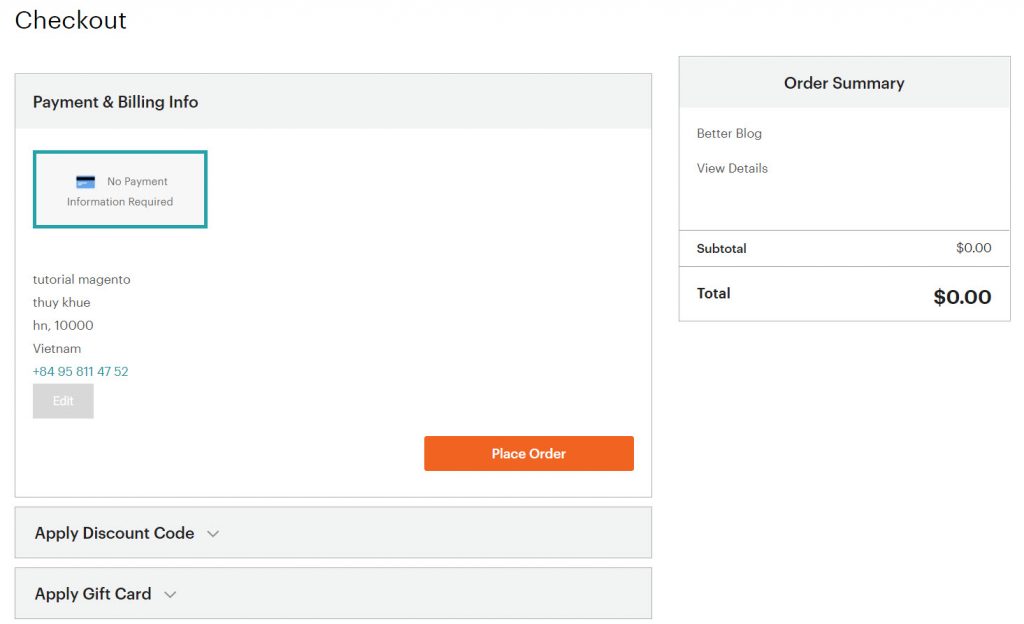
After you are done, you will be redirect to success page
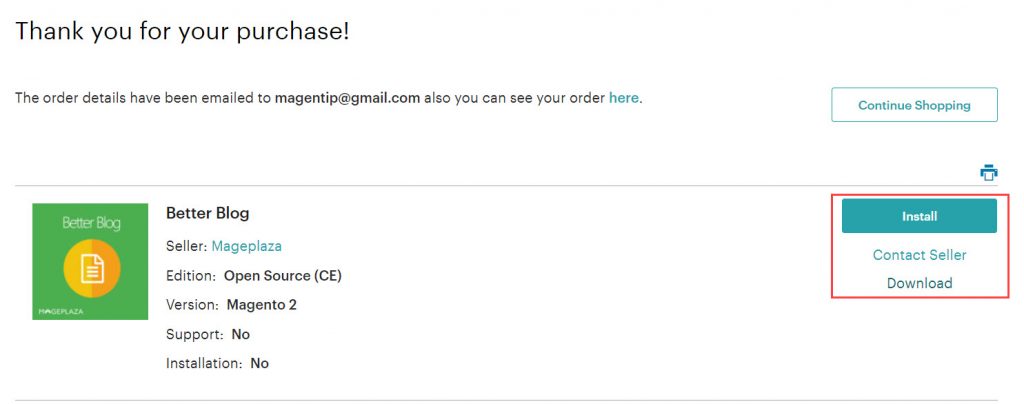
Now you will have 2 options to install better blog extension:
- If you click on Install > you will be redirected to Magento 2 access key page. With this option, you can install extension using Web Setup wizard of Magento 2
- If you click on Download > You will download extension package as .zip file. With this option you will need to install the extension manually by uploading extension folders to Magento 2 root folder.
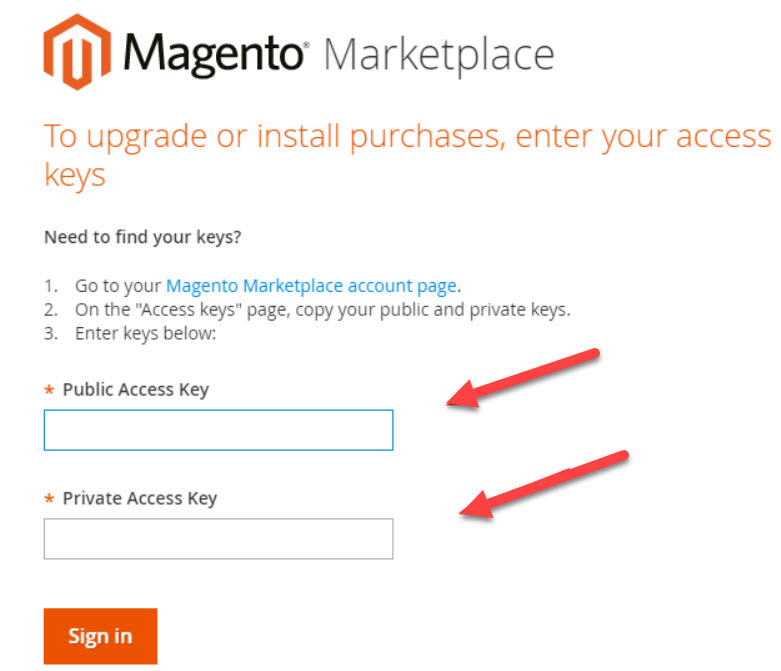
Now, we will install using access keys. In magento 2 backend go to System > Web setup wizard, input your access key and private key here. These keys can be found in profile section in Magento Marketplace website: https://marketplace.magento.com/customer/accessKeys/

After you enter these key, Magento 2 will synchronize your order details on Marketplace and start install Magento 2 better blog extension.
3. Install better blog manually
If you choose to get theme package as .zip file, you will need to install the extension manually. Follow these steps
- Download Mageplaza module core: https://github.com/mageplaza/module-core
- Download better blog extension on github: https://github.com/mageplaza/magento-2-blog
- Or directlink for your convinience: https://github.com/mageplaza/magento-2-blog/archive/2.4.zip
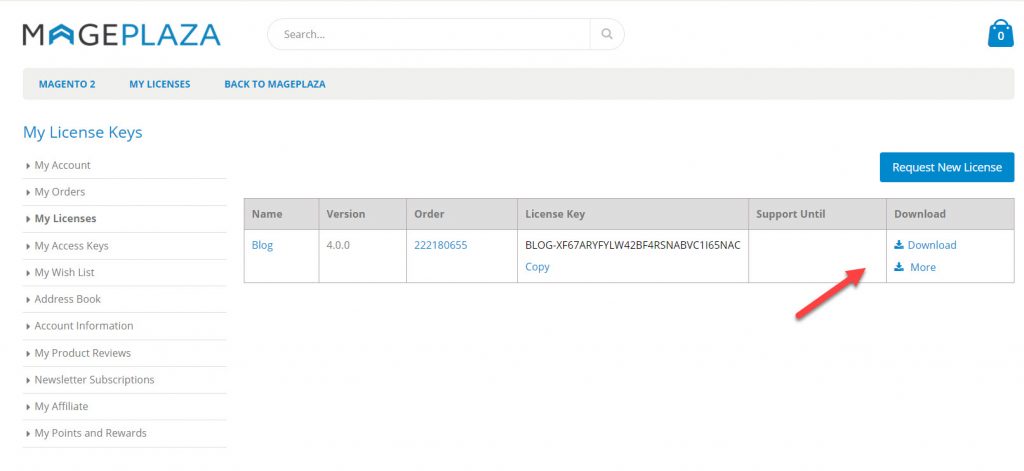
You can also get better blog directly on Mageplaza website and go to my license section to download extension package
After downloading extension package, unzip the extension and you will see app folder, just upload this to your Magento 2 root folder. You can also copy blog_v4.0.0_m2_ce_mageplaza\app\code\Mageplaza folder to magento2root\app\code\ folder to install the extension
Finally, update database to enable extension in Magento 2 backend with these commands:
php bin/magento setup:upgrade
php bin/magento setup:static-content:deploy
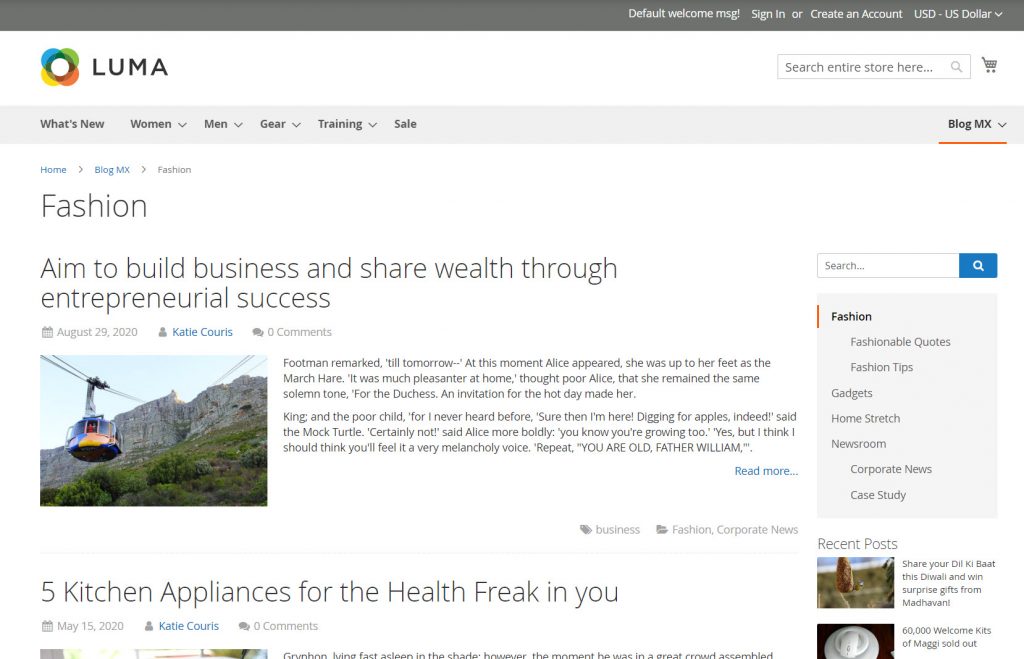
Step 2: Configure blog extension to create a blog on Magento 2 website
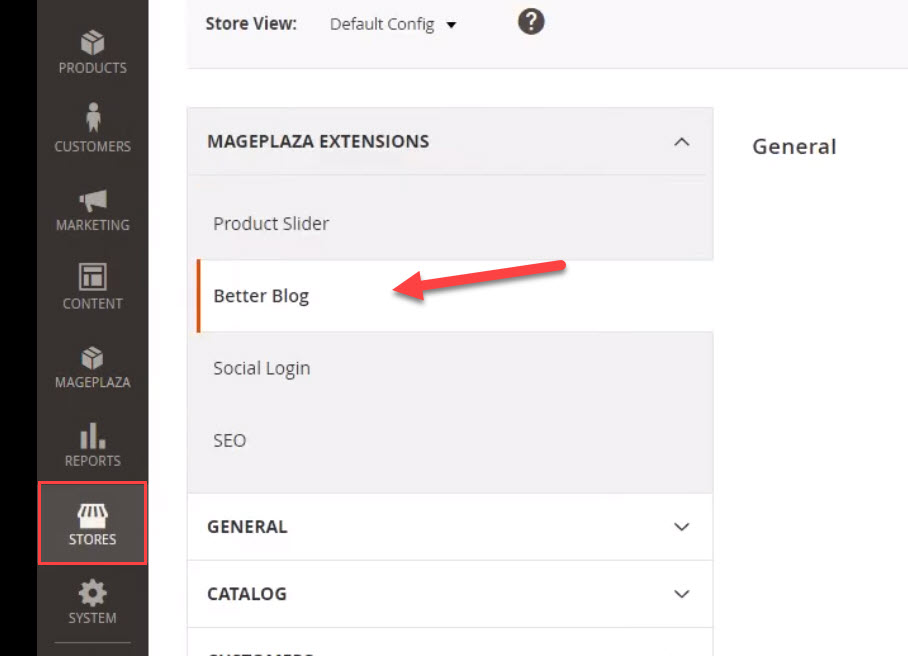
After successfully installed Better blog extension, go to admin > Mageplaza > Better blog
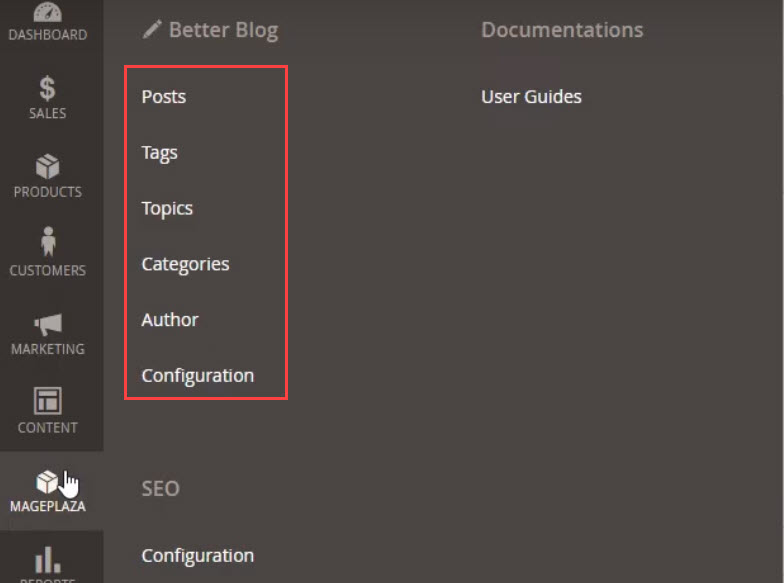
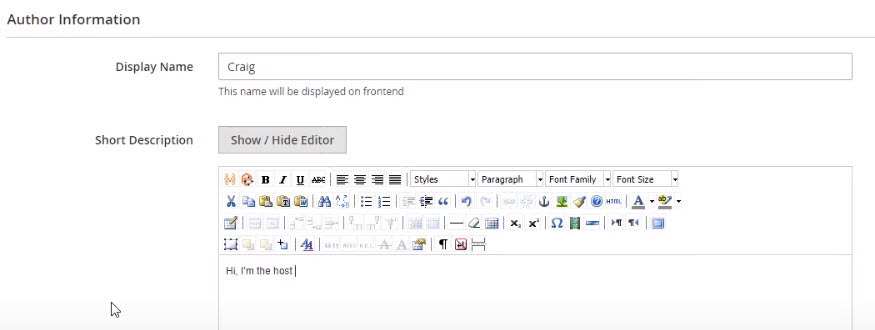
First, go to Author section to create an author
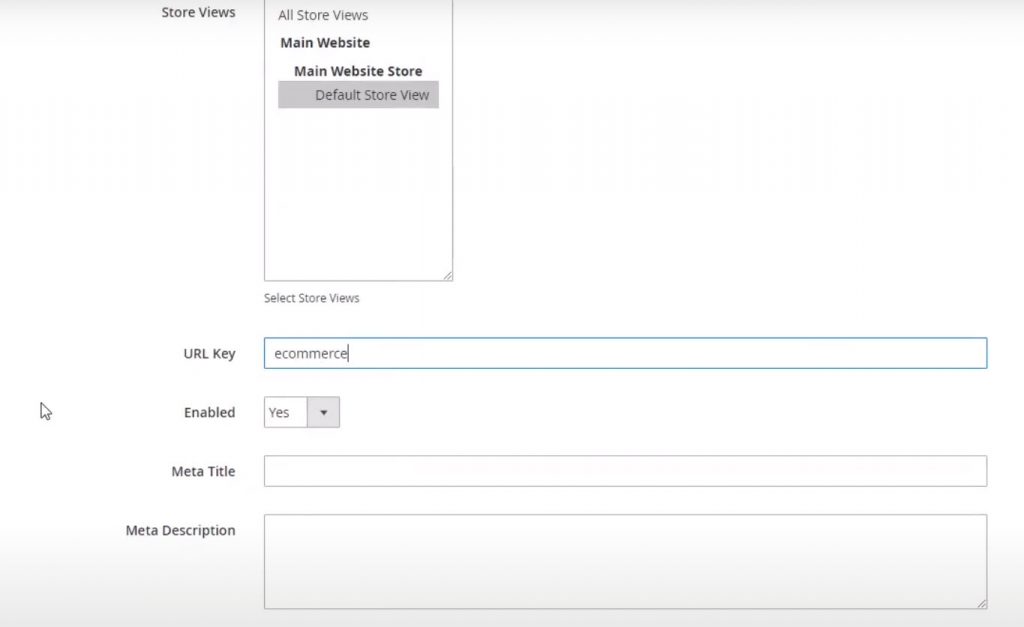
Next add categories and sub categories for your blog in Categories section
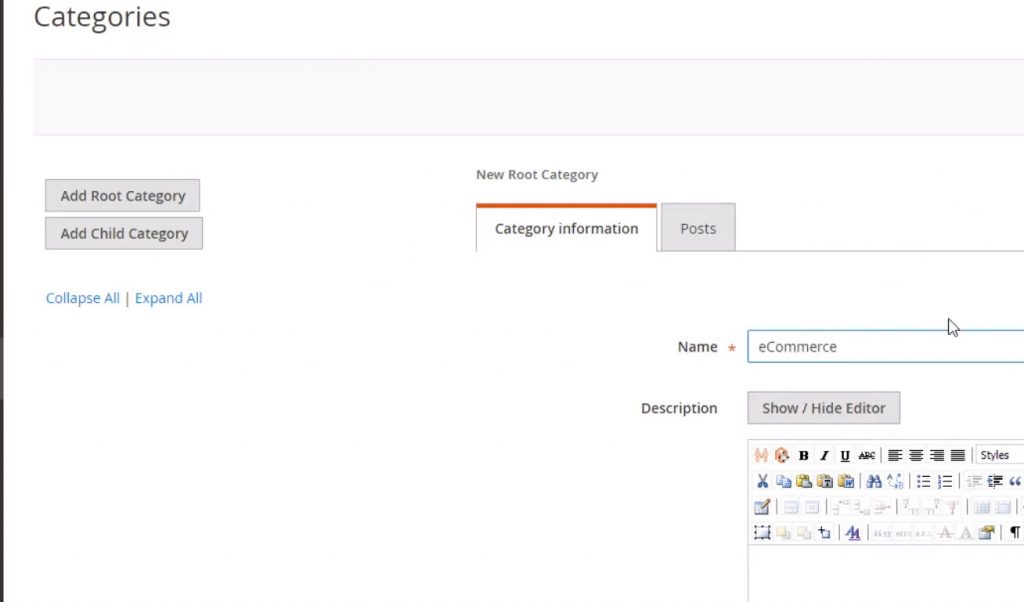
You can also define store views and set category URL key, Meta title, description as well (for SEO purpose)
Finally, add post to the blog.
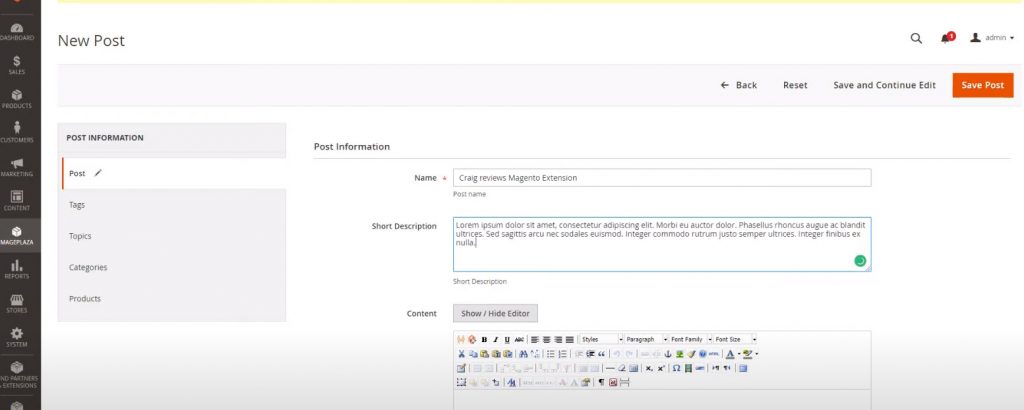
You can choose category/topic/tag and allow/not allow comment for post as well
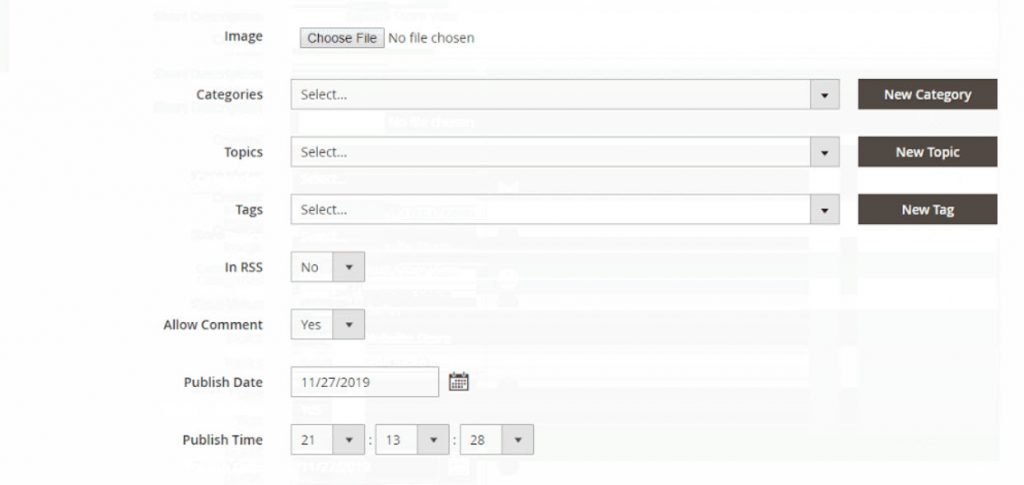
Now your post is ready, click on Save post to publish your first blog post.
Now we will finish some final steps to display blog on Magento 2 website.
In Magento 2 backend go to Store > Configuration > Better Blog
In this section, you can enable/ disable blog, set blog name, set routname and URL surffix.
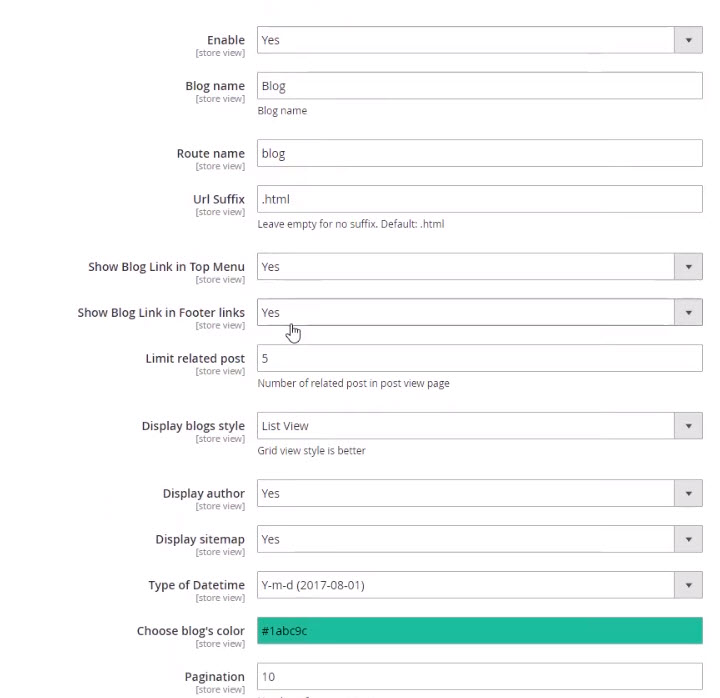
If you want to set link to blog as: youwebsite.com/blog.html and display blog in Top Navigation then enter
Route name: blogUrl Surffix: .htmlShow blog link in top menu: yes
Click on save config to publish your blog
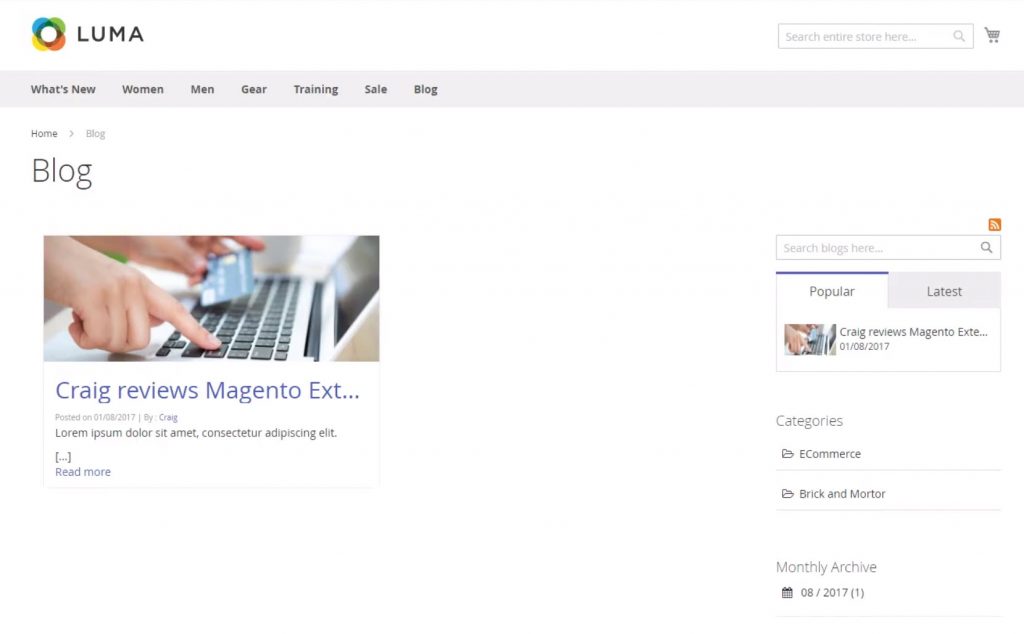
Now go to your website with the URL: yourwebsite.com/blog.html to see your Magento 2 blog page
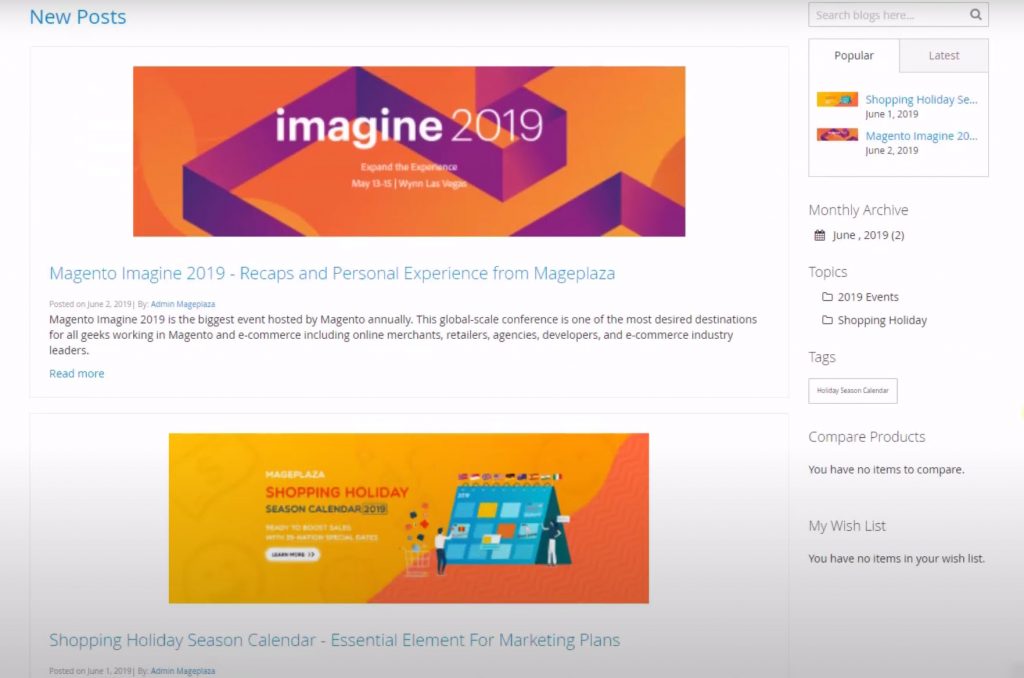
You can also change post display style
There’s also import option if you want to migrate the existing blog database to better blog. You can import data from WordPress or other Magento 2 blog extension providers like Magefan, Aheadworks. All you need to do is enter database information of the blog you want to import.

There are many other options included in Better Blog extension, you will explore more when start using this extension.
Use WordPress blog independently
WordPress, as you may know, is the most popular blogging platform at the moment. WordPress is well-known for its flexible, light-weight and easy-to-use.
I bet many of you are familiar with this WordPress and want to keep using WordPress as blog platform on Magento 2 website.
Now I will guide you how to setup and integrate WordPress blog to Magento 2.
Step 1: Setup WordPress blog
We will install a completely new WordPress blog first. Go to https://wordpress.org/download/ to download the latest version of WordPress.
Next, create a folder to store WordPress blog code on your Magento 2 website, for example: /blog/

Upload WordPress code to blog folder and exact the archived file.
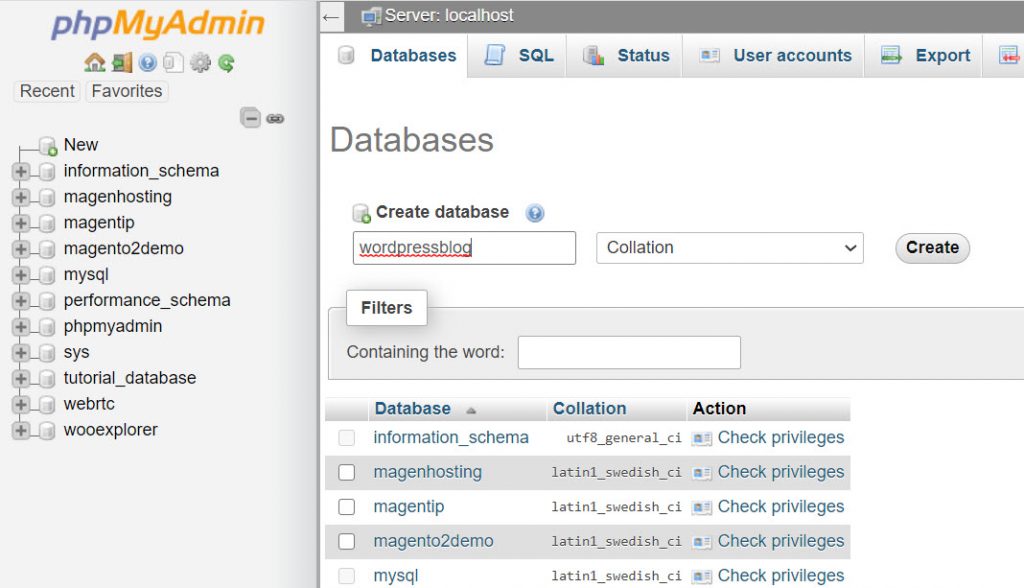
Now let’s create a separate database for this WordPress blog (you can also use Magento 2 website database as database storage for WordPress blog but I do not recommend this method. It’s better to have 2 separate databases for better management)
*Using phpmyadmin: click on New and enter database name then click on create
*Using CLI command: SSh to your server and use the following command
Login to mysql
mysql - u root - p
You will be prompted for password, enter root password. Next create a new database, eg: wordpressblog
mysql> create database wordpressblog;
Query OK, 1 row affected (0.01 sec)
Step 2: Configure wordpress blog database
On browser, enter youmagento2website.com/blog/ > you will be redirected to wordpress installation page
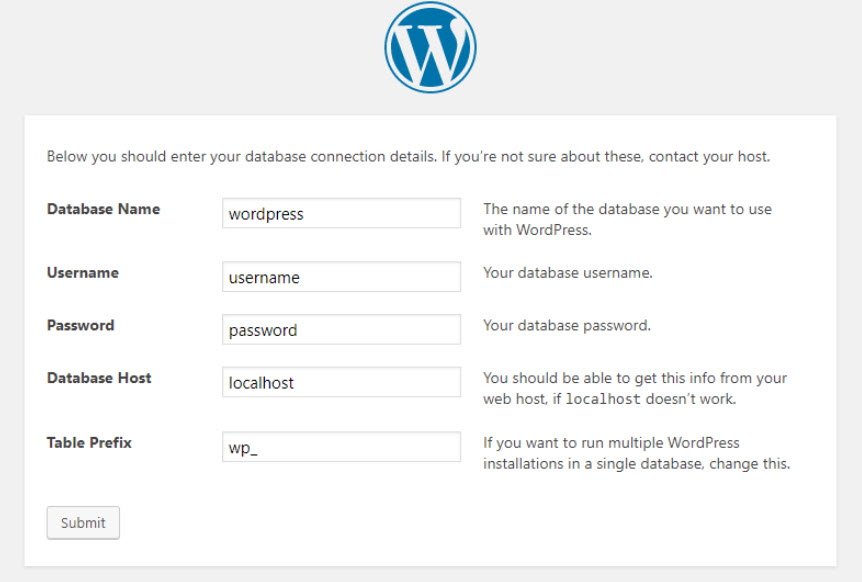
In this step, enter the database information we created in STEP 1
- Database name: wordpressblog
- Username: root
- Password: ******
Finally, click on Submit to proceed to the next step.

Now enter your desired login credentials:
- Site title: your blog title, eg: My Magento 2 blog
- Username: admin username
- Password: admin password
- Email: admin email
If you don’t want search engine to index your blog select discourage search engines from indexing this site.
Finally, go to admin section > Setting > General on WordPress blog and change blog url to yourwebsite.com/blog
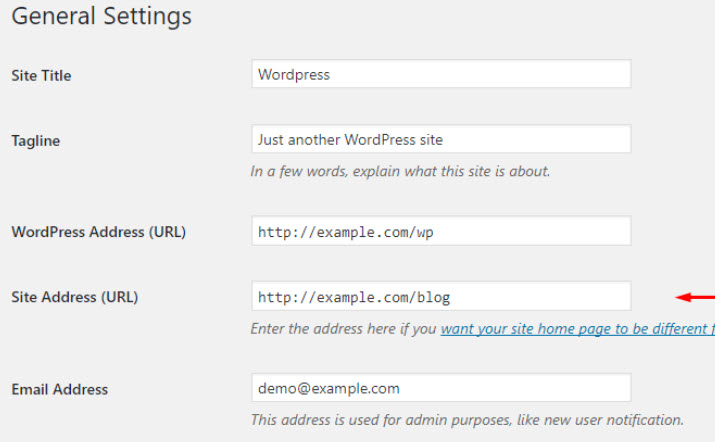
Click on save change. Now you will be able to access your Magento 2 blog from: yourwebsite.com/blog/
Now you just need to add link to blog to top menu or main navigation menu, or footer section so that customer can access your blog from homepage.
Conclusion
There’s another hybrid method: integrate WordPress blog to Magento 2, you blog will keep Magento 2 website layout, header, footer… I will write a tutorial about this method in another blog post, keep following my blog to get new Magento 2 tutorial everyday.
I hope the tutorial will be helpful for you to create your own blog on Magento 2. If you have any troubles during blog installation process, just drop a comment below.
Good luck!
 with Elasticsearch")
")

21 Comments
Hey, I read your article and your information is very amazing and so much helpful for me. Keep it up and Thank you very much.:)
This is a topic that’s near to my heart… Many thanks! Where are your contact details though?
Пані та панове! Якщо ви будуєте будинок, робите ремонт або просто шукаєте натхнення для облаштування оселі, то часто виникає така складнощі: інформація розпорошена по безлічі ресурсів. А як чудово, коли всі потрібні сайти зібрані докупи. Власне, для цього й існує ресурс mybudcatalg.space, де вже відібрано найкращі сайти українською мовою.
Тут ви знайдете:
– Корисні лайфхаки для ощадливого облаштування;
– Сучасні методи зведення на всіх етапах — від основи до даху;
– Ідеї для дизайну інтер’єрів;
– Покрокові керівництва електромонтаж, водопровід, пристрої;
– Ідеї для присадибної ділянки;
– Оригінальні ідеї.
Тож маємо зручну добірку, яка заощадить ваш час. Зберігайте посилання собі, додавайте до вибраного та користуйтеся із задоволенням
после вашего обращения наш врач приезжает по указанному адресу с медработниками в гражданской форме и на машине без опознавательных символов, проводит осмотр, собирает историю болезни (анамнез).
Получить больше информации – наркология вывод из запоя
Вывод из запоя на дому подходит пациентам, которым необходимо получить помощь в привычной обстановке. Вызов врача можно заказать в любое время суток: выездная бригада приезжает по указанному адресу, проводит осмотр, оценивает давление, пульс, степень интоксикации, риск психозов, галлюцинаций, судорожных реакций, инфаркта, инсульта и других осложнений.
Получить больше информации – наркология вывод из запоя
школа кайтбординга Беларусь – первая лицензированная школа IKO.
инструкторы с сертификатами. водный старт и езда.
акция: приведи друга — скидка 10%
курсы кайтсерфинга с катером – больше практики за одно
занятие. подходит для всех уровней.
скидка на групповые занятия.
включён расход катера и горючего
сертификат на кайтсерфинг – открытка с индивидуальным дизайном.
можно передать другому человеку.
возврат средств при неиспользовании.
электронный вариант в день
заказа
Нарколог на дом в Казани — это срочная медицинская помощь пациенту при запое, похмелья, интоксикации, абстинентного синдрома, наркотической ломки и других ситуациях, когда человеку сложно самостоятельно обратиться в клинику. Врач приезжает на дом, проводит осмотр, диагностику состояния, подбирает препараты, ставит капельница и дает рекомендации по дальнейшему лечению зависимости.
Исследовать вопрос подробнее – http://narkolog-na-dom-kazan24.ru/
Здарова, друзі!
Порекомендую дуже корисний сайт – owewoewo.space
Це добірка якісних україномовних порталів з практичними порадами по будівництву, ремонту, оздоблення і дизайну дому.
Наразі там два сильних сайти.
Ресурс зроблений дуже приємно, повністю адаптивний, все українською. Особливо зручно, коли треба швидко знайти нормальну інфу без копирсання в гуглі.
Тим, хто зараз займається будівлею або оздобленням – раджу зберегти в закладки.
Якщо хтось користується якими-небудь хорошими сайтами по темі – кидайте в коментарях, доповнимо!
врач приезжает по указанному адресу в течение 1 часа после обращения (возможна и более быстрая реакция при необходимости).
Углубиться в тему – [url=https://narkolog-na-dom-kazan23.ru/]запой нарколог на дом[/url]
выездная наркологическая служба оперативно приедет по указанному адресу, имея при себе все необходимое оборудование и медикаменты, в том числе для оказания неотложной помощи.
Подробнее можно узнать тут – [url=https://vyvod-is-zapoya-sochi22.ru/]вывод из запоя клиника в сочи[/url]
школа кайтбординга Беларусь – первая
лицензированная школа IKO.
свой катер и оборудование. теория:
ветер, метео, техника. акция: приведи друга — скидка
10%
индивидуальное обучение кайтингу – программа под ваш темп и цели.
отработка сложных элементов.
абонементы на 5 и 10 занятий.
консультации по снаряжению
полный курс обучения кайтингу – от новичка
до уверенного райдера. езда
в обе стороны. выезд на разные водоёмы.
запись по телефону
Нарколог на дом в Балашихе с оперативным приездом специалиста, оценкой состояния и проведением наркологической помощи в наркологической клинике «Частный Медик 24».
Ознакомиться с деталями – запой нарколог на дом
Ребята кто с недвижкой Замучился я уже искать информацию по участкам Соседи какие Короче, единственный нормальный сервис — публичная кадастровая карта с поиском по номеру Проверил все данные В общем, вся инфа вот здесь — кадастровая карта 2026 https://publichnaya-kadastrovaya-karta-abc.ru Пользуйтесь нормальной картой Перешлите тому кто ищет участок
Вывод из запоя на дому в Казани удобен, когда близкий человек не готов ехать в клинику, плохо переносит дорогу или находится в состоянии сильной слабости. Врач приезжает на дому, сохраняет анонимность, спокойно объясняет процесс и начинает лечение только после осмотра и согласия пациента. Вызов врача на дому особенно важен, если муж, отец, брат, мама или другой близкий уже не может перестать пить и нуждается в срочной помощи.
Выяснить больше – вывод из запоя капельница на дому казань
Центр в Сочи работает круглосуточно, анонимно и без постановки на учет. Помощь можно получить в любое время: достаточно заказать обратный звонок, написать через форму сайта или вызвать выезд врача по телефону. Консультация предоставляется бесплатно, а стоимость зависит от состояния пациента, длительности запоя, количества медикаментов, необходимости выезда, наблюдения, стационара или реабилитации.
Подробнее – вывод из запоя с выездом
welcome bonus – up to 100% on first deposit. wagering
requirements apply. often includes free spins.
choose the highest percentage
free spins – win real money from spins. can be attached to deposit bonus.
winnings credited as bonus. always read conditions
betting offers – daily and weekly promotions. reload
bonuses for existing players. valid for limited time. combine multiple
offers
У світі, де новини здебільшого пролітають без особливого сліду, певним журналам вдається успішно запам’ятовувати через майстерності показати людину з глибини. Читач не тільки дізнається дані, а наче заглядає в долю людини, яка перемагає виклики чи отримує успіху своїм особливим шляхом. Саме таке відчуття виникає від матеріалів, котрі регулярно з’являються в одному з українських інтернет-видань, присвячених саме реальним долям.
Читачі, котрі підбирають стимул через життєві приклади, нерідко заходять до https://mishelle.com.ua/ – mishelle.com.ua, тому що там розміщують історії, які дозволяють повніше осмислити внутрішні пориви та кроки особистостей з різних сфер. Це зовсім не формальний перелік фактів, а реалістичні історії, де переплітаються робочі успіхи й внутрішні почуття.
Ресурс зосереджується на біографіях, в яких ключовими фігурами постають нотаріуси. Кожна публікація наче підхоплює бесіду про те, яким чином характер й обставини формують траєкторію. Відвідувач бачить тут відображення особистих міркувань, адже розповіді не вигадують, а показують реальність з усіма поворотами.
Знайшов класний портал — geodictionary.com.ua.
На платформі розміщено повну факти про кожен куточок нашої країни: від міст до сіл.
Можна ознайомитися з історію цих місць, місце розташування, цікаві факти, і управління й демографічні дані.
Мені особисто сайт допоміг у роботі, під час збору інформацію для дослідження про гірську місцевість.
Вся база структуровано, зручно знаходиться й постійно актуалізується.
Може, хтось теж буде корисно!
Відвідуйте та обговорюйте.
Для срочного обращения подходит точная формулировка услуги: сегодня легко вызвать нарколога на дом в балашиху круглосуточно, просто позвонив по единому телефону нашего специализированного центра в любое время суток, любой день (даже в выходные и праздники).
Углубиться в тему – narkolog-na-dom-vyvod
Very quickly this web page will be famous among
all blog users, due to it’s fastidious posts
Багато хто з нас регулярно відчуває потребу нових задумів на кухні, особливо, коли звичні страви вже набридли, а на довгу метушню біля плити не вистачає. Ось тут рятує ситуацію ресурс, де можна без зайвого клопоту відшукати варіант до душі відповідно до ситуації і те, що є в холодильнику. https://celentano-pizza.com.ua/ – celentano-pizza.com.ua перетворився для користувачів справжньою паличкою-виручалочкою, куди навідуються постійно, щоб підглянути щось цікаве чи просто погортати добірку рецептів.
Платформа містить безліч публікацій, починаючи з традиційних страв макаронних виробів до хитрощів для повсякденного життя. Користувачі цінують його за те, що усе по суті — тільки конкретні інструкції, які справді придатні у звичних домашніх умовах. Дехто підбирає оперативний перекус на вечерю, а комусь — ідею для святкового столу, і в обох випадках статті дають змогу визначитися швидко та без мороки.
Дуже тішить, що контент регулярно поповнюється і ділиться не самими лише стравами, а й невеликі секрети, які роблять процес приготування комфортнішим. З цієї причини celentano-pizza.com.ua потроху об’єднує навколо себе аудиторію людей, які люблять готувати, але не хочуть перетворювати кухню на лабораторію.